

With the 30 tiny little images featured in the Here Comes Santa Claus stamp set*, there are a lot of things you can do. This sweet set is part of the Joy For You release from Simon Says Stamp. I decided to make each image its own star — literally and figuratively. I took a sheet of Lawn Fawn Vanilla Malt cardstock and cut an A2 card base. Next, I took the other half of the sheet and die cut 11 stars of all different sizes using a set of nested stars dies. I have had my dies a long time, but I can recommend the Simon Says Stamp Nested Stars Wafer Dies.
I stamped on each star, using my MISTI, using Concord & 9th Rainforest ink, Altenew Dark Night ink, and Altenew Plum ink. Then I carefully ink blended around the edges of each star with the same ink using my Waffle Flower Shader 1+ blending brushes.

I took a small piece of my leftover Vanilla Malt cardstock and dry embossed it with the Simon Says Stamp Tiny Tufts Embossing Folder. I cut it to be about 1.5” x 5.25”. I took another small piece and stamped the Many Blessings sentiment with the Dark Night ink. I took a small scrap of navy blue cardstock and cut both it and the sentiment into rhomboid shapes and glued them together.
I took my cardbase and cut off about 1” of the top flap. Then I glued on a strip (about 1/4”) of matte gold cardstock on the edge of that. Again, I’ve had mine awhile, but it seems identical to the Simon Says Stamp Matte Gold Cardstock. I also glued my dry embossed strip of cardstock to the back flap, so it showed at the front.
Next, based on an arrangement I had figured out before I started stamping, I adhered all the stars onto the cut front flap using Simon Says Stamp Black Foam Adhesive Squares. I trimmed down the stars on every edge (not easy on the right side since they were not hanging off the edge). I glued down the sentiment onto my largest star.
Finally, I added some Pinkfresh Studio Metallic Pearls in Matte Gold. I love matte gold at Christmas.
If you shop from the highlighted product links above, I may receive a small commission at no cost to you. It is much appreciated and helps fund my crafting. Also, any item first marked with an asterisk * was provided by an online store. Otherwise, I bought my supplies.
With the 30 tiny little images featured in the Here Comes Santa Claus stamp set*, there are a lot of things you can do. This sweet set is part of the Joy For You release from Simon Says Stamp. I decided to make each image its own star — literally and figuratively. I took a sheet of Lawn Fawn Vanilla Malt cardstock and cut an A2 card base. Next, I took the other half of the sheet and die cut 11 stars of all different sizes using a set of nested stars dies. I have had my dies a long time, but I can recommend the Simon Says Stamp Nested Stars Wafer Dies.
I stamped on each star, using my MISTI, using Concord & 9th Rainforest ink, Altenew Dark Night ink, and Altenew Plum ink. Then I carefully ink blended around the edges of each star with the same ink using my Waffle Flower Shader 1+ blending brushes.
I took a small piece of my leftover Vanilla Malt cardstock and dry embossed it with the Simon Says Stamp Tiny Tufts Embossing Folder. I cut it to be about 1.5” x 5.25”. I took another small piece and stamped the Many Blessings sentiment with the Dark Night ink. I took a small scrap of navy blue cardstock and cut both it and the sentiment into rhomboid shapes and glued them together.
I took my cardbase and cut off about 1” of the top flap. Then I glued on a strip (about 1/4”) of matte gold cardstock on the edge of that. Again, I’ve had mine awhile, but it seems identical to the Simon Says Stamp Matte Gold Cardstock. I also glued my dry embossed strip of cardstock to the back flap, so it showed at the front.
Next, based on an arrangement I had figured out before I started stamping, I adhered all the stars onto the cut front flap using Simon Says Stamp Black Foam Adhesive Squares. I trimmed down the stars on every edge (not easy on the right side since they were not hanging off the edge). I glued down the sentiment onto my largest star.
Finally, I added some Pinkfresh Studio Metallic Pearls in Matte Gold. I love matte gold at Christmas.
If you shop from the highlighted product links above, I may receive a small commission at no cost to you. It is much appreciated and helps fund my crafting. Also, any item first marked with an asterisk * was provided by an online store. Otherwise, I bought my supplies.

I took a little break from Stamptember creating for Simon Says Stamp to enter their Wednesday challenge. The theme is summertime blues featuring Pinkfresh Studio. I’ve come to thoroughly adore the time I spend stamping, stenciling, and die cutting with their products.
This card features plenty of Pinkfresh Studio’s products. I used the largest of the Elegant Circles dies. I stacked 2 and then added foam tape to the back. I also used the stamp, stencil and die bundle from All Kinds of Wonderful to create the 4 flowers that make up the bouquet. I used a variety of pale blue inks, one tan, and a green from Tim Holtz, Stampin’ Up! and Concord & 9th for the colors.

For the background I took a 4.25 x 5.5” piece of Neenah Classic Crest 110lb coverstock and ink blended C9’s Powder ink from the bottom right corner to the top left. Then I took the Pinkfresh Studio Floral Lattice coverplate die and cut it. This took a bit of weeding to make it look like it should. Next time I cut it, I will make sure I have a tight sandwich for my die cutting machine. I backed this with a Neenah white cardbase.
I added the Pinkfresh Studio sentiment from the stamp and die set Beyond Happy just where the stems meet at the bottom of the circle (I love these circles).
Finally, I added some sequins to the card for a little sparkle. Sadly, several of these Pinkfresh products have retired and are not available from many retailers. But, many other stamps, dies and sentiments would work.
I am also entering Time Out Challenge #319 with the Pick 2 of Floral and Birthday.

I took a little break from Stamptember creating for Simon Says Stamp to enter their Wednesday challenge. The theme is summertime blues featuring Pinkfresh Studio. I’ve come to thoroughly adore the time I spend stamping, stenciling, and die cutting with their products.
This card features plenty of Pinkfresh Studio’s products. I used the largest of the Elegant Circles dies. I stacked 2 and then added foam tape to the back. I also used the stamp, stencil and die bundle from All Kinds of Wonderful to create the 4 flowers that make up the bouquet. I used a variety of pale blue inks, one tan, and a green from Tim Holtz, Stampin’ Up! and Concord & 9th for the colors.
For the background I took a 4.25 x 5.5” piece of Neenah Classic Crest 110lb coverstock and ink blended C9’s Powder ink from the bottom right corner to the top left. Then I took the Pinkfresh Studio Floral Lattice coverplate die and cut it. This took a bit of weeding to make it look like it should. Next time I cut it, I will make sure I have a tight sandwich for my die cutting machine. I backed this with a Neenah white cardbase.
I added the Pinkfresh Studio sentiment from the stamp and die set Beyond Happy just where the stems meet at the bottom of the circle (I love these circles).
Finally, I added some sequins to the card for a little sparkle. Sadly, several of these Pinkfresh products have retired and are not available from many retailers. But, many other stamps, dies and sentiments would work.
I am also entering Time Out Challenge #319 with the Pick 2 of Floral and Birthday.

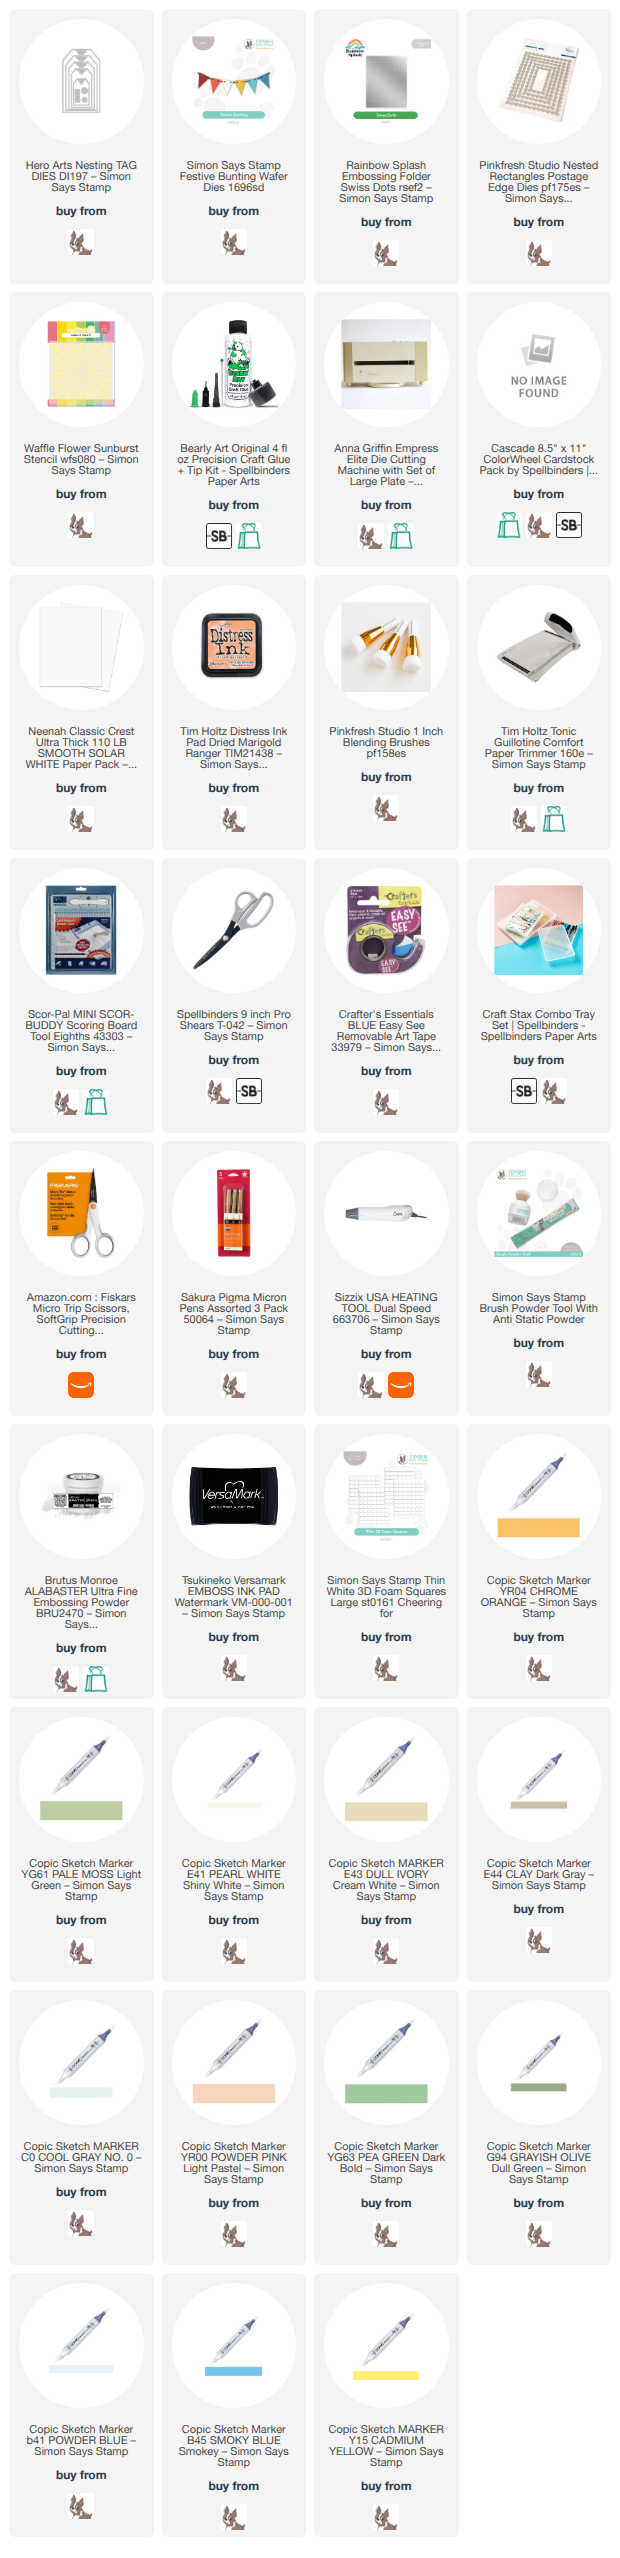
This card was inspired by one of my favorite card makers, Inge Groot. I used the wonderful Coffee with Friends* stamp set from the new Every Happiness release from Simon Says Stamp. I Copic colored the bear and the tree using E41, E43, E44, Y15, YR04, C0, B41, B45, G94, YG61, YG63, YR00. The remaining colors I used were Dick Blick Brush Markers and Spectrum Noir markers. I highlighted everything using a Gelly Roll white pen.

I used an old Sizzix Swiss Dot embossing folder (it's retired and I've linked to one by Simon Says Stamp) with the white tag I cut using Hero Arts Nested Tag Dies. I made the frame using Cascade cardstock from Spellbinders and an old Poppystamps die set called Scalloped Stitch Frames (again, this is retired so I've linked to a set of very similar double stitch frames by Pinkfresh Studio.) I used Dried Marigold Distress Ink to ink blend through the Sunburst Stencil by Waffle Flower. I cut this piece with the Pinkfresh Studios Nested Rectangles Postage Edge dies. Behind all this is a small scrap of black and white lined paper from an old MFT paper pad.
The sentiment is part of this sweet stamp set. I heat embossed it on black with Brutus Monroe Alabaster embossing powder.
The fun part is the Simon Says Stamp Festive Bunting die I used in the top left. I cut the triangle parts with 3 different colors (the blue is the Cascade I used earlier), and then the string part from black. The holes are large enough to easily snake the black string part through the holes.
I used a variety of foam and liquid glue to adhere everything to an A2 card base made with Neenah Classic Crest Solar White 110lb.
Affiliate links are used in this post at no cost to you. This means I may receive a small commission when you click through and shop using the links I provide. This helps support me in creating and posting my crafts. Items marked with an asterisk * at first mention were provided by a store or manufacturer. Otherwise, all items were purchased by me.
This card was inspired by one of my favorite card makers, Inge Groot. I used the wonderful Coffee with Friends* stamp set from the new Every Happiness release from Simon Says Stamp. I Copic colored the bear and the tree using E41, E43, E44, Y15, YR04, C0, B41, B45, G94, YG61, YG63, YR00. The remaining colors I used were Dick Blick Brush Markers and Spectrum Noir markers. I highlighted everything using a Gelly Roll white pen.
I used an old Sizzix Swiss Dot embossing folder (it's retired and I've linked to one by Simon Says Stamp) with the white tag I cut using Hero Arts Nested Tag Dies. I made the frame using Cascade cardstock from Spellbinders and an old Poppystamps die set called Scalloped Stitch Frames (again, this is retired so I've linked to a set of very similar double stitch frames by Pinkfresh Studio.) I used Dried Marigold Distress Ink to ink blend through the Sunburst Stencil by Waffle Flower. I cut this piece with the Pinkfresh Studios Nested Rectangles Postage Edge dies. Behind all this is a small scrap of black and white lined paper from an old MFT paper pad.
The sentiment is part of this sweet stamp set. I heat embossed it on black with Brutus Monroe Alabaster embossing powder.
The fun part is the Simon Says Stamp Festive Bunting die I used in the top left. I cut the triangle parts with 3 different colors (the blue is the Cascade I used earlier), and then the string part from black. The holes are large enough to easily snake the black string part through the holes.
I used a variety of foam and liquid glue to adhere everything to an A2 card base made with Neenah Classic Crest Solar White 110lb.
Affiliate links are used in this post at no cost to you. This means I may receive a small commission when you click through and shop using the links I provide. This helps support me in creating and posting my crafts. Items marked with an asterisk * at first mention were provided by a store or manufacturer. Otherwise, all items were purchased by me.

This sympathy card started with a very pale purple cardstock. I used the retired Purple Posy from Stampin’ Up!, but Fairy Tale from Spellbinders would make an excellent substitute. Using a super light cardstock color means my dye inks were barely effected by the color underneath. I used the wonderful Leafy Background stencil set from Pinkfresh Studio along with Tim Holtz Distress Ink in Seedless Preserves, and Lost Lagoon and Sweet Sugarplum ink from Stampin’ Up! to ink blend through the stencil.

Next, I used the Papertrey Ink Into the Blooms: Cherry Blossom Die Set along with Neenah Classic Crest 110 white cardstock, and Stampin’ Up! cardstock colors including Lost Lagoon, Rich Razzleberry, and Sweet Sugarplum to build the flowers. I ink blended a little Sweet Sugarplum ink onto the white flower pieces.
I used Versa Clair black ink to stamp the Papertrey Ink Reflections Number 6 stamp (my favorite Bible verse) onto the largest Reflections Number 6 die, also by Papertrey Ink. I assembled the flowers as shown and then glued everything onto the background, and then onto a Rich Razzleberry piece of cardstock to make the cardfront.
I am entering this card into 2 challenges. Simon Says Stamp Monday Challenge for May 4, and the Paper Players #784 challenge.
When do you make sympathy cards? As you need them? Or before you need them?
Affiliate links are used in this post at no cost to you. This means I may receive a small commission when you click through and shop using the links I provide. This helps support me in creating and posting my crafts. Items marked with an asterisk * at first mention were provided by a store or manufacturer. Otherwise, all items were purchased by me. I do not get paid to promote any products.

This sympathy card started with a very pale purple cardstock. I used the retired Purple Posy from Stampin’ Up!, but Fairy Tale from Spellbinders would make an excellent substitute. Using a super light cardstock color means my dye inks were barely effected by the color underneath. I used the wonderful Leafy Background stencil set from Pinkfresh Studio along with Tim Holtz Distress Ink in Seedless Preserves, and Lost Lagoon and Sweet Sugarplum ink from Stampin’ Up! to ink blend through the stencil.
Next, I used the Papertrey Ink Into the Blooms: Cherry Blossom Die Set along with Neenah Classic Crest 110 white cardstock, and Stampin’ Up! cardstock colors including Lost Lagoon, Rich Razzleberry, and Sweet Sugarplum to build the flowers. I ink blended a little Sweet Sugarplum ink onto the white flower pieces.
I used Versa Clair black ink to stamp the Papertrey Ink Reflections Number 6 stamp (my favorite Bible verse) onto the largest Reflections Number 6 die, also by Papertrey Ink. I assembled the flowers as shown and then glued everything onto the background, and then onto a Rich Razzleberry piece of cardstock to make the cardfront.
I am entering this card into 2 challenges. Simon Says Stamp Monday Challenge for May 4, and the Paper Players #784 challenge.
When do you make sympathy cards? As you need them? Or before you need them?
Affiliate links are used in this post at no cost to you. This means I may receive a small commission when you click through and shop using the links I provide. This helps support me in creating and posting my crafts. Items marked with an asterisk * at first mention were provided by a store or manufacturer. Otherwise, all items were purchased by me. I do not get paid to promote any products.
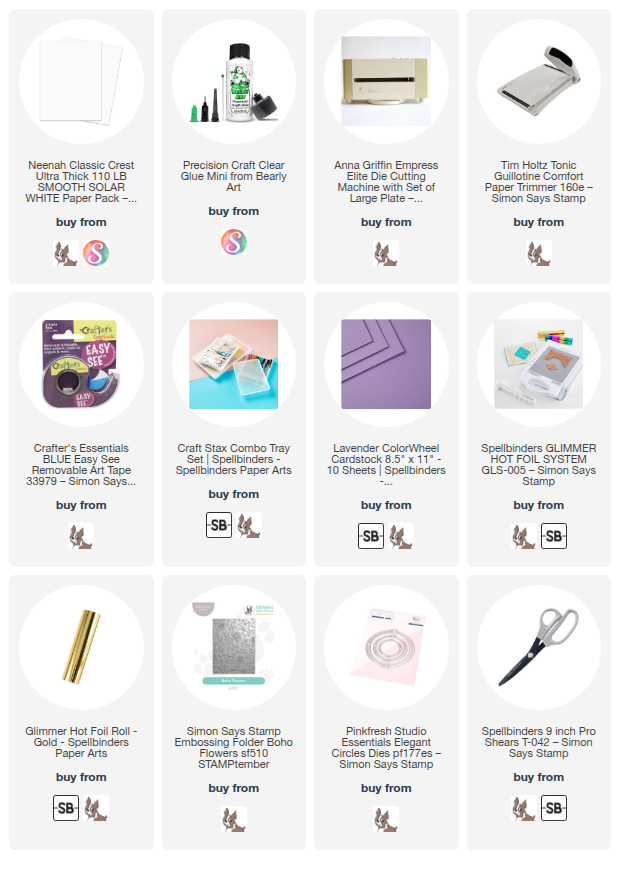
Spring and the color lavendar go together like the finest pairing of cheese and wine. They simply belong together. I made this card for my youngest daughter on the completion of her medical assistant certification. She loves lavendar. I used the Spellbinders Colorwheel Lavender cardstock along with Neenah Classic Crest 110lb cardstock. I dry embossed a 4” x 5.25” piece of lavender with the Simon Says Stamp Boho Flowers Embossing Folder. It’s an ideal floral pattern for almost any time of year.

Next, I matted that to a cardbase 4.25" x 5.5". I used the middle-size circle from the Pink Fresh Studios Elegant Circles die set and cut it (and kept the center) from the white cardstock. I used the Spellbinders Betterpress You Are Everything Letterpress inking plate and matching die along with their gold foil to create the sentiment on my Spellbinders Glimmer machine. The flowers are from Pinkfresh Studios Breezy Blossoms where I used their matching stamps, stencils and dies. The ink is Lavender Glaze from Taylored Expressions.
I assembled everything as shown and added Clear Iridescent sequins from This Calls for Confetti (such a cool business name.)

Affiliate links are used in this post at no cost to you. This means I may receive a small commission when you click through and shop using the links I provide. This helps support me in creating and posting my crafts. Items marked with an asterisk * at first mention were provided by a store or manufacturer. Otherwise, all items were purchased by me. I do not get paid to promote any products.
Spring and the color lavendar go together like the finest pairing of cheese and wine. They simply belong together. I made this card for my youngest daughter on the completion of her medical assistant certification. She loves lavendar. I used the Spellbinders Colorwheel Lavender cardstock along with Neenah Classic Crest 110lb cardstock. I dry embossed a 4” x 5.25” piece of lavender with the Simon Says Stamp Boho Flowers Embossing Folder. It’s an ideal floral pattern for almost any time of year.
Next, I matted that to a cardbase 4.25" x 5.5". I used the middle-size circle from the Pink Fresh Studios Elegant Circles die set and cut it (and kept the center) from the white cardstock. I used the Spellbinders Betterpress You Are Everything Letterpress inking plate and matching die along with their gold foil to create the sentiment on my Spellbinders Glimmer machine. The flowers are from Pinkfresh Studios Breezy Blossoms where I used their matching stamps, stencils and dies. The ink is Lavender Glaze from Taylored Expressions.
I assembled everything as shown and added Clear Iridescent sequins from This Calls for Confetti (such a cool business name.)
Affiliate links are used in this post at no cost to you. This means I may receive a small commission when you click through and shop using the links I provide. This helps support me in creating and posting my crafts. Items marked with an asterisk * at first mention were provided by a store or manufacturer. Otherwise, all items were purchased by me. I do not get paid to promote any products.
Hi everyone! I am very excited to announce I was invited to join the Simon Says Stamp Designer Family last month. So, today I am helping to introduce the In My Heart release from Simon Says Stamp. I have 3 cards to share today featuring the Bereavement Thank Yous* sentiment stamp set designed by Cathy Zielske for this release. Now, I think we’d all admit that this isn’t exactly a stamp set you’d be “excited” to use. However, when you’ve been through a significant loss of any kind, and people love and support you through it, you want to say thank you. This is that stamp set. It’s also an ideal set to have on hand to make thank you cards for someone else to give in their time of need. Those kinds of cards are a gift all unto themselves.


My first card was inspired by the gorgeous new Spellbinders Color Wheel cardstock. I chose their Oceanside cardstock (the color reminds me of Tim Holtz Uncharted Mariner Distress Ink) and cut 2 pieces to 4.25” x 5.5”. Next, I die cut a circle out of the right lower portion of 1 piece, leaving the perfect amount of room for my Bereavement Thank Yous sentiment to fit inside. Finally, I embossed it with the Tufted 3D Embossing folder from Spellbinders. That folder really has a Wow factor. With the flat piece, I heat embossed my sentiment onto the lower right portion to line up with the cut circle. I used Ink on 3 Gold Rush again.
Next, I die cut a variety of pieces of leaves and flowers from Poppystamps Floral Vase Pop Up Easel Set and Floral Cake Pop Up Easel Set. I glued those down on the embossed top piece and attached that with a lot of foam tape to the sentiment piece. Finally, I stamped the slender one-line sentiment from the same stamp set in a dark teal ink onto white cardstock. I used a Honey Bee Stamps sentiment strip die to cut it out. I attached it with glue on the left and 2 skinny strips of foam tape on the right to hover just below the gold sentiment. Finally, I attached all this to a white card base.


My second card features not only the Bereavement Thank Yous but also the Heart Flowers Background from Simon Says Stamp. I used a few of Tim Holtz’s Distress Watercolor Pencils from Set #4 and scribbled all over the stamp. I spritzed the stamp with water and then stamped it onto a light kraft cardstock. I did this 2-3 times to get one good impression. I absolutely love how those pencils (pigment-based) look on colored cardstock. I cut it to the size I wanted. Next, I took a copper colored cardstock and dry embossed it with a folder featuring an all-over-pattern. I cut that to a size just a fraction larger. Next, I took my Tim Holtz Tonic Paper Distresser (a favorite tool) and roughed up all the edges on both these pieces.
I heat embossed the “I appreciate you” (a great stamp for any kind of thank you) with Ink on 3 Gold Rush embossing powder on a strip of dark brown cardstock. I also die cut a circle from this same cardstock. Between these two, I sandwiched lots of leaves cut using Simon Says Stamp’s Eucalyptus Leaves die set and Trinity Stamps Wildflower Clippings. I used a darker kraft cardstock, the copper colored cardstock, and also a gold pearly cardstock from the Crafter’s Companion (Violet Studio) 6x6 Pearlescent Colours paper pack.
Finally, I added two pieces of rough twine (they came with a pack of tags I bought on Amazon) to the cluster and attached everything with glue and foam tape.


My third card is simpler and larger. I wanted a 5x7” card so I could allow a decent amount of white space around the sentiment. First, I used Pinkfresh Studio’s Breezy Blossoms set of dies, stamps, and stencils to make a few floral accents. I used Taylored Expressions Lavender Glaze ink and Dusty Concord Distress Ink to color the flowers. Next, I used a piece of Neenah Classic Crest 110lb Cover stock and stamped it with the Bereavement Thank Yous sentiment using black Versa Clair ink.
Leaving space above and below the sentiment, I die cut it using the Spellbinders Essential Arches dies. I cut a larger arch from black cardstock to mat it onto. I used a piece of Neenah cover stock about 3.5” x 5.5” and embossed it with Honey Bee Stamps Spring Medley 3D embossing folder. I mat that onto a piece of Taylored Expressions Lavender Glaze cardstock, and then onto my 5x7 piece of black cardstock. I assembled everything as shown and added tiny black gems around the floral accents. Of course, all this was glued to the top of a cardbase made out of Neenah 110lb cardstock.
Affiliate links are used in this post at no cost to you. This means I may receive a small commission when you click through and shop using the links I provide. This helps support me in creating and posting my crafts. Items marked with an asterisk (*) at first mention were provided by a store or manufacturer. Otherwise, all items were purchased by me. I do not get paid to promote any products.
Hi everyone! I am very excited to announce I was invited to join the Simon Says Stamp Designer Family last month. So, today I am helping to introduce the In My Heart release from Simon Says Stamp. I have 3 cards to share today featuring the Bereavement Thank Yous* sentiment stamp set designed by Cathy Zielske for this release. Now, I think we’d all admit that this isn’t exactly a stamp set you’d be “excited” to use. However, when you’ve been through a significant loss of any kind, and people love and support you through it, you want to say thank you. This is that stamp set. It’s also an ideal set to have on hand to make thank you cards for someone else to give in their time of need. Those kinds of cards are a gift all unto themselves.
My first card was inspired by the gorgeous new Spellbinders Color Wheel cardstock. I chose their Oceanside cardstock (the color reminds me of Tim Holtz Uncharted Mariner Distress Ink) and cut 2 pieces to 4.25” x 5.5”. Next, I die cut a circle out of the right lower portion of 1 piece, leaving the perfect amount of room for my Bereavement Thank Yous sentiment to fit inside. Finally, I embossed it with the Tufted 3D Embossing folder from Spellbinders. That folder really has a Wow factor. With the flat piece, I heat embossed my sentiment onto the lower right portion to line up with the cut circle. I used Ink on 3 Gold Rush again.
Next, I die cut a variety of pieces of leaves and flowers from Poppystamps Floral Vase Pop Up Easel Set and Floral Cake Pop Up Easel Set. I glued those down on the embossed top piece and attached that with a lot of foam tape to the sentiment piece. Finally, I stamped the slender one-line sentiment from the same stamp set in a dark teal ink onto white cardstock. I used a Honey Bee Stamps sentiment strip die to cut it out. I attached it with glue on the left and 2 skinny strips of foam tape on the right to hover just below the gold sentiment. Finally, I attached all this to a white card base.
My second card features not only the Bereavement Thank Yous but also the Heart Flowers Background from Simon Says Stamp. I used a few of Tim Holtz’s Distress Watercolor Pencils from Set #4 and scribbled all over the stamp. I spritzed the stamp with water and then stamped it onto a light kraft cardstock. I did this 2-3 times to get one good impression. I absolutely love how those pencils (pigment-based) look on colored cardstock. I cut it to the size I wanted. Next, I took a copper colored cardstock and dry embossed it with a folder featuring an all-over-pattern. I cut that to a size just a fraction larger. Next, I took my Tim Holtz Tonic Paper Distresser (a favorite tool) and roughed up all the edges on both these pieces.
I heat embossed the “I appreciate you” (a great stamp for any kind of thank you) with Ink on 3 Gold Rush embossing powder on a strip of dark brown cardstock. I also die cut a circle from this same cardstock. Between these two, I sandwiched lots of leaves cut using Simon Says Stamp’s Eucalyptus Leaves die set and Trinity Stamps Wildflower Clippings. I used a darker kraft cardstock, the copper colored cardstock, and also a gold pearly cardstock from the Crafter’s Companion (Violet Studio) 6x6 Pearlescent Colours paper pack.
Finally, I added two pieces of rough twine (they came with a pack of tags I bought on Amazon) to the cluster and attached everything with glue and foam tape.
My third card is simpler and larger. I wanted a 5x7” card so I could allow a decent amount of white space around the sentiment. First, I used Pinkfresh Studio’s Breezy Blossoms set of dies, stamps, and stencils to make a few floral accents. I used Taylored Expressions Lavender Glaze ink and Dusty Concord Distress Ink to color the flowers. Next, I used a piece of Neenah Classic Crest 110lb Cover stock and stamped it with the Bereavement Thank Yous sentiment using black Versa Clair ink.
Leaving space above and below the sentiment, I die cut it using the Spellbinders Essential Arches dies. I cut a larger arch from black cardstock to mat it onto. I used a piece of Neenah cover stock about 3.5” x 5.5” and embossed it with Honey Bee Stamps Spring Medley 3D embossing folder. I mat that onto a piece of Taylored Expressions Lavender Glaze cardstock, and then onto my 5x7 piece of black cardstock. I assembled everything as shown and added tiny black gems around the floral accents. Of course, all this was glued to the top of a cardbase made out of Neenah 110lb cardstock.
Affiliate links are used in this post at no cost to you. This means I may receive a small commission when you click through and shop using the links I provide. This helps support me in creating and posting my crafts. Items marked with an asterisk (*) at first mention were provided by a store or manufacturer. Otherwise, all items were purchased by me. I do not get paid to promote any products.
Well, here we are after all this time. 2026 is starting off with a bang and bucket list items. I attended the 2026 Rose Parade in Pasadena, CA (lots of rain and lots of fun). And on January 19, I became a grandmother for the first time to a little baby boy. I feel like I've already had a full year!
I had fun over the past 6 weeks working on 3 different Valentine designs.
The first is a CASE of a Tammy C. Wilson card. It features a retired stamp and die set by Stampin' Up called Sweet Conversations and Sweet Hearts, respectively. I used an old woodgrain 2D Sizzix embossing folder. Ink is Wisteria Wonder, Sweet Sugarplum, and Versamark. Embossing Powder is the wonderful Brutus Monroe Alabaster. Patterned paper was also retired from Stampin' Up! The splatter pattern was made with a spatter stamp from MFT. Cardstock is SU's Wisteria Wonder, Sweet Sugarplum (both retired) and Rich Razzleberry. Embellishments are from my stash.


The next card features a Honey Bee Stamps 3D embossing folder called Spring Medley. I used Pinkfresh Studio's Shaker Hearts dies, their Breezy Blossoms stamp, die and stencil sets, and their All Kinds of Wonderful stamp and die set for the sentiment. Inks I wasn't so good about keeping up with. I know I used Concord & 9th's Nectar and Grapefruit and then I used an orangish-red ink for the darkest color. The greens are very blue-green inks such as Distress Evergreen Bough. I used my handy color wheel to pick the greens and I was not disappointed.


The last card features the super cute Simon Says Stamp die set called Mail Call along with Taylored Expression's Papaya cardstock and Stampin' Up's Pretty Peacock. The sentiment is computer generated. The background uses Waffle Flower Love Postage Collage stamps along with the original WF Postage Collage stamps, all stamped with Concord & 9th's Powder dye ink. The arch dies are Spellbinder's Essential Arches. (Can you tell how much I like the coral-teal color combos?)


I am entering the Just Add Ink Challenge, the Cut It Up challenge, and the Alphabet Challenge.
Well, here we are after all this time. 2026 is starting off with a bang and bucket list items. I attended the 2026 Rose Parade in Pasadena, CA (lots of rain and lots of fun). And on January 19, I became a grandmother for the first time to a little baby boy. I feel like I've already had a full year!
I had fun over the past 6 weeks working on 3 different Valentine designs.
The first is a CASE of a Tammy C. Wilson card. It features a retired stamp and die set by Stampin' Up called Sweet Conversations and Sweet Hearts, respectively. I used an old woodgrain 2D Sizzix embossing folder. Ink is Wisteria Wonder, Sweet Sugarplum, and Versamark. Embossing Powder is the wonderful Brutus Monroe Alabaster. Patterned paper was also retired from Stampin' Up! The splatter pattern was made with a spatter stamp from MFT. Cardstock is SU's Wisteria Wonder, Sweet Sugarplum (both retired) and Rich Razzleberry. Embellishments are from my stash.
The next card features a Honey Bee Stamps 3D embossing folder called Spring Medley. I used Pinkfresh Studio's Shaker Hearts dies, their Breezy Blossoms stamp, die and stencil sets, and their All Kinds of Wonderful stamp and die set for the sentiment. Inks I wasn't so good about keeping up with. I know I used Concord & 9th's Nectar and Grapefruit and then I used an orangish-red ink for the darkest color. The greens are very blue-green inks such as Distress Evergreen Bough. I used my handy color wheel to pick the greens and I was not disappointed.
The last card features the super cute Simon Says Stamp die set called Mail Call along with Taylored Expression's Papaya cardstock and Stampin' Up's Pretty Peacock. The sentiment is computer generated. The background uses Waffle Flower Love Postage Collage stamps along with the original WF Postage Collage stamps, all stamped with Concord & 9th's Powder dye ink. The arch dies are Spellbinder's Essential Arches. (Can you tell how much I like the coral-teal color combos?)
I am entering the Just Add Ink Challenge, the Cut It Up challenge, and the Alphabet Challenge.


