

Happy Stamptember once again!! I hope you are enjoying all that Simon Says Stamp has to offer during this very special month. I will have Stamptember-related posts on my blog for Sept 1-4.
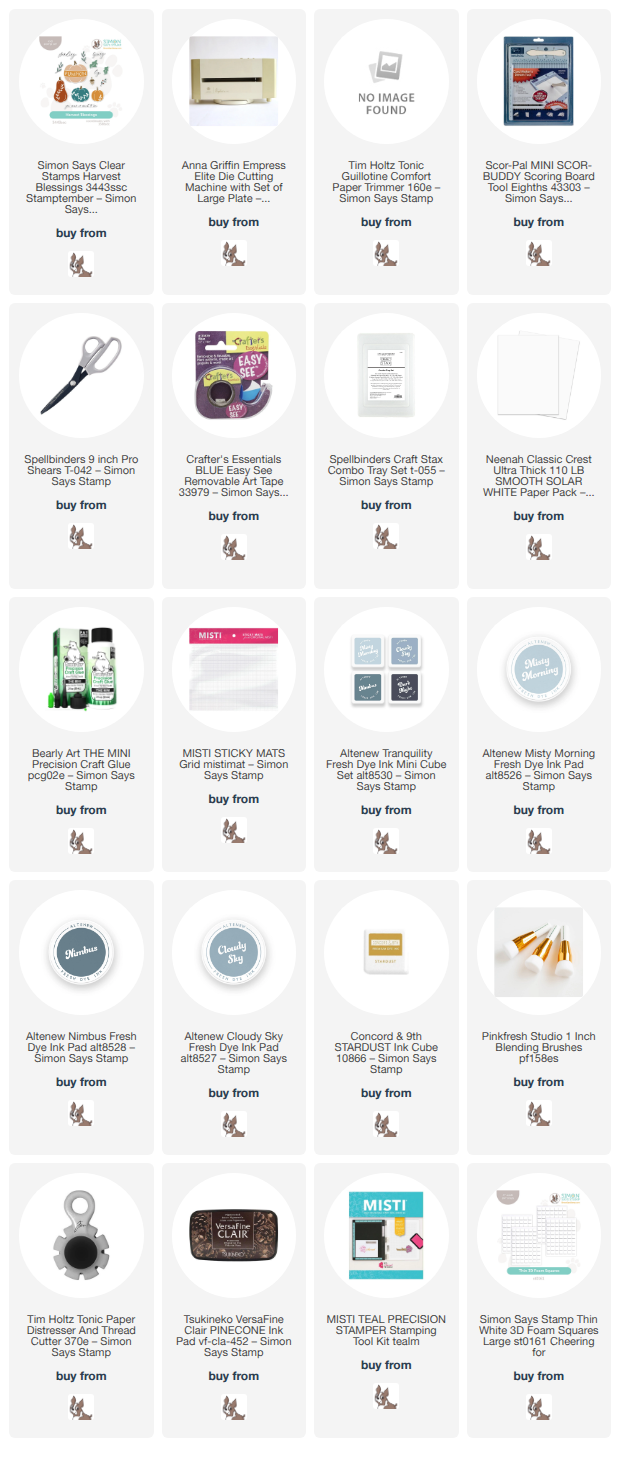
With so many cute, solid images in the Harvest Blessings stamp set*, I just had to use these to make a background. I used Stampin’ Up! ink including Pumpkin Pie, Old Olive, Rich Razzleberry, Crumb Cake and Early Espresso. I have linked to similar colors of ink and cardstock available from Simon Says Stamp below. I stamped the yellow leaves with Gina K Designs’ Sweet Corn yellow ink. I stamped randomly all over a piece of vanilla cardstock. I also stamped the word ‘sending’ in dark brown ink and then the itty-bitty heart stamp with the Rich Razzleberry ink. A great alternative to this cardstock and ink color is Gina K's Plum Punch. I cut it into a tag shape - no die used.

I die cut this stamped panel, as well as a Rich Razzleberry panel, using the Paper Rose Stitched Rectangles set of dies. These may be hard to find, but Simon Says Stamp makes an almost identical set which I have linked below.
For my focal point, I stamped the large pumpkin and stem in Pumpkin Pie and Early Espresso ink. Then I carefully stamped the word Blessings in the middle with Versamark. I also stamped the 2 leaves on a scrap piece. I heat embossed all three with Ink on 3’s Gold Rush embossing powder. I fussy cut the pumpkin and the leaves and popped them up with foam tape. The background is made of a cork sheet I’ve had in my stash forever. I die cut that with Spellbinders Labels 18 nested die set. It is retired but 2 great alternatives from Simon Says Stamp are their Grandstand Labels and the Petal Tipped Labels.

I assembled everything as shown and attached the tag with some linen thread to the fold in my card. I decided to adhere the tag to the card using a bit of foam adhesive, but you could easily leave it loose.
Happy Stamptember, y’all!
If you shop from the links below. I may receive a small commission at no cost to you. It is much appreciated and helps fund my crafting. Also, any item first marked with an asterisk * was provided by an online store. Otherwise, I bought my supplies.
Happy Stamptember once again!! I hope you are enjoying all that Simon Says Stamp has to offer during this very special month. I will have Stamptember-related posts on my blog for Sept 1-4.
With so many cute, solid images in the Harvest Blessings stamp set*, I just had to use these to make a background. I used Stampin’ Up! ink including Pumpkin Pie, Old Olive, Rich Razzleberry, Crumb Cake and Early Espresso. I have linked to similar colors of ink and cardstock available from Simon Says Stamp below. I stamped the yellow leaves with Gina K Designs’ Sweet Corn yellow ink. I stamped randomly all over a piece of vanilla cardstock. I also stamped the word ‘sending’ in dark brown ink and then the itty-bitty heart stamp with the Rich Razzleberry ink. A great alternative to this cardstock and ink color is Gina K's Plum Punch. I cut it into a tag shape - no die used.
I die cut this stamped panel, as well as a Rich Razzleberry panel, using the Paper Rose Stitched Rectangles set of dies. These may be hard to find, but Simon Says Stamp makes an almost identical set which I have linked below.
For my focal point, I stamped the large pumpkin and stem in Pumpkin Pie and Early Espresso ink. Then I carefully stamped the word Blessings in the middle with Versamark. I also stamped the 2 leaves on a scrap piece. I heat embossed all three with Ink on 3’s Gold Rush embossing powder. I fussy cut the pumpkin and the leaves and popped them up with foam tape. The background is made of a cork sheet I’ve had in my stash forever. I die cut that with Spellbinders Labels 18 nested die set. It is retired but 2 great alternatives from Simon Says Stamp are their Grandstand Labels and the Petal Tipped Labels.
I assembled everything as shown and attached the tag with some linen thread to the fold in my card. I decided to adhere the tag to the card using a bit of foam adhesive, but you could easily leave it loose.
Happy Stamptember, y’all!
If you shop from the links below. I may receive a small commission at no cost to you. It is much appreciated and helps fund my crafting. Also, any item first marked with an asterisk * was provided by an online store. Otherwise, I bought my supplies.

Happy STAMPtember from me to you! It’s a thrill to be participating as a member of the Simon Says Stamp Designer Family in my first STAMPtember. All my projects will use the elegant and easy-to-use Harvest Blessings stamp set*. When I opened my up my package from Simon Says Stamp and I saw all the pumpkins and gourds on the stamp set, I thought “they know me!” You see, I LOVE pumpkins. I decorate my home for fall in almost every room. I have pumpkins made of ceramic, glass, wicker, wood, plastic, and sweater material. I have a giant ivory-colored pumpkin platter (from Crate & Barrel eons ago) that sits on a shelf in my kitchen almost year round, except for December. I have a coffee mug that says “Crazy Pumpkin Lady” that I bought from Joann’s (#RIP).

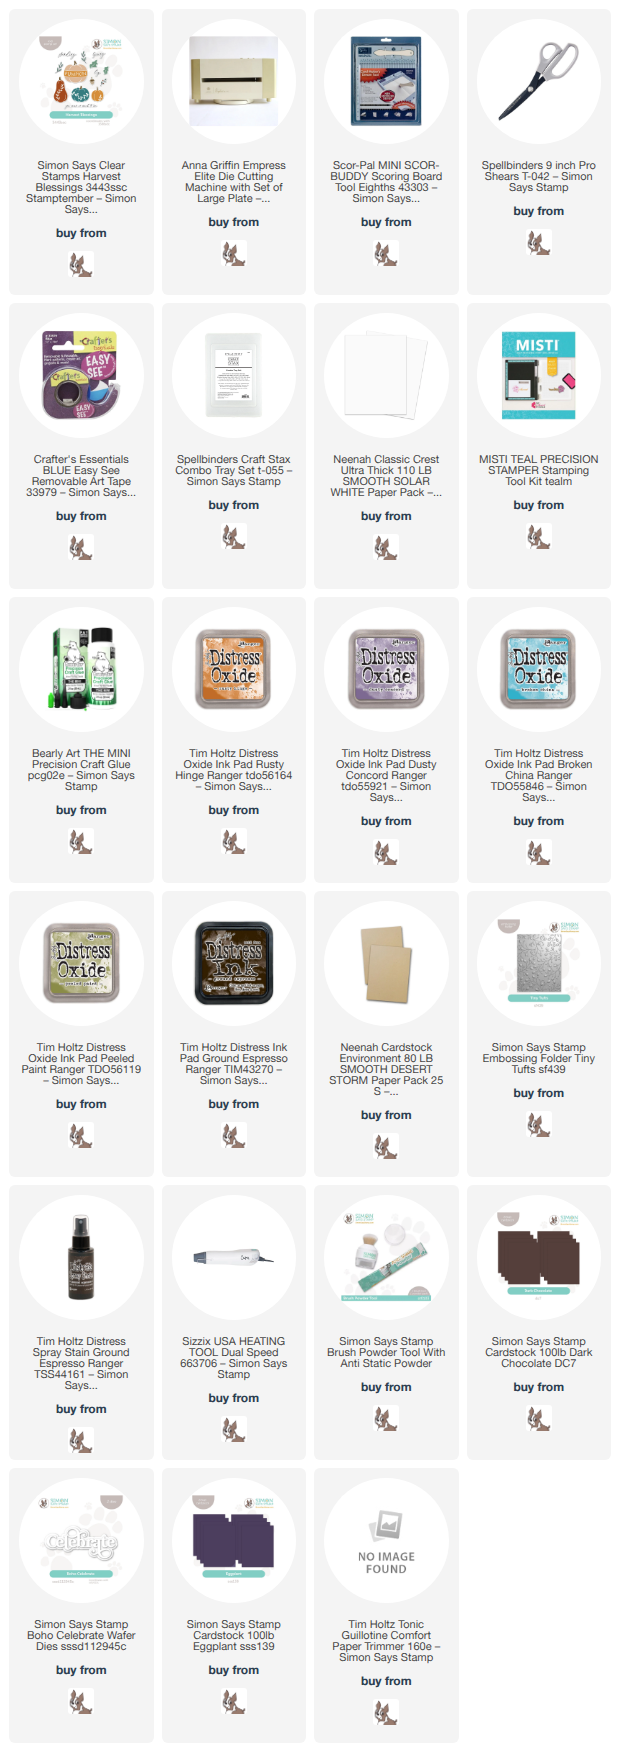
Anyway, it was easy to come up with ideas for this set. For this first card, I decided to treat the solid-image stamps to my Distress Oxide inks. So that I could overlap the images, I used masks made from Post-It Notes to cover the images I stamped and didn’t want to stamp on top of. I used Rusty Hinge, Dusty Concord, Broken China, and Peeled Paint, along with Ground Espresso Distress Ink for the stems. After doing this stamping in a vertical line on a piece of Neenah Desert Storm cardstock, I splattered it with my Dr. Ph. Martin Bombay India Ink in Sepia. However, an equally good choice for this dark brown splatter is Tim Holtz’s Distress Spray in Ground Espresso. Just flick it from the little straw inside the bottle, instead of spraying it.
When my ink and my splatter were dry, I fussy cut the right edge of the stacked gourds as shown. I laid this edge down on some dark brown cardstock and traced it with a pencil. Next, I fussy cut the edge of the brown paper so I could make the shadow behind the gourds. I glued this thin piece behind the gourd piece.
Next came the leaves. I stamped the 2 leaf shapes in the stamp set onto the same Desert Storm cardstock with Versamark and heat embossed them with Lindy’s Gang Twilight Bronze embossing powder. If you have trouble finding this one, any dark, metallic embossing powder would work great. Gold would work perfectly too. I glued the leaves as shown onto my stamped piece.
I took a piece of purple cardstock (my best match for the Dusty Concord Distress Ink, I’ve linked to the Simon Says Stamp Eggplant cardstock below as I think it would be ideal) and dry embossed a piece of 4.5 x 6” cardstock with a favorite: Simon Says Stamp’s Tiny Tufts embossing folder. I purposedly used a larger than A2 piece for this as the dry embossing sort of “shrinks” the size of the paper because of the impressions it makes. Next, I cut it to an A2 size of 4.25” x 5.5”.
I built this card in an odd way - I took the purple piece and glued it to a cardbase made of Neenah Classic Crest 110lb cover stock in white. Then, I took the stamped piece (with the brown glued on the back) and scored it and folded it over the left side of the card. It made it kinda chunky and I might do this differently next time.
I then die cut Simon Says Stamp’s Boho Celebrate die three times from dark brown cardstock. I stacked two of them and glued them together, and then smooshed my Versamark inkpad onto the top one and again heat embossed with the same Twilight Bronze embossing powder. I cut the third die cut in half and glued only the right half onto the back of the word. I did this because the word was going to be glued down on the higher left side, and then hang over the lower embossed purple panel (I really hope that made sense [said no AI ever]). I was happy with how it all worked out.
Enjoy this Stamptember month at Simons Says Stamp and tune it every day for some fun surprises. By the way, the Harvest Blessings stamp set WILL be available past Stamptember.
Thanks!
Happy STAMPtember from me to you! It’s a thrill to be participating as a member of the Simon Says Stamp Designer Family in my first STAMPtember. All my projects will use the elegant and easy-to-use Harvest Blessings stamp set*. When I opened my up my package from Simon Says Stamp and I saw all the pumpkins and gourds on the stamp set, I thought “they know me!” You see, I LOVE pumpkins. I decorate my home for fall in almost every room. I have pumpkins made of ceramic, glass, wicker, wood, plastic, and sweater material. I have a giant ivory-colored pumpkin platter (from Crate & Barrel eons ago) that sits on a shelf in my kitchen almost year round, except for December. I have a coffee mug that says “Crazy Pumpkin Lady” that I bought from Joann’s (#RIP).
Anyway, it was easy to come up with ideas for this set. For this first card, I decided to treat the solid-image stamps to my Distress Oxide inks. So that I could overlap the images, I used masks made from Post-It Notes to cover the images I stamped and didn’t want to stamp on top of. I used Rusty Hinge, Dusty Concord, Broken China, and Peeled Paint, along with Ground Espresso Distress Ink for the stems. After doing this stamping in a vertical line on a piece of Neenah Desert Storm cardstock, I splattered it with my Dr. Ph. Martin Bombay India Ink in Sepia. However, an equally good choice for this dark brown splatter is Tim Holtz’s Distress Spray in Ground Espresso. Just flick it from the little straw inside the bottle, instead of spraying it.
When my ink and my splatter were dry, I fussy cut the right edge of the stacked gourds as shown. I laid this edge down on some dark brown cardstock and traced it with a pencil. Next, I fussy cut the edge of the brown paper so I could make the shadow behind the gourds. I glued this thin piece behind the gourd piece.
Next came the leaves. I stamped the 2 leaf shapes in the stamp set onto the same Desert Storm cardstock with Versamark and heat embossed them with Lindy’s Gang Twilight Bronze embossing powder. If you have trouble finding this one, any dark, metallic embossing powder would work great. Gold would work perfectly too. I glued the leaves as shown onto my stamped piece.
I took a piece of purple cardstock (my best match for the Dusty Concord Distress Ink, I’ve linked to the Simon Says Stamp Eggplant cardstock below as I think it would be ideal) and dry embossed a piece of 4.5 x 6” cardstock with a favorite: Simon Says Stamp’s Tiny Tufts embossing folder. I purposedly used a larger than A2 piece for this as the dry embossing sort of “shrinks” the size of the paper because of the impressions it makes. Next, I cut it to an A2 size of 4.25” x 5.5”.
I built this card in an odd way - I took the purple piece and glued it to a cardbase made of Neenah Classic Crest 110lb cover stock in white. Then, I took the stamped piece (with the brown glued on the back) and scored it and folded it over the left side of the card. It made it kinda chunky and I might do this differently next time.
I then die cut Simon Says Stamp’s Boho Celebrate die three times from dark brown cardstock. I stacked two of them and glued them together, and then smooshed my Versamark inkpad onto the top one and again heat embossed with the same Twilight Bronze embossing powder. I cut the third die cut in half and glued only the right half onto the back of the word. I did this because the word was going to be glued down on the higher left side, and then hang over the lower embossed purple panel (I really hope that made sense [said no AI ever]). I was happy with how it all worked out.
Enjoy this Stamptember month at Simons Says Stamp and tune it every day for some fun surprises. By the way, the Harvest Blessings stamp set WILL be available past Stamptember.
Thanks!

Another fantastic die set from Vicky Papaioannou’s Whimsical Village Collection* by Spellbinders is the Whimsical Blooms* dies. These Dr. Seuss-like flowers work beautifully alone or in a group. They are super simple to assemble. Just find a great color combo you like and put it all together.

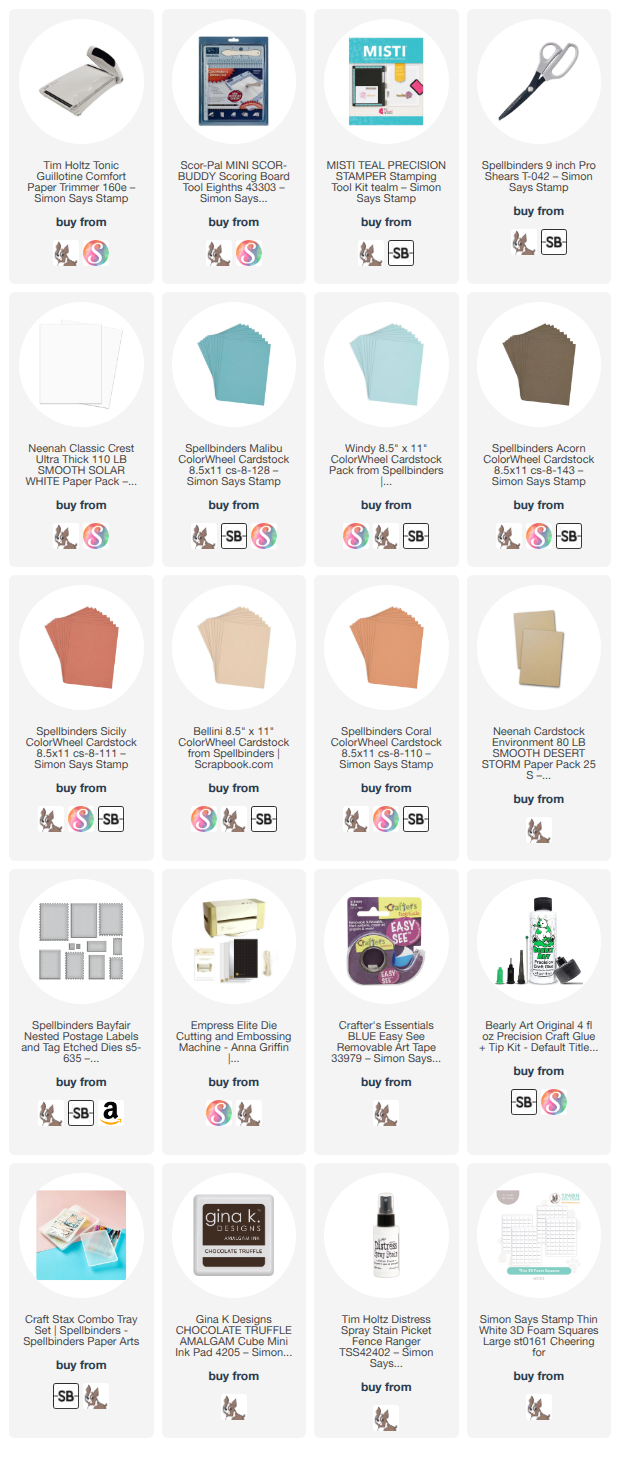
Here I mixed Spellbinders Colorwheel cardstock in Sicily, Bellini, Coral, Breeze, Malibu and Acorn to make this funky little garden. I used an A2 panel of the Malibu for the base. Next, I die cut a stitched rectangle from the Spellbinders Nested Postage Labels and Tag die set using Neenah Desert Storm cardstock. I first splattered the Neenah cardstock with Tim Holtz Distress Spray Stain in Picket Fence. I cut all my flowers and stems and assembled them using liquid glue and thin foam adhesive on the Desert Storm panel. I put a sentiment from the Whimsical Wishes stamp set stamped in dark brown ink on white cardstock over the stems. This card came together very quickly and was fun to make.
Affiliate links are used in this post at no cost to you. This means I may receive a small commission when you click through and shop using the links I provide. This helps support me in creating and posting my crafts. Items marked with an asterisk * at first mention were provided by a store or manufacturer. Otherwise, all items were purchased by me.
Another fantastic die set from Vicky Papaioannou’s Whimsical Village Collection* by Spellbinders is the Whimsical Blooms* dies. These Dr. Seuss-like flowers work beautifully alone or in a group. They are super simple to assemble. Just find a great color combo you like and put it all together.
Here I mixed Spellbinders Colorwheel cardstock in Sicily, Bellini, Coral, Breeze, Malibu and Acorn to make this funky little garden. I used an A2 panel of the Malibu for the base. Next, I die cut a stitched rectangle from the Spellbinders Nested Postage Labels and Tag die set using Neenah Desert Storm cardstock. I first splattered the Neenah cardstock with Tim Holtz Distress Spray Stain in Picket Fence. I cut all my flowers and stems and assembled them using liquid glue and thin foam adhesive on the Desert Storm panel. I put a sentiment from the Whimsical Wishes stamp set stamped in dark brown ink on white cardstock over the stems. This card came together very quickly and was fun to make.
Affiliate links are used in this post at no cost to you. This means I may receive a small commission when you click through and shop using the links I provide. This helps support me in creating and posting my crafts. Items marked with an asterisk * at first mention were provided by a store or manufacturer. Otherwise, all items were purchased by me.

Using words and phrases as an integral part of a card design is something I love to do. I love text, fonts, big words, titles, you name it. If it involves the alphabet more than numbers, I'm there. (Yep, I am a Wordle addict). So when Poppystamps chose Word Art as this month's challenge topic, I was all in. This card features the Freestyle Hello die and the matching shadow. I saw Debby Hughes of Lime Doodle Design watercolor on a large stamp of small floral images, then spritz it with water and stamp onto watercolor paper. The sharp lines of the image blurred and moved and made it look amazing. I used four Zig Clean Color Markers and tried the same thing with a rubber stamp with little florals all over it. I was thrilled with the result. I used the mid-size die from the Scalloped Stitch Frames die set and cut a white frame. I trimmed the top of the frame off and glued this to a Stampin' Up! Crumb Cake card front. Next, I trimmed the watercolor to slightly larger than the frame opening and mounted it with foam adhesive to the card. I matted the kraft onto a SU Calypso Coral card.

I cut the Freestyle Hello from Neenah Classic Crest Solar White 110lb cardstock. Next I cut the matching shadow from Heavyweight Vellum I bought on Amazon. I hid drops of clear Nuvo Crystal Drops behind the hello and adhered it to the shadow and then the watercolor piece.

I finished the card with tiny adhesive pearls on the watercolor paper. I'd love to make this again with different colors.
Using words and phrases as an integral part of a card design is something I love to do. I love text, fonts, big words, titles, you name it. If it involves the alphabet more than numbers, I'm there. (Yep, I am a Wordle addict). So when Poppystamps chose Word Art as this month's challenge topic, I was all in. This card features the Freestyle Hello die and the matching shadow. I saw Debby Hughes of Lime Doodle Design watercolor on a large stamp of small floral images, then spritz it with water and stamp onto watercolor paper. The sharp lines of the image blurred and moved and made it look amazing. I used four Zig Clean Color Markers and tried the same thing with a rubber stamp with little florals all over it. I was thrilled with the result. I used the mid-size die from the Scalloped Stitch Frames die set and cut a white frame. I trimmed the top of the frame off and glued this to a Stampin' Up! Crumb Cake card front. Next, I trimmed the watercolor to slightly larger than the frame opening and mounted it with foam adhesive to the card. I matted the kraft onto a SU Calypso Coral card.
I cut the Freestyle Hello from Neenah Classic Crest Solar White 110lb cardstock. Next I cut the matching shadow from Heavyweight Vellum I bought on Amazon. I hid drops of clear Nuvo Crystal Drops behind the hello and adhered it to the shadow and then the watercolor piece.
I finished the card with tiny adhesive pearls on the watercolor paper. I'd love to make this again with different colors.

Two young women who are very dear to me both have July birthdays, and own and love cats. So, when I saw the Poppystamps Whittle Adorable Kitty Kit I knew exactly who I was going to make my creations for.

Two young women who are very dear to me both have July birthdays, and own and love cats. So, when I saw the Poppystamps Whittle Adorable Kitty Kit I knew exactly who I was going to make my creations for.

Does your family like leftovers? My husband and I do. Leftovers can often be even better in cardmaking than in the fridge. I had made a colorful watercolored tag with Tim Holtz Distress Ink Picked Raspberry, Abandoned Coral and Spiced Marmalade. As Tim has taught over and over, when you have leftover ink on your glass mat, mist it with water and pick it up on a piece of watercolor paper. I did just that.

Later I used this same piece to test out a glimmery spray I had. This made this little 4x6 piece of cardstock ideal to try out my new Sizzix Garden Greens dies. I was making this card for several different card challenges that called for dies. I also used the dies to cut Neenah 110lb Solar White cardstock, Stampin' Up!'s Pink Pirouette and Calypso Coral cardstock, and Memory Box metallic gold cardstock from their 6x6 Rainbow Reflections Mirror Pad. I die cut one of the Paper Roses Stitched Rectangle dies from white cardstock and a Stampin' Up! circle from their Stitched Shapes dies.
I also used Calypso Coral to cut out Wishes from Spellbinders Simply Perfect Mix & Match Sentiments. And I used the word Best from Tim Holtz Metallic Quotation Stickers. Before I adhered everything down, I splattered the rectangle with a watercolor brush dipped in Stampin' Up!'s Flirty Flamingo ink mixed with water. Sometimes my splatters turn out disastrously, but this didn't.
I'm entering this into the Simon Says Stamp Wednesday Challenge to use a die cut (hah, I used 12!) and the Little Red Wagon Challenge #643 and the Fab 'n Funky Challenge #546.
Does your family like leftovers? My husband and I do. Leftovers can often be even better in cardmaking than in the fridge. I had made a colorful watercolored tag with Tim Holtz Distress Ink Picked Raspberry, Abandoned Coral and Spiced Marmalade. As Tim has taught over and over, when you have leftover ink on your glass mat, mist it with water and pick it up on a piece of watercolor paper. I did just that.
Later I used this same piece to test out a glimmery spray I had. This made this little 4x6 piece of cardstock ideal to try out my new Sizzix Garden Greens dies. I was making this card for several different card challenges that called for dies. I also used the dies to cut Neenah 110lb Solar White cardstock, Stampin' Up!'s Pink Pirouette and Calypso Coral cardstock, and Memory Box metallic gold cardstock from their 6x6 Rainbow Reflections Mirror Pad. I die cut one of the Paper Roses Stitched Rectangle dies from white cardstock and a Stampin' Up! circle from their Stitched Shapes dies.
I also used Calypso Coral to cut out Wishes from Spellbinders Simply Perfect Mix & Match Sentiments. And I used the word Best from Tim Holtz Metallic Quotation Stickers. Before I adhered everything down, I splattered the rectangle with a watercolor brush dipped in Stampin' Up!'s Flirty Flamingo ink mixed with water. Sometimes my splatters turn out disastrously, but this didn't.
I'm entering this into the Simon Says Stamp Wednesday Challenge to use a die cut (hah, I used 12!) and the Little Red Wagon Challenge #643 and the Fab 'n Funky Challenge #546.


CS: Neenah Solar White 110lb, Tim Holtz Idea-ology Kraft-Stock in Cool (dark blue), Bazzill Basics in Raven, Stampin' Up! Black and So Saffron
Paper: Tim Holtz Idea-ology Wallflower Paper Stash (blue/text background), map by The Paper Studio/Hobby Lobby, Bo Bunny Double Dots designs (gray dot), Jenny Bowlin Red Soda Label
Ink: Distress Oxides - Fossilized Amber, Antique Linen, Fired Brick, Aged Mahogany, Chipped Sapphire, Speckled Egg, Evergreen Bough, Gathered Twig, Ground Espresso; Distress Inks: Pumice Stone; Tuxedo Black Memento Ink, Versamark
Stamp: "Enjoy the Now" by Heidi Swapp
Embellishments: Tim Holtz Mini Fasteners, black thread, beige thread, Tim Holtz Idea-ology Snippets Ephemera Pack, Tim Holtz Metallic Stickers Quotations, Cheesecloth in Tan from ByFernStudio on Etsy.
Dry Embossing Folder: Wind and Water from Fun Stampers Journey(FSJ) (purchased from Spellbinders)
Embossing powder: Champagne by Recollections/Michaels
CS: Neenah Solar White 110lb, Tim Holtz Idea-ology Kraft-Stock in Cool (dark blue), Bazzill Basics in Raven, Stampin' Up! Black and So Saffron
Paper: Tim Holtz Idea-ology Wallflower Paper Stash (blue/text background), map by The Paper Studio/Hobby Lobby, Bo Bunny Double Dots designs (gray dot), Jenny Bowlin Red Soda Label
Ink: Distress Oxides - Fossilized Amber, Antique Linen, Fired Brick, Aged Mahogany, Chipped Sapphire, Speckled Egg, Evergreen Bough, Gathered Twig, Ground Espresso; Distress Inks: Pumice Stone; Tuxedo Black Memento Ink, Versamark
Stamp: "Enjoy the Now" by Heidi Swapp
Embellishments: Tim Holtz Mini Fasteners, black thread, beige thread, Tim Holtz Idea-ology Snippets Ephemera Pack, Tim Holtz Metallic Stickers Quotations, Cheesecloth in Tan from ByFernStudio on Etsy.
Dry Embossing Folder: Wind and Water from Fun Stampers Journey(FSJ) (purchased from Spellbinders)
Embossing powder: Champagne by Recollections/Michaels


