

Happy Stamptember! I hope you are enjoying all the goodness of this fun, stamping season over at Simon Says Stamp. It promises to be an exciting month.
I love the phrase “Hey There, Pumpkin,” as I call my daughters by this affectionate name (or more commonly, Pumpkin Head). I decided to take the Harvest Blessings stamp set* and the Classic Friendship stamp set* and create a tag. The tag shape is all my own making — no die involved.

I first stamped the largest pumpkin (which has interchangeable phrases that go in the middle: Blessings, Pumpkin, and Thanks) with Versamark on Neenah Desert Storm Cardstock. Next, I heat embossed with Tim Holtz Distress Embossing Glaze in Rusty Hinge. Instead of stamping the word Pumpkin between the top and bottom of the pumpkin, I stamped it separately and heat embossed it with Lindy’s Gang Twilight Bronze embossing powder. If you don’t have that, any metallic embossing powder would work great. I cut out the word and glued it in the center of my fussy-cut pumpkin. The stem was stamped with a dark brown ink - no heat embossing.
Just behind my pumpkin, I wanted to create some very subtle foliage. I used 2 different die sets for this. First, I used the Simon Says Stamp Dainty Floral Vine and added leaves from Tim Holtz Funky Foliage die set from Sizzix to cut from the same Desert Storm cardstock.

I used Poppystamps Scalloped Stitch Frames die set to make the frame from green paper from the Tim Holtz idea-ology Green 8 x8 Paper Pallette Collection. This is retired so I have linked to a frame set from Simon Says Stamp. Combined with a rectangular die, this would make a frame. The light background of the frame and the dark background paper on the tag are both from Tim Holtz idea-ology Backdrops Vol 4. I stamped Hey There from the Simon Says Stamp Classic Friendship stamp set with Versamark and heat embossed with the same Lindy’s Gang Twilight Bronze embossing powder. The frame is popped up with foam tape.
I used both leaf stamps in the Harvest Blessings stamp set to stamp with Hero Arts Wet Cement ink onto the dark Backdrops paper background. A lot of light brown inks would work for this, or even Versamark, as I was only trying to get a watermark effect.
I assembled everything as shown adding a dark brown cardstock background, a hole reinforcer, crinkled seam binding and a little tan and white baker’s twine.
Hope you are all enjoying Stamptember.
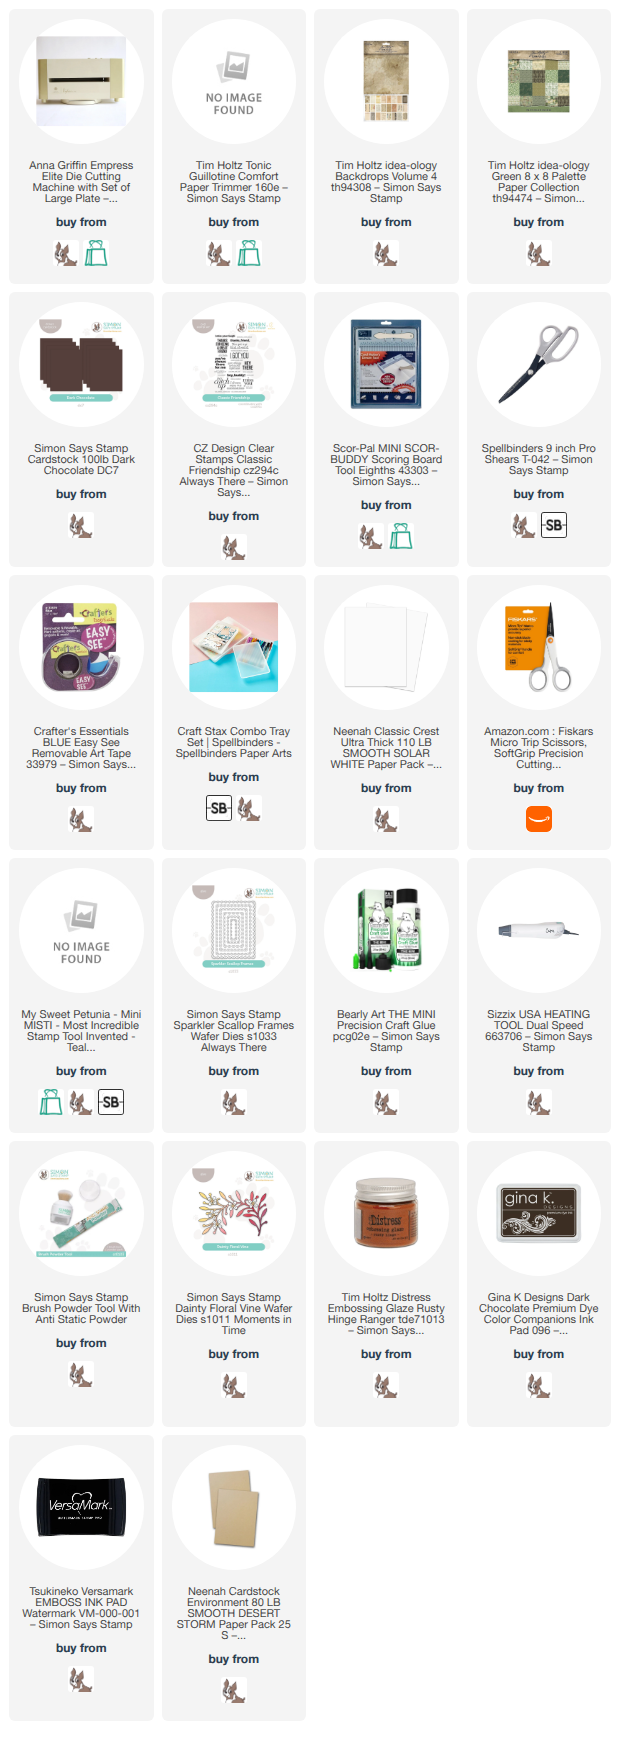
If you shop from the links below. I may receive a small commission at no cost to you. It is much appreciated and helps fund my crafting. Also, any item first marked with an asterisk * was provided by an online store. Otherwise, I bought my supplies.
Happy Stamptember! I hope you are enjoying all the goodness of this fun, stamping season over at Simon Says Stamp. It promises to be an exciting month.
I love the phrase “Hey There, Pumpkin,” as I call my daughters by this affectionate name (or more commonly, Pumpkin Head). I decided to take the Harvest Blessings stamp set* and the Classic Friendship stamp set* and create a tag. The tag shape is all my own making — no die involved.
I first stamped the largest pumpkin (which has interchangeable phrases that go in the middle: Blessings, Pumpkin, and Thanks) with Versamark on Neenah Desert Storm Cardstock. Next, I heat embossed with Tim Holtz Distress Embossing Glaze in Rusty Hinge. Instead of stamping the word Pumpkin between the top and bottom of the pumpkin, I stamped it separately and heat embossed it with Lindy’s Gang Twilight Bronze embossing powder. If you don’t have that, any metallic embossing powder would work great. I cut out the word and glued it in the center of my fussy-cut pumpkin. The stem was stamped with a dark brown ink - no heat embossing.
Just behind my pumpkin, I wanted to create some very subtle foliage. I used 2 different die sets for this. First, I used the Simon Says Stamp Dainty Floral Vine and added leaves from Tim Holtz Funky Foliage die set from Sizzix to cut from the same Desert Storm cardstock.
I used Poppystamps Scalloped Stitch Frames die set to make the frame from green paper from the Tim Holtz idea-ology Green 8 x8 Paper Pallette Collection. This is retired so I have linked to a frame set from Simon Says Stamp. Combined with a rectangular die, this would make a frame. The light background of the frame and the dark background paper on the tag are both from Tim Holtz idea-ology Backdrops Vol 4. I stamped Hey There from the Simon Says Stamp Classic Friendship stamp set with Versamark and heat embossed with the same Lindy’s Gang Twilight Bronze embossing powder. The frame is popped up with foam tape.
I used both leaf stamps in the Harvest Blessings stamp set to stamp with Hero Arts Wet Cement ink onto the dark Backdrops paper background. A lot of light brown inks would work for this, or even Versamark, as I was only trying to get a watermark effect.
I assembled everything as shown adding a dark brown cardstock background, a hole reinforcer, crinkled seam binding and a little tan and white baker’s twine.
Hope you are all enjoying Stamptember.
If you shop from the links below. I may receive a small commission at no cost to you. It is much appreciated and helps fund my crafting. Also, any item first marked with an asterisk * was provided by an online store. Otherwise, I bought my supplies.

With Mother's Day fast approaching, I wanted to put Tim Holtz's Floral Outlines stamp set by Stampers Anonymous to the test. I was eager to combine this with some Lindy's Magicals I had just recently received.
I first used four 4.5 x 6" panels of Canson XL watercolor paper and sprinkled it with 1-2 colors of Lindy's Magical Powders (if you haven't tried these yet, you are *truly* missing something). I used combinations including Cape Cod Coral, Salt Water Taffy, and Clam Bake Beige all from the Nantucket Shimmer Magicals set of 5. I also used Rizzo's Rowdy Red from the Go Greased Lightnin' set of Flat Magicals (no shimmer, but plenty of magic) by itself on one card. After the powder was on the card, I spritzed it with water and let the colors do their thing mixing around on the paper. In a couple of cases, I added a bit more powder.

I sprinkled 1-2 magicals onto my watercolor paper with a dry paintbrush, then spritzed with water to make them come alive. When I had the colors the way I liked them on each of my 4 panels, I dried them with my Ranger Heat Tool. I absolutely love the line art that is the Tim Holtz Floral Outlines stamp set. After my panels were dry, I brushed on anti-static powder (happy this did not dull my watercolor) and stamped this trio of stamps onto my paper with Versamark. For the three pink backgrounds, I used Inkon3's Gold Rush Ultra Fine Embossing Powder to heat emboss with. For the red background, I used Taylored Expression's White Fine Detail Embossing Powder.


With Mother's Day fast approaching, I wanted to put Tim Holtz's Floral Outlines stamp set by Stampers Anonymous to the test. I was eager to combine this with some Lindy's Magicals I had just recently received.
I first used four 4.5 x 6" panels of Canson XL watercolor paper and sprinkled it with 1-2 colors of Lindy's Magical Powders (if you haven't tried these yet, you are *truly* missing something). I used combinations including Cape Cod Coral, Salt Water Taffy, and Clam Bake Beige all from the Nantucket Shimmer Magicals set of 5. I also used Rizzo's Rowdy Red from the Go Greased Lightnin' set of Flat Magicals (no shimmer, but plenty of magic) by itself on one card. After the powder was on the card, I spritzed it with water and let the colors do their thing mixing around on the paper. In a couple of cases, I added a bit more powder.
I sprinkled 1-2 magicals onto my watercolor paper with a dry paintbrush, then spritzed with water to make them come alive. When I had the colors the way I liked them on each of my 4 panels, I dried them with my Ranger Heat Tool. I absolutely love the line art that is the Tim Holtz Floral Outlines stamp set. After my panels were dry, I brushed on anti-static powder (happy this did not dull my watercolor) and stamped this trio of stamps onto my paper with Versamark. For the three pink backgrounds, I used Inkon3's Gold Rush Ultra Fine Embossing Powder to heat emboss with. For the red background, I used Taylored Expression's White Fine Detail Embossing Powder.


I decided to enter a few challenges and let them drive my design this week. The Global Design Project CASE the Designer challenge was the most unique. The challenge was to Copy And Selectively Edit from this original.

I am still enjoying my MFT Harvest Mouse stamps, so I paired this mouse with 3 dies and one embossing folder. I colored the mouse and apple basket with alcohol markers and then die cut them. Next I used a stitch circle die with kraft paper and dry embossed the circle. I wanted to mimic the leaves in the original design and I used two different dies to do that. I wanted a red background to pick up the color of the apples and found this double-sided piece in my stash. I wanted to use a kraft cardstock base but wanted something to give it interest. I used a very old background stamp with Versamark on the card base. I assembled it all using both liquid glue and foam adhesive, and tied twine around the main portion just like in the original. I added the sentiment after I’d heat embossed it.
Ingredients
CS: Stampin' Up! Crumb Cake, Soft Suede, Neenah Classic Crest Solar White 110lb
Patterned Paper: unknown - from my stash
Ink: Memento Tuxedo Black, Versamark embossing ink
Stamps: My Favorite Things Harvest Mouse, friend definition background stamp - unknown (maybe Hero Arts)
Dies: Circle: Stampin' Up! Stitched Shapes, Poppystamps Poinsettia Background, David Tutera for Sizzix Eucalyptus, MFT Harvest Mouse
Markers: Copic & Dick Blick alcohol markers
Embellishments: Stampin' Up! linen thread, Nuvo Crystal Drops Dandelion Yellow, Taylored Expressions white embossing powder, Darice fall leaves embossing folder, Signo Uniball white gel pen
Challenges: The Global Design Project #GDP316, AAA Challenge Birthday Card Challenge
, Craft Animals Challenge

I decided to enter a few challenges and let them drive my design this week. The Global Design Project CASE the Designer challenge was the most unique. The challenge was to Copy And Selectively Edit from this original.
I am still enjoying my MFT Harvest Mouse stamps, so I paired this mouse with 3 dies and one embossing folder. I colored the mouse and apple basket with alcohol markers and then die cut them. Next I used a stitch circle die with kraft paper and dry embossed the circle. I wanted to mimic the leaves in the original design and I used two different dies to do that. I wanted a red background to pick up the color of the apples and found this double-sided piece in my stash. I wanted to use a kraft cardstock base but wanted something to give it interest. I used a very old background stamp with Versamark on the card base. I assembled it all using both liquid glue and foam adhesive, and tied twine around the main portion just like in the original. I added the sentiment after I’d heat embossed it.
Ingredients
CS: Stampin' Up! Crumb Cake, Soft Suede, Neenah Classic Crest Solar White 110lb
Patterned Paper: unknown - from my stash
Ink: Memento Tuxedo Black, Versamark embossing ink
Stamps: My Favorite Things Harvest Mouse, friend definition background stamp - unknown (maybe Hero Arts)
Dies: Circle: Stampin' Up! Stitched Shapes, Poppystamps Poinsettia Background, David Tutera for Sizzix Eucalyptus, MFT Harvest Mouse
Markers: Copic & Dick Blick alcohol markers
Embellishments: Stampin' Up! linen thread, Nuvo Crystal Drops Dandelion Yellow, Taylored Expressions white embossing powder, Darice fall leaves embossing folder, Signo Uniball white gel pen
Challenges: The Global Design Project #GDP316, AAA Challenge Birthday Card Challenge
, Craft Animals Challenge
I was thrilled to be chosen the winner of a recent Poppystamps (PS) Challenge with my Turquoise and Coral card. But after that, things got even more exciting. I was contacted by the Design Team leader and asked if I'd like to join their Poppystamps Design Team and make projects showing off all their great stamps and dies. You get one guess what I said.

So, to kick off my new endeavor, I wanted to design a slimline card, which typically measures 3.5” x 8.5” when folded. I couldn't wait to get my hands on the lovely PS Soaring Tree Frame and I cut it from kraft cardstock.


I used blue cardstock and cut the washi-covered piece down to just fit behind the tree. I used the same blue for the card base. Next, I die cut the adorable PS Pile of Pumpkins (I adore pumpkins!) I used a plain circle die to create the green hill, and then I swiped Versamark ink on the tops of pumpkins, the hill, and in one area of the tree. I heat embossed with white embossing powder to give it the look of snow. I went over a few more branches with a white gel pen. I probably could have used the gel pen on everything instead of embossing, but I like the look of the shiny powder on the pumpkins.
CS: Stampin' Up! Hello Honey, Cherry Cobbler, Dapper Denim(?), Crumb Cake, Always Artichoke, Very Vanilla, and Cajun Craze; Pumpkins are a deep orange from my stash
Washi Tape: Poppystamps Snowspeckle
I was thrilled to be chosen the winner of a recent Poppystamps (PS) Challenge with my Turquoise and Coral card. But after that, things got even more exciting. I was contacted by the Design Team leader and asked if I'd like to join their Poppystamps Design Team and make projects showing off all their great stamps and dies. You get one guess what I said.
So, to kick off my new endeavor, I wanted to design a slimline card, which typically measures 3.5” x 8.5” when folded. I couldn't wait to get my hands on the lovely PS Soaring Tree Frame and I cut it from kraft cardstock.
I used blue cardstock and cut the washi-covered piece down to just fit behind the tree. I used the same blue for the card base. Next, I die cut the adorable PS Pile of Pumpkins (I adore pumpkins!) I used a plain circle die to create the green hill, and then I swiped Versamark ink on the tops of pumpkins, the hill, and in one area of the tree. I heat embossed with white embossing powder to give it the look of snow. I went over a few more branches with a white gel pen. I probably could have used the gel pen on everything instead of embossing, but I like the look of the shiny powder on the pumpkins.
CS: Stampin' Up! Hello Honey, Cherry Cobbler, Dapper Denim(?), Crumb Cake, Always Artichoke, Very Vanilla, and Cajun Craze; Pumpkins are a deep orange from my stash
Washi Tape: Poppystamps Snowspeckle
I was thrilled to have my card chosen by the Color Hues Color Challenge as the winner of their 24th challenge with my Coral & Turquoise card. As a result, they have graciously asked me to be the guest designer for challenge #26. Pink and purple are the challenge colors, and they are not just for unicorns and Disney princesses anymore. When I think of these two colors, I think of flowers. My husband loves to grow flowers in our backyard and lilies in our koi pond and they are most often pink and purple. I recently purchased a gorgeous 6x6" background stamp from My Favorite Things called Roses All Over Background. It is stunning, and a big departure from the adorable animal stamps I know them for. It is not new in their catalog; I've simply never seen it until recently. I stamped this on watercolor paper with Versamark (I got the best results from putting the paper down onto the stamp and pressing) and then heat embossing in white. I used only 2 of my Zig Clean Color Real Brush markers to put the color down. Then I used a water brush to spread it onto the rose pattern, even blending a little here and there.
To let the beauty of the stamp and the colors shine through (and to not stray from pink and purple), I kept the sentiment short, sweet, and black and white. It needed more than a stamped phrase, but not much more. I don't yet own any script dies (soon, I promise), so I used my Silhouette. I used the Silhouette's offset feature to get the black background. I pop dotted everything off a white background and I was done. The card will fit into a 5.5" square envelope.


CS: Gina K Pure Luxury Heavy Weight 110lb, Canson XL cold press watercolor paper, Bazzill Licorice Twist
Ink: Versamark
Die: Silhouette used with font Bigfat Script from Fontspace.com
Embossing Powder: Taylored Expressions Fine Detail White Embossing Powder
Watercolor: Zig Clean Color Real Brush Markers in Lilac 080 and Pink 025; Pentel waterbrush with largest tip
I was thrilled to have my card chosen by the Color Hues Color Challenge as the winner of their 24th challenge with my Coral & Turquoise card. As a result, they have graciously asked me to be the guest designer for challenge #26. Pink and purple are the challenge colors, and they are not just for unicorns and Disney princesses anymore. When I think of these two colors, I think of flowers. My husband loves to grow flowers in our backyard and lilies in our koi pond and they are most often pink and purple. I recently purchased a gorgeous 6x6" background stamp from My Favorite Things called Roses All Over Background. It is stunning, and a big departure from the adorable animal stamps I know them for. It is not new in their catalog; I've simply never seen it until recently. I stamped this on watercolor paper with Versamark (I got the best results from putting the paper down onto the stamp and pressing) and then heat embossing in white. I used only 2 of my Zig Clean Color Real Brush markers to put the color down. Then I used a water brush to spread it onto the rose pattern, even blending a little here and there.
To let the beauty of the stamp and the colors shine through (and to not stray from pink and purple), I kept the sentiment short, sweet, and black and white. It needed more than a stamped phrase, but not much more. I don't yet own any script dies (soon, I promise), so I used my Silhouette. I used the Silhouette's offset feature to get the black background. I pop dotted everything off a white background and I was done. The card will fit into a 5.5" square envelope.
CS: Gina K Pure Luxury Heavy Weight 110lb, Canson XL cold press watercolor paper, Bazzill Licorice Twist
Ink: Versamark
Die: Silhouette used with font Bigfat Script from Fontspace.com
Embossing Powder: Taylored Expressions Fine Detail White Embossing Powder
Watercolor: Zig Clean Color Real Brush Markers in Lilac 080 and Pink 025; Pentel waterbrush with largest tip


CS: Neenah Solar White 110lb, Tim Holtz Idea-ology Kraft-Stock in Cool (dark blue), Bazzill Basics in Raven, Stampin' Up! Black and So Saffron
Paper: Tim Holtz Idea-ology Wallflower Paper Stash (blue/text background), map by The Paper Studio/Hobby Lobby, Bo Bunny Double Dots designs (gray dot), Jenny Bowlin Red Soda Label
Ink: Distress Oxides - Fossilized Amber, Antique Linen, Fired Brick, Aged Mahogany, Chipped Sapphire, Speckled Egg, Evergreen Bough, Gathered Twig, Ground Espresso; Distress Inks: Pumice Stone; Tuxedo Black Memento Ink, Versamark
Stamp: "Enjoy the Now" by Heidi Swapp
Embellishments: Tim Holtz Mini Fasteners, black thread, beige thread, Tim Holtz Idea-ology Snippets Ephemera Pack, Tim Holtz Metallic Stickers Quotations, Cheesecloth in Tan from ByFernStudio on Etsy.
Dry Embossing Folder: Wind and Water from Fun Stampers Journey(FSJ) (purchased from Spellbinders)
Embossing powder: Champagne by Recollections/Michaels
CS: Neenah Solar White 110lb, Tim Holtz Idea-ology Kraft-Stock in Cool (dark blue), Bazzill Basics in Raven, Stampin' Up! Black and So Saffron
Paper: Tim Holtz Idea-ology Wallflower Paper Stash (blue/text background), map by The Paper Studio/Hobby Lobby, Bo Bunny Double Dots designs (gray dot), Jenny Bowlin Red Soda Label
Ink: Distress Oxides - Fossilized Amber, Antique Linen, Fired Brick, Aged Mahogany, Chipped Sapphire, Speckled Egg, Evergreen Bough, Gathered Twig, Ground Espresso; Distress Inks: Pumice Stone; Tuxedo Black Memento Ink, Versamark
Stamp: "Enjoy the Now" by Heidi Swapp
Embellishments: Tim Holtz Mini Fasteners, black thread, beige thread, Tim Holtz Idea-ology Snippets Ephemera Pack, Tim Holtz Metallic Stickers Quotations, Cheesecloth in Tan from ByFernStudio on Etsy.
Dry Embossing Folder: Wind and Water from Fun Stampers Journey(FSJ) (purchased from Spellbinders)
Embossing powder: Champagne by Recollections/Michaels
Love this floral frame and using just three colors to color it. It came together with vellum, and several other things I dug out of my stash. I used Gina K Connect Glue to glue the gold frame, cut from my Silhouette, to the floral frame, then to the vellum, then to the cardstock. The Connect Glue gives you a little play time and doesn't bond instantly. I love my Art Glitter Glue, but it bonds pretty darn quick. I used Wink of Stella to add a glimmer to the dark green leaves. Keep scrolling for the list of ingredients.


Love this floral frame and using just three colors to color it. It came together with vellum, and several other things I dug out of my stash. I used Gina K Connect Glue to glue the gold frame, cut from my Silhouette, to the floral frame, then to the vellum, then to the cardstock. The Connect Glue gives you a little play time and doesn't bond instantly. I love my Art Glitter Glue, but it bonds pretty darn quick. I used Wink of Stella to add a glimmer to the dark green leaves. Keep scrolling for the list of ingredients.


