

[Stay tuned for a little die cutting trick I did below.] The Still Here stamp set* from Simon Says Stamp’s October Sending Cheer release is a very unique size. The hand measures 1 7/8” x 4 1/8”. In order to make a card where 3 hands could fit on the card, I really needed to make an A6 card, measuring 4.5 x 6.25”. I wanted to do a pastel treatment on the hands with a relatively simple background.
I cut 3 pieces of white cardstock to 4.5” x 6.25”. I took my first panel and dry embossed it with the Simon Says Stamp Dotty Diamonds Embossing Folder. I then cut it down to 3.5” x 5.25” and distressed the edge of this. I cut my second panel to 4” x 5.75”. I left my third panel as is.
I stamped the peace-sign hand three times. First, using Concord & 9th’s Harbor ink, then using Taylored Expressions Lavender Glaze ink, and finally using a retired Stampin’ Up! colored called Soft Seafoam. An ideal substitute for the Stampin’ Up! color is Altenew’s Pistachio Fresh Dye Ink. I fussy cut all three hands and adhered them to the front of the embossed panel as shown, with the blue one on top.

Now for the die cutting trick. I stamped the sentiment “You don’t have to carry it all alone” with black VersaFine Clair Nocturne ink on a piece of white cardstock. I used the smallest tag die from Simon Says Stamps Rounded Tags die set, and by making sure the bottom edge of the tag was always hanging off my cutting mat (thereby not getting cut), I was able to cut the label in the shape you see, after it was stamped. I first put the die to the left of the sentiment and cut the top and sides, then switched it to the right side of the sentiment, cutting the top and sides of the tag shape. It was a little tricky, but it worked perfectly. And using the tag holes, I threaded some Simon Says Stamp Metallic Silver Cord through the holes and around the back of the embossed decorated panel.
I layered all three of these panels on top of one another, using thin foam adhesive under the embossed panel.
I finished by adding some clear, iridescent sequins in 2 sizes.
If you shop from the highlighted product links above, I may receive a small commission at no cost to you. It is much appreciated and helps fund my crafting. Also, any item first marked with an asterisk * was provided by an online store. Otherwise, I bought my supplies.
[Stay tuned for a little die cutting trick I did below.] The Still Here stamp set* from Simon Says Stamp’s October Sending Cheer release is a very unique size. The hand measures 1 7/8” x 4 1/8”. In order to make a card where 3 hands could fit on the card, I really needed to make an A6 card, measuring 4.5 x 6.25”. I wanted to do a pastel treatment on the hands with a relatively simple background.
I cut 3 pieces of white cardstock to 4.5” x 6.25”. I took my first panel and dry embossed it with the Simon Says Stamp Dotty Diamonds Embossing Folder. I then cut it down to 3.5” x 5.25” and distressed the edge of this. I cut my second panel to 4” x 5.75”. I left my third panel as is.
I stamped the peace-sign hand three times. First, using Concord & 9th’s Harbor ink, then using Taylored Expressions Lavender Glaze ink, and finally using a retired Stampin’ Up! colored called Soft Seafoam. An ideal substitute for the Stampin’ Up! color is Altenew’s Pistachio Fresh Dye Ink. I fussy cut all three hands and adhered them to the front of the embossed panel as shown, with the blue one on top.
Now for the die cutting trick. I stamped the sentiment “You don’t have to carry it all alone” with black VersaFine Clair Nocturne ink on a piece of white cardstock. I used the smallest tag die from Simon Says Stamps Rounded Tags die set, and by making sure the bottom edge of the tag was always hanging off my cutting mat (thereby not getting cut), I was able to cut the label in the shape you see, after it was stamped. I first put the die to the left of the sentiment and cut the top and sides, then switched it to the right side of the sentiment, cutting the top and sides of the tag shape. It was a little tricky, but it worked perfectly. And using the tag holes, I threaded some Simon Says Stamp Metallic Silver Cord through the holes and around the back of the embossed decorated panel.
I layered all three of these panels on top of one another, using thin foam adhesive under the embossed panel.
I finished by adding some clear, iridescent sequins in 2 sizes.
If you shop from the highlighted product links above, I may receive a small commission at no cost to you. It is much appreciated and helps fund my crafting. Also, any item first marked with an asterisk * was provided by an online store. Otherwise, I bought my supplies.

Happy Stamptember once again!! I hope you are enjoying all that Simon Says Stamp has to offer during this very special month. I will have Stamptember-related posts on my blog for Sept 1-4.
With so many cute, solid images in the Harvest Blessings stamp set*, I just had to use these to make a background. I used Stampin’ Up! ink including Pumpkin Pie, Old Olive, Rich Razzleberry, Crumb Cake and Early Espresso. I have linked to similar colors of ink and cardstock available from Simon Says Stamp below. I stamped the yellow leaves with Gina K Designs’ Sweet Corn yellow ink. I stamped randomly all over a piece of vanilla cardstock. I also stamped the word ‘sending’ in dark brown ink and then the itty-bitty heart stamp with the Rich Razzleberry ink. A great alternative to this cardstock and ink color is Gina K's Plum Punch. I cut it into a tag shape - no die used.

I die cut this stamped panel, as well as a Rich Razzleberry panel, using the Paper Rose Stitched Rectangles set of dies. These may be hard to find, but Simon Says Stamp makes an almost identical set which I have linked below.
For my focal point, I stamped the large pumpkin and stem in Pumpkin Pie and Early Espresso ink. Then I carefully stamped the word Blessings in the middle with Versamark. I also stamped the 2 leaves on a scrap piece. I heat embossed all three with Ink on 3’s Gold Rush embossing powder. I fussy cut the pumpkin and the leaves and popped them up with foam tape. The background is made of a cork sheet I’ve had in my stash forever. I die cut that with Spellbinders Labels 18 nested die set. It is retired but 2 great alternatives from Simon Says Stamp are their Grandstand Labels and the Petal Tipped Labels.

I assembled everything as shown and attached the tag with some linen thread to the fold in my card. I decided to adhere the tag to the card using a bit of foam adhesive, but you could easily leave it loose.
Happy Stamptember, y’all!
If you shop from the links below. I may receive a small commission at no cost to you. It is much appreciated and helps fund my crafting. Also, any item first marked with an asterisk * was provided by an online store. Otherwise, I bought my supplies.
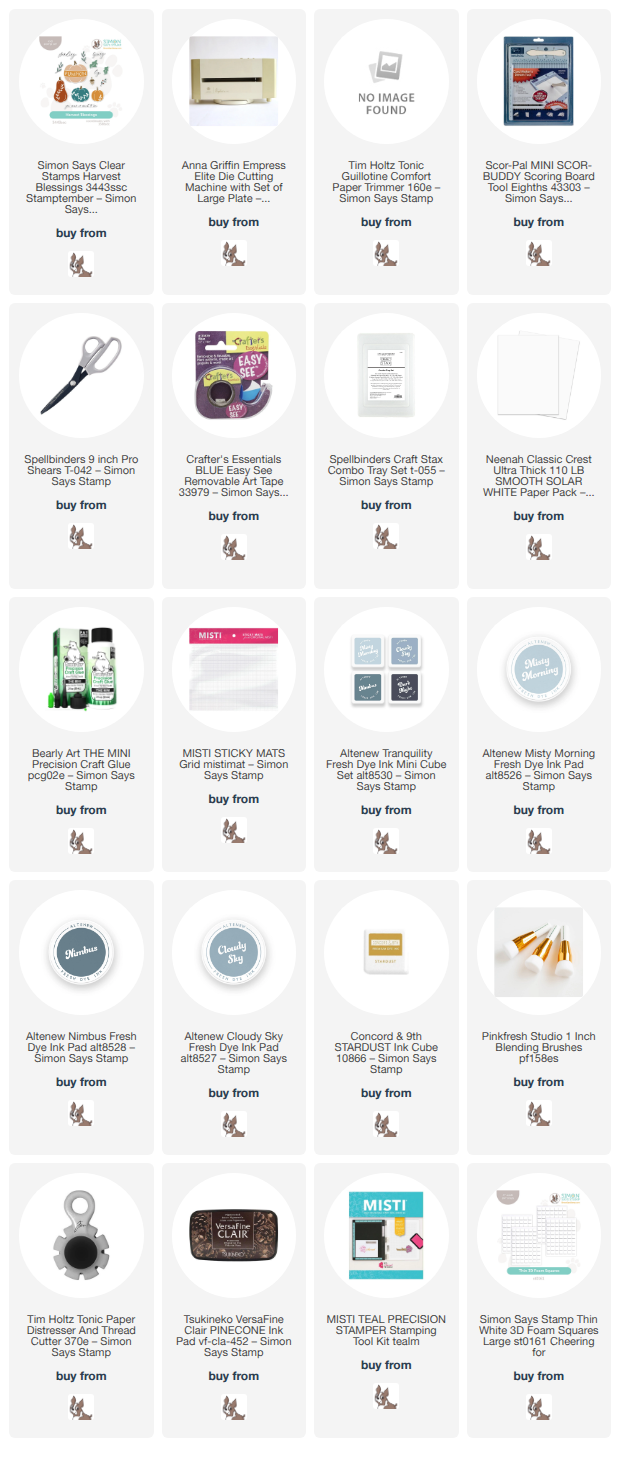
Happy Stamptember once again!! I hope you are enjoying all that Simon Says Stamp has to offer during this very special month. I will have Stamptember-related posts on my blog for Sept 1-4.
With so many cute, solid images in the Harvest Blessings stamp set*, I just had to use these to make a background. I used Stampin’ Up! ink including Pumpkin Pie, Old Olive, Rich Razzleberry, Crumb Cake and Early Espresso. I have linked to similar colors of ink and cardstock available from Simon Says Stamp below. I stamped the yellow leaves with Gina K Designs’ Sweet Corn yellow ink. I stamped randomly all over a piece of vanilla cardstock. I also stamped the word ‘sending’ in dark brown ink and then the itty-bitty heart stamp with the Rich Razzleberry ink. A great alternative to this cardstock and ink color is Gina K's Plum Punch. I cut it into a tag shape - no die used.
I die cut this stamped panel, as well as a Rich Razzleberry panel, using the Paper Rose Stitched Rectangles set of dies. These may be hard to find, but Simon Says Stamp makes an almost identical set which I have linked below.
For my focal point, I stamped the large pumpkin and stem in Pumpkin Pie and Early Espresso ink. Then I carefully stamped the word Blessings in the middle with Versamark. I also stamped the 2 leaves on a scrap piece. I heat embossed all three with Ink on 3’s Gold Rush embossing powder. I fussy cut the pumpkin and the leaves and popped them up with foam tape. The background is made of a cork sheet I’ve had in my stash forever. I die cut that with Spellbinders Labels 18 nested die set. It is retired but 2 great alternatives from Simon Says Stamp are their Grandstand Labels and the Petal Tipped Labels.
I assembled everything as shown and attached the tag with some linen thread to the fold in my card. I decided to adhere the tag to the card using a bit of foam adhesive, but you could easily leave it loose.
Happy Stamptember, y’all!
If you shop from the links below. I may receive a small commission at no cost to you. It is much appreciated and helps fund my crafting. Also, any item first marked with an asterisk * was provided by an online store. Otherwise, I bought my supplies.

I am the guest designer on the super fun Cut It Up Challenge Blog today. I encourage you to join us for this challenge, #356. This round’s theme is flowers. I decided to go with a hot foil glimmer plate from Spellbinders called Glimmering Peonies. It is a giant image that exceeds the bounds of an A2 card. I used the Spellbinders Glimmer Hot Foil Roll in Polished Brass to foil this onto Secret Sea colored cardstock from Stampin’ Up! I initially die cut it with Spellbinders Essential Modern Ovals. As I played with it, I realized I wanted it to fit on an A2 card, so I cut off about an inch of the oval at the bottom, leaving me with an arch. Naturally, you could use an arch die to do this, such as the Essential Arches from Spellbinders.

Next, I used Ink On 3 Gold embossing powder along with the Mini Messages Stamp Set from Honey Bee Stamps to heat emboss the sentiment onto a strip of the Secret Sea cardstock. I used Spellbinders Sentiment Labels dies to cut a piece of brushed gold cardstock, the sentiment, and the “string” which is simply paper.
I took one more A2 sized piece of Secret Sea cardstock and dry embossed it with Simon Says Stamp Tiny Tufts 3D embossing folder. I just love the delicate botanical image this folder creates.
I adhered all the elements with either foam tape or my favorite glue.
So what florals can you use to join us in the Flowers challenge on the Cut It Up Challenge?
Affiliate links are used in this post at no cost to you. This means I may receive a small commission when you click through and shop using the links I provide. This helps support me in creating and posting my crafts. Items marked with an asterisk * at first mention were provided by a store or manufacturer. Otherwise, all items were purchased by me. I do not get paid to promote any products.

I am the guest designer on the super fun Cut It Up Challenge Blog today. I encourage you to join us for this challenge, #356. This round’s theme is flowers. I decided to go with a hot foil glimmer plate from Spellbinders called Glimmering Peonies. It is a giant image that exceeds the bounds of an A2 card. I used the Spellbinders Glimmer Hot Foil Roll in Polished Brass to foil this onto Secret Sea colored cardstock from Stampin’ Up! I initially die cut it with Spellbinders Essential Modern Ovals. As I played with it, I realized I wanted it to fit on an A2 card, so I cut off about an inch of the oval at the bottom, leaving me with an arch. Naturally, you could use an arch die to do this, such as the Essential Arches from Spellbinders.
Next, I used Ink On 3 Gold embossing powder along with the Mini Messages Stamp Set from Honey Bee Stamps to heat emboss the sentiment onto a strip of the Secret Sea cardstock. I used Spellbinders Sentiment Labels dies to cut a piece of brushed gold cardstock, the sentiment, and the “string” which is simply paper.
I took one more A2 sized piece of Secret Sea cardstock and dry embossed it with Simon Says Stamp Tiny Tufts 3D embossing folder. I just love the delicate botanical image this folder creates.
I adhered all the elements with either foam tape or my favorite glue.
So what florals can you use to join us in the Flowers challenge on the Cut It Up Challenge?
Affiliate links are used in this post at no cost to you. This means I may receive a small commission when you click through and shop using the links I provide. This helps support me in creating and posting my crafts. Items marked with an asterisk * at first mention were provided by a store or manufacturer. Otherwise, all items were purchased by me. I do not get paid to promote any products.

This sympathy card started with a very pale purple cardstock. I used the retired Purple Posy from Stampin’ Up!, but Fairy Tale from Spellbinders would make an excellent substitute. Using a super light cardstock color means my dye inks were barely effected by the color underneath. I used the wonderful Leafy Background stencil set from Pinkfresh Studio along with Tim Holtz Distress Ink in Seedless Preserves, and Lost Lagoon and Sweet Sugarplum ink from Stampin’ Up! to ink blend through the stencil.

Next, I used the Papertrey Ink Into the Blooms: Cherry Blossom Die Set along with Neenah Classic Crest 110 white cardstock, and Stampin’ Up! cardstock colors including Lost Lagoon, Rich Razzleberry, and Sweet Sugarplum to build the flowers. I ink blended a little Sweet Sugarplum ink onto the white flower pieces.
I used Versa Clair black ink to stamp the Papertrey Ink Reflections Number 6 stamp (my favorite Bible verse) onto the largest Reflections Number 6 die, also by Papertrey Ink. I assembled the flowers as shown and then glued everything onto the background, and then onto a Rich Razzleberry piece of cardstock to make the cardfront.
I am entering this card into 2 challenges. Simon Says Stamp Monday Challenge for May 4, and the Paper Players #784 challenge.
When do you make sympathy cards? As you need them? Or before you need them?
Affiliate links are used in this post at no cost to you. This means I may receive a small commission when you click through and shop using the links I provide. This helps support me in creating and posting my crafts. Items marked with an asterisk * at first mention were provided by a store or manufacturer. Otherwise, all items were purchased by me. I do not get paid to promote any products.

This sympathy card started with a very pale purple cardstock. I used the retired Purple Posy from Stampin’ Up!, but Fairy Tale from Spellbinders would make an excellent substitute. Using a super light cardstock color means my dye inks were barely effected by the color underneath. I used the wonderful Leafy Background stencil set from Pinkfresh Studio along with Tim Holtz Distress Ink in Seedless Preserves, and Lost Lagoon and Sweet Sugarplum ink from Stampin’ Up! to ink blend through the stencil.
Next, I used the Papertrey Ink Into the Blooms: Cherry Blossom Die Set along with Neenah Classic Crest 110 white cardstock, and Stampin’ Up! cardstock colors including Lost Lagoon, Rich Razzleberry, and Sweet Sugarplum to build the flowers. I ink blended a little Sweet Sugarplum ink onto the white flower pieces.
I used Versa Clair black ink to stamp the Papertrey Ink Reflections Number 6 stamp (my favorite Bible verse) onto the largest Reflections Number 6 die, also by Papertrey Ink. I assembled the flowers as shown and then glued everything onto the background, and then onto a Rich Razzleberry piece of cardstock to make the cardfront.
I am entering this card into 2 challenges. Simon Says Stamp Monday Challenge for May 4, and the Paper Players #784 challenge.
When do you make sympathy cards? As you need them? Or before you need them?
Affiliate links are used in this post at no cost to you. This means I may receive a small commission when you click through and shop using the links I provide. This helps support me in creating and posting my crafts. Items marked with an asterisk * at first mention were provided by a store or manufacturer. Otherwise, all items were purchased by me. I do not get paid to promote any products.
If I were ever stuck on a desert island with only a select number of craft supplies, the Waffle Flower Postage Collage (PC) collection would be at the top of my list. One of the most viral stamp/die/stencil collections ever made, I never get tired of using it and trying more and more ways to combine them all.

Today’s card using the original Postage Collage A2 Die, the PC Envelope Die, the PC Envelope Stencil, the PC Collage Mini Seals Die and the original Postage Collage Stamp Set.
I started with the stencil and ink blended using Tim Holtz Distress Ink in Tumbled Glass and Faded Jeans, and Stampin’ Up!’s Crumb Cake ink.
I colored in the tiny hearts formed by the die with a Uni-ball Signo Gold Gel pen.

Next, I used the original Postage Collage A2 die and cut the stenciled panel to make it look like a sheet of stamps. Using Gina K’s Amalgam black inkpad, I stamped with the PC stamp set in 3 places.
Now that my background was done, I die cut an envelope, an envelope liner, a little paper note, and a tiny seal all with the PC Mini Seals die set and scraps of cardstock. I inked the edges of the letter, and I stamped a tiny little heart-circle in Versamark inside the little seal using the Simon Says Stamp Easter Greetings Stamp set (I was so happy to discover this little stamp in my stamp collection). I assembled everything as shown and added a Gold foiled Happy Birthday sentiment from the Spellbinders You Are Everything Press Plate and Die set with foam tape. I backed the panel with Stampin’ Up!’s Crumb Cake cardstock and then with Spellbinders Malibu cardstock.
Affiliate links are used in this post at no cost to you. This means I may receive a small commission when you click through and shop using the links I provide. This helps support me in creating and posting my crafts. Items marked with an asterisk * at first mention were provided by a store or manufacturer. Otherwise, all items were purchased by me. I do not get paid to promote any products.
SUPPLIES USED
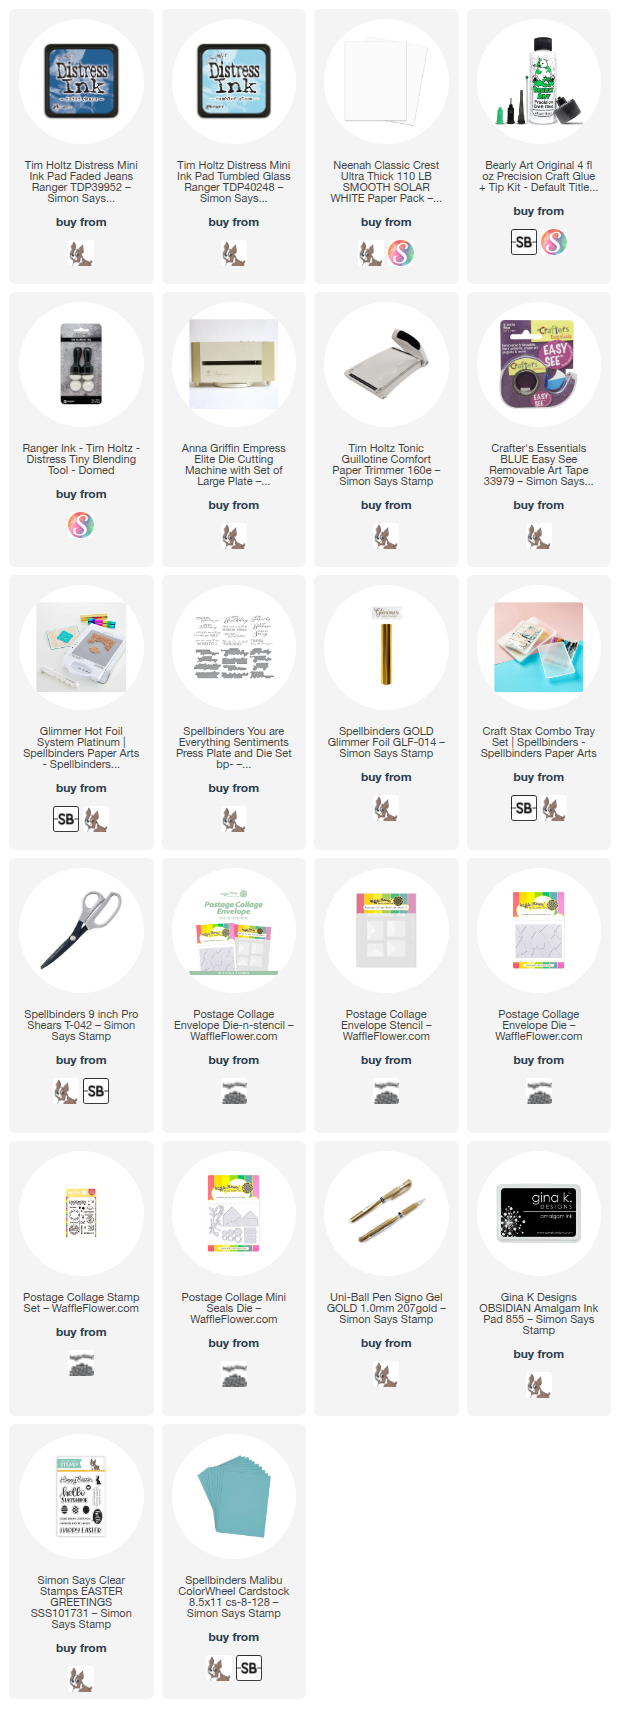
If I were ever stuck on a desert island with only a select number of craft supplies, the Waffle Flower Postage Collage (PC) collection would be at the top of my list. One of the most viral stamp/die/stencil collections ever made, I never get tired of using it and trying more and more ways to combine them all.
Today’s card using the original Postage Collage A2 Die, the PC Envelope Die, the PC Envelope Stencil, the PC Collage Mini Seals Die and the original Postage Collage Stamp Set.
I started with the stencil and ink blended using Tim Holtz Distress Ink in Tumbled Glass and Faded Jeans, and Stampin’ Up!’s Crumb Cake ink.
I colored in the tiny hearts formed by the die with a Uni-ball Signo Gold Gel pen.
Next, I used the original Postage Collage A2 die and cut the stenciled panel to make it look like a sheet of stamps. Using Gina K’s Amalgam black inkpad, I stamped with the PC stamp set in 3 places.
Now that my background was done, I die cut an envelope, an envelope liner, a little paper note, and a tiny seal all with the PC Mini Seals die set and scraps of cardstock. I inked the edges of the letter, and I stamped a tiny little heart-circle in Versamark inside the little seal using the Simon Says Stamp Easter Greetings Stamp set (I was so happy to discover this little stamp in my stamp collection). I assembled everything as shown and added a Gold foiled Happy Birthday sentiment from the Spellbinders You Are Everything Press Plate and Die set with foam tape. I backed the panel with Stampin’ Up!’s Crumb Cake cardstock and then with Spellbinders Malibu cardstock.
Affiliate links are used in this post at no cost to you. This means I may receive a small commission when you click through and shop using the links I provide. This helps support me in creating and posting my crafts. Items marked with an asterisk * at first mention were provided by a store or manufacturer. Otherwise, all items were purchased by me. I do not get paid to promote any products.
SUPPLIES USED
When I started this card I knew I wanted to combine this adorable Flourish Rabbit die from Simon Says Stamp with the Elegant Circles Die Set from Pinkfresh Studio. What I didn’t know is that I’d use one of the oldest embellishments I own and had never opened before (we’re talking 19 years, people).

I cut the bunny from Neenah Classic Crest 110lb coverstock. For the piece that makes the background of the ear, I gently ink blended a little Dried Marigold Distress Ink to give a hint of color. On that same piece, I colored the eye black so it would show through the top piece of the die. I used 2 alcohol ink markers to color the flower and leaves on the rabbit. I also used one of my lightest Copic markers (E40) to add in a hint of shading on a few edges of the rabbit.

I used the largest die in the Pinkfresh Studios Elegant Circles die set and cut it from a pale green cardstock, Soft Seafoam from Stampin’ Up!. I stacked this die cut with 3 more behind it to give it a lot of lift and sandwiched a circle of Heavyweight Vellum from Amazon amongst the stack. After I had glued the rabbit on this portion, I wanted to add tiny flowers and leaves on the bottom edge to give the rabbit something to sit on. I pulled out my basket of “paper flowers.” In this basket is both the kind of paper flowers I would buy from Prima decades ago and tiny little paper flowers from left over die cutting I had done recently. I unearthed an unopened package of tiny white paper flowers and silver brads from a long-ago company called Making Memories. I bought these in about 2007 when I was working for Archiver’s. I paired these cute little flowers with greenery from some large Poppystamps Pop Up Easel card die sets. I put tiny orange Poppystamps Fairy Jewels in the center of all the flowers and glued everything onto my circle frame.
I discovered an already paint splattered piece of Stampin’ Up! Crumb Cake in my stash, cut it into a 5 x 5” square and dry embossed it with the Tufted 3D Embossing Folder from Spellbinders. I backed this with a piece of pale orange cardstock 5.25 x 5.25” and another piece of Crumb Cake, 5.5 x 5.5”. Finally, I stamped a sentiment in dark green ink from the Simon Says Stamp Easter Greetings stamp set and used the Honeybee Stamps Mini Messages Banner die set to cut out the greeting. As usual, I attached this to a white cardbase.
I am entering this card in 3 challenges. First is the Simon Says Stamp Monday Challenge with the theme of Emboss It. Next is the Double Trouble Challenge using the 3-2-1 element (3 Copic markers, 2 new dies, 1 cotton tail) plus Thing 3 theme of Easter. Finally, I am entering the CreaLadies challenge with the theme of animal.
NOTE: Square cards in square envelopes, of any size, cost more to mail than a rectangular envelope. Please check with the USPS to make sure you have enough postage.
A very happy Easter to you!
Affiliate links are used in this post at no cost to you. This means I may receive a small commission when you click through and shop using the links I provide. This helps support me in creating and posting my crafts. Items marked with an asterisk * at first mention were provided by a store or manufacturer. Otherwise, all items were purchased by me. I do not get paid to promote any products.
When I started this card I knew I wanted to combine this adorable Flourish Rabbit die from Simon Says Stamp with the Elegant Circles Die Set from Pinkfresh Studio. What I didn’t know is that I’d use one of the oldest embellishments I own and had never opened before (we’re talking 19 years, people).
I cut the bunny from Neenah Classic Crest 110lb coverstock. For the piece that makes the background of the ear, I gently ink blended a little Dried Marigold Distress Ink to give a hint of color. On that same piece, I colored the eye black so it would show through the top piece of the die. I used 2 alcohol ink markers to color the flower and leaves on the rabbit. I also used one of my lightest Copic markers (E40) to add in a hint of shading on a few edges of the rabbit.
I used the largest die in the Pinkfresh Studios Elegant Circles die set and cut it from a pale green cardstock, Soft Seafoam from Stampin’ Up!. I stacked this die cut with 3 more behind it to give it a lot of lift and sandwiched a circle of Heavyweight Vellum from Amazon amongst the stack. After I had glued the rabbit on this portion, I wanted to add tiny flowers and leaves on the bottom edge to give the rabbit something to sit on. I pulled out my basket of “paper flowers.” In this basket is both the kind of paper flowers I would buy from Prima decades ago and tiny little paper flowers from left over die cutting I had done recently. I unearthed an unopened package of tiny white paper flowers and silver brads from a long-ago company called Making Memories. I bought these in about 2007 when I was working for Archiver’s. I paired these cute little flowers with greenery from some large Poppystamps Pop Up Easel card die sets. I put tiny orange Poppystamps Fairy Jewels in the center of all the flowers and glued everything onto my circle frame.
I discovered an already paint splattered piece of Stampin’ Up! Crumb Cake in my stash, cut it into a 5 x 5” square and dry embossed it with the Tufted 3D Embossing Folder from Spellbinders. I backed this with a piece of pale orange cardstock 5.25 x 5.25” and another piece of Crumb Cake, 5.5 x 5.5”. Finally, I stamped a sentiment in dark green ink from the Simon Says Stamp Easter Greetings stamp set and used the Honeybee Stamps Mini Messages Banner die set to cut out the greeting. As usual, I attached this to a white cardbase.
I am entering this card in 3 challenges. First is the Simon Says Stamp Monday Challenge with the theme of Emboss It. Next is the Double Trouble Challenge using the 3-2-1 element (3 Copic markers, 2 new dies, 1 cotton tail) plus Thing 3 theme of Easter. Finally, I am entering the CreaLadies challenge with the theme of animal.
NOTE: Square cards in square envelopes, of any size, cost more to mail than a rectangular envelope. Please check with the USPS to make sure you have enough postage.
A very happy Easter to you!
Affiliate links are used in this post at no cost to you. This means I may receive a small commission when you click through and shop using the links I provide. This helps support me in creating and posting my crafts. Items marked with an asterisk * at first mention were provided by a store or manufacturer. Otherwise, all items were purchased by me. I do not get paid to promote any products.
Well, here we are after all this time. 2026 is starting off with a bang and bucket list items. I attended the 2026 Rose Parade in Pasadena, CA (lots of rain and lots of fun). And on January 19, I became a grandmother for the first time to a little baby boy. I feel like I've already had a full year!
I had fun over the past 6 weeks working on 3 different Valentine designs.
The first is a CASE of a Tammy C. Wilson card. It features a retired stamp and die set by Stampin' Up called Sweet Conversations and Sweet Hearts, respectively. I used an old woodgrain 2D Sizzix embossing folder. Ink is Wisteria Wonder, Sweet Sugarplum, and Versamark. Embossing Powder is the wonderful Brutus Monroe Alabaster. Patterned paper was also retired from Stampin' Up! The splatter pattern was made with a spatter stamp from MFT. Cardstock is SU's Wisteria Wonder, Sweet Sugarplum (both retired) and Rich Razzleberry. Embellishments are from my stash.


The next card features a Honey Bee Stamps 3D embossing folder called Spring Medley. I used Pinkfresh Studio's Shaker Hearts dies, their Breezy Blossoms stamp, die and stencil sets, and their All Kinds of Wonderful stamp and die set for the sentiment. Inks I wasn't so good about keeping up with. I know I used Concord & 9th's Nectar and Grapefruit and then I used an orangish-red ink for the darkest color. The greens are very blue-green inks such as Distress Evergreen Bough. I used my handy color wheel to pick the greens and I was not disappointed.


The last card features the super cute Simon Says Stamp die set called Mail Call along with Taylored Expression's Papaya cardstock and Stampin' Up's Pretty Peacock. The sentiment is computer generated. The background uses Waffle Flower Love Postage Collage stamps along with the original WF Postage Collage stamps, all stamped with Concord & 9th's Powder dye ink. The arch dies are Spellbinder's Essential Arches. (Can you tell how much I like the coral-teal color combos?)


I am entering the Just Add Ink Challenge, the Cut It Up challenge, and the Alphabet Challenge.
Well, here we are after all this time. 2026 is starting off with a bang and bucket list items. I attended the 2026 Rose Parade in Pasadena, CA (lots of rain and lots of fun). And on January 19, I became a grandmother for the first time to a little baby boy. I feel like I've already had a full year!
I had fun over the past 6 weeks working on 3 different Valentine designs.
The first is a CASE of a Tammy C. Wilson card. It features a retired stamp and die set by Stampin' Up called Sweet Conversations and Sweet Hearts, respectively. I used an old woodgrain 2D Sizzix embossing folder. Ink is Wisteria Wonder, Sweet Sugarplum, and Versamark. Embossing Powder is the wonderful Brutus Monroe Alabaster. Patterned paper was also retired from Stampin' Up! The splatter pattern was made with a spatter stamp from MFT. Cardstock is SU's Wisteria Wonder, Sweet Sugarplum (both retired) and Rich Razzleberry. Embellishments are from my stash.
The next card features a Honey Bee Stamps 3D embossing folder called Spring Medley. I used Pinkfresh Studio's Shaker Hearts dies, their Breezy Blossoms stamp, die and stencil sets, and their All Kinds of Wonderful stamp and die set for the sentiment. Inks I wasn't so good about keeping up with. I know I used Concord & 9th's Nectar and Grapefruit and then I used an orangish-red ink for the darkest color. The greens are very blue-green inks such as Distress Evergreen Bough. I used my handy color wheel to pick the greens and I was not disappointed.
The last card features the super cute Simon Says Stamp die set called Mail Call along with Taylored Expression's Papaya cardstock and Stampin' Up's Pretty Peacock. The sentiment is computer generated. The background uses Waffle Flower Love Postage Collage stamps along with the original WF Postage Collage stamps, all stamped with Concord & 9th's Powder dye ink. The arch dies are Spellbinder's Essential Arches. (Can you tell how much I like the coral-teal color combos?)
I am entering the Just Add Ink Challenge, the Cut It Up challenge, and the Alphabet Challenge.

I'm back today with a field of poppies. Years ago I bought some Stampin' Up! patterned paper called Peaceful Poppies. I think it is gorgeous, but I was just letting it sit in a bin until "one day." At the same time, I'm looking at my Spellbinders' Essential Arches dies thinking "I just haven't used those enough." So, for Mother's Day, I married the two and made a series of cards with 4 different color schemes. (I'm trying to work through my "one day" stash when the inspiration strikes.)


I'm back today with a field of poppies. Years ago I bought some Stampin' Up! patterned paper called Peaceful Poppies. I think it is gorgeous, but I was just letting it sit in a bin until "one day." At the same time, I'm looking at my Spellbinders' Essential Arches dies thinking "I just haven't used those enough." So, for Mother's Day, I married the two and made a series of cards with 4 different color schemes. (I'm trying to work through my "one day" stash when the inspiration strikes.)

Yes, I'm still here. Like much of the blogosphere, I got busy with life. Since I am not trying to monetize this blog nor any of my social media, there is always other things pulling my attention. However, rest assured, I am creating almost everyday. Somedays it is an ink swatch book, other days a card, other days I am working on my daughter's wedding album.
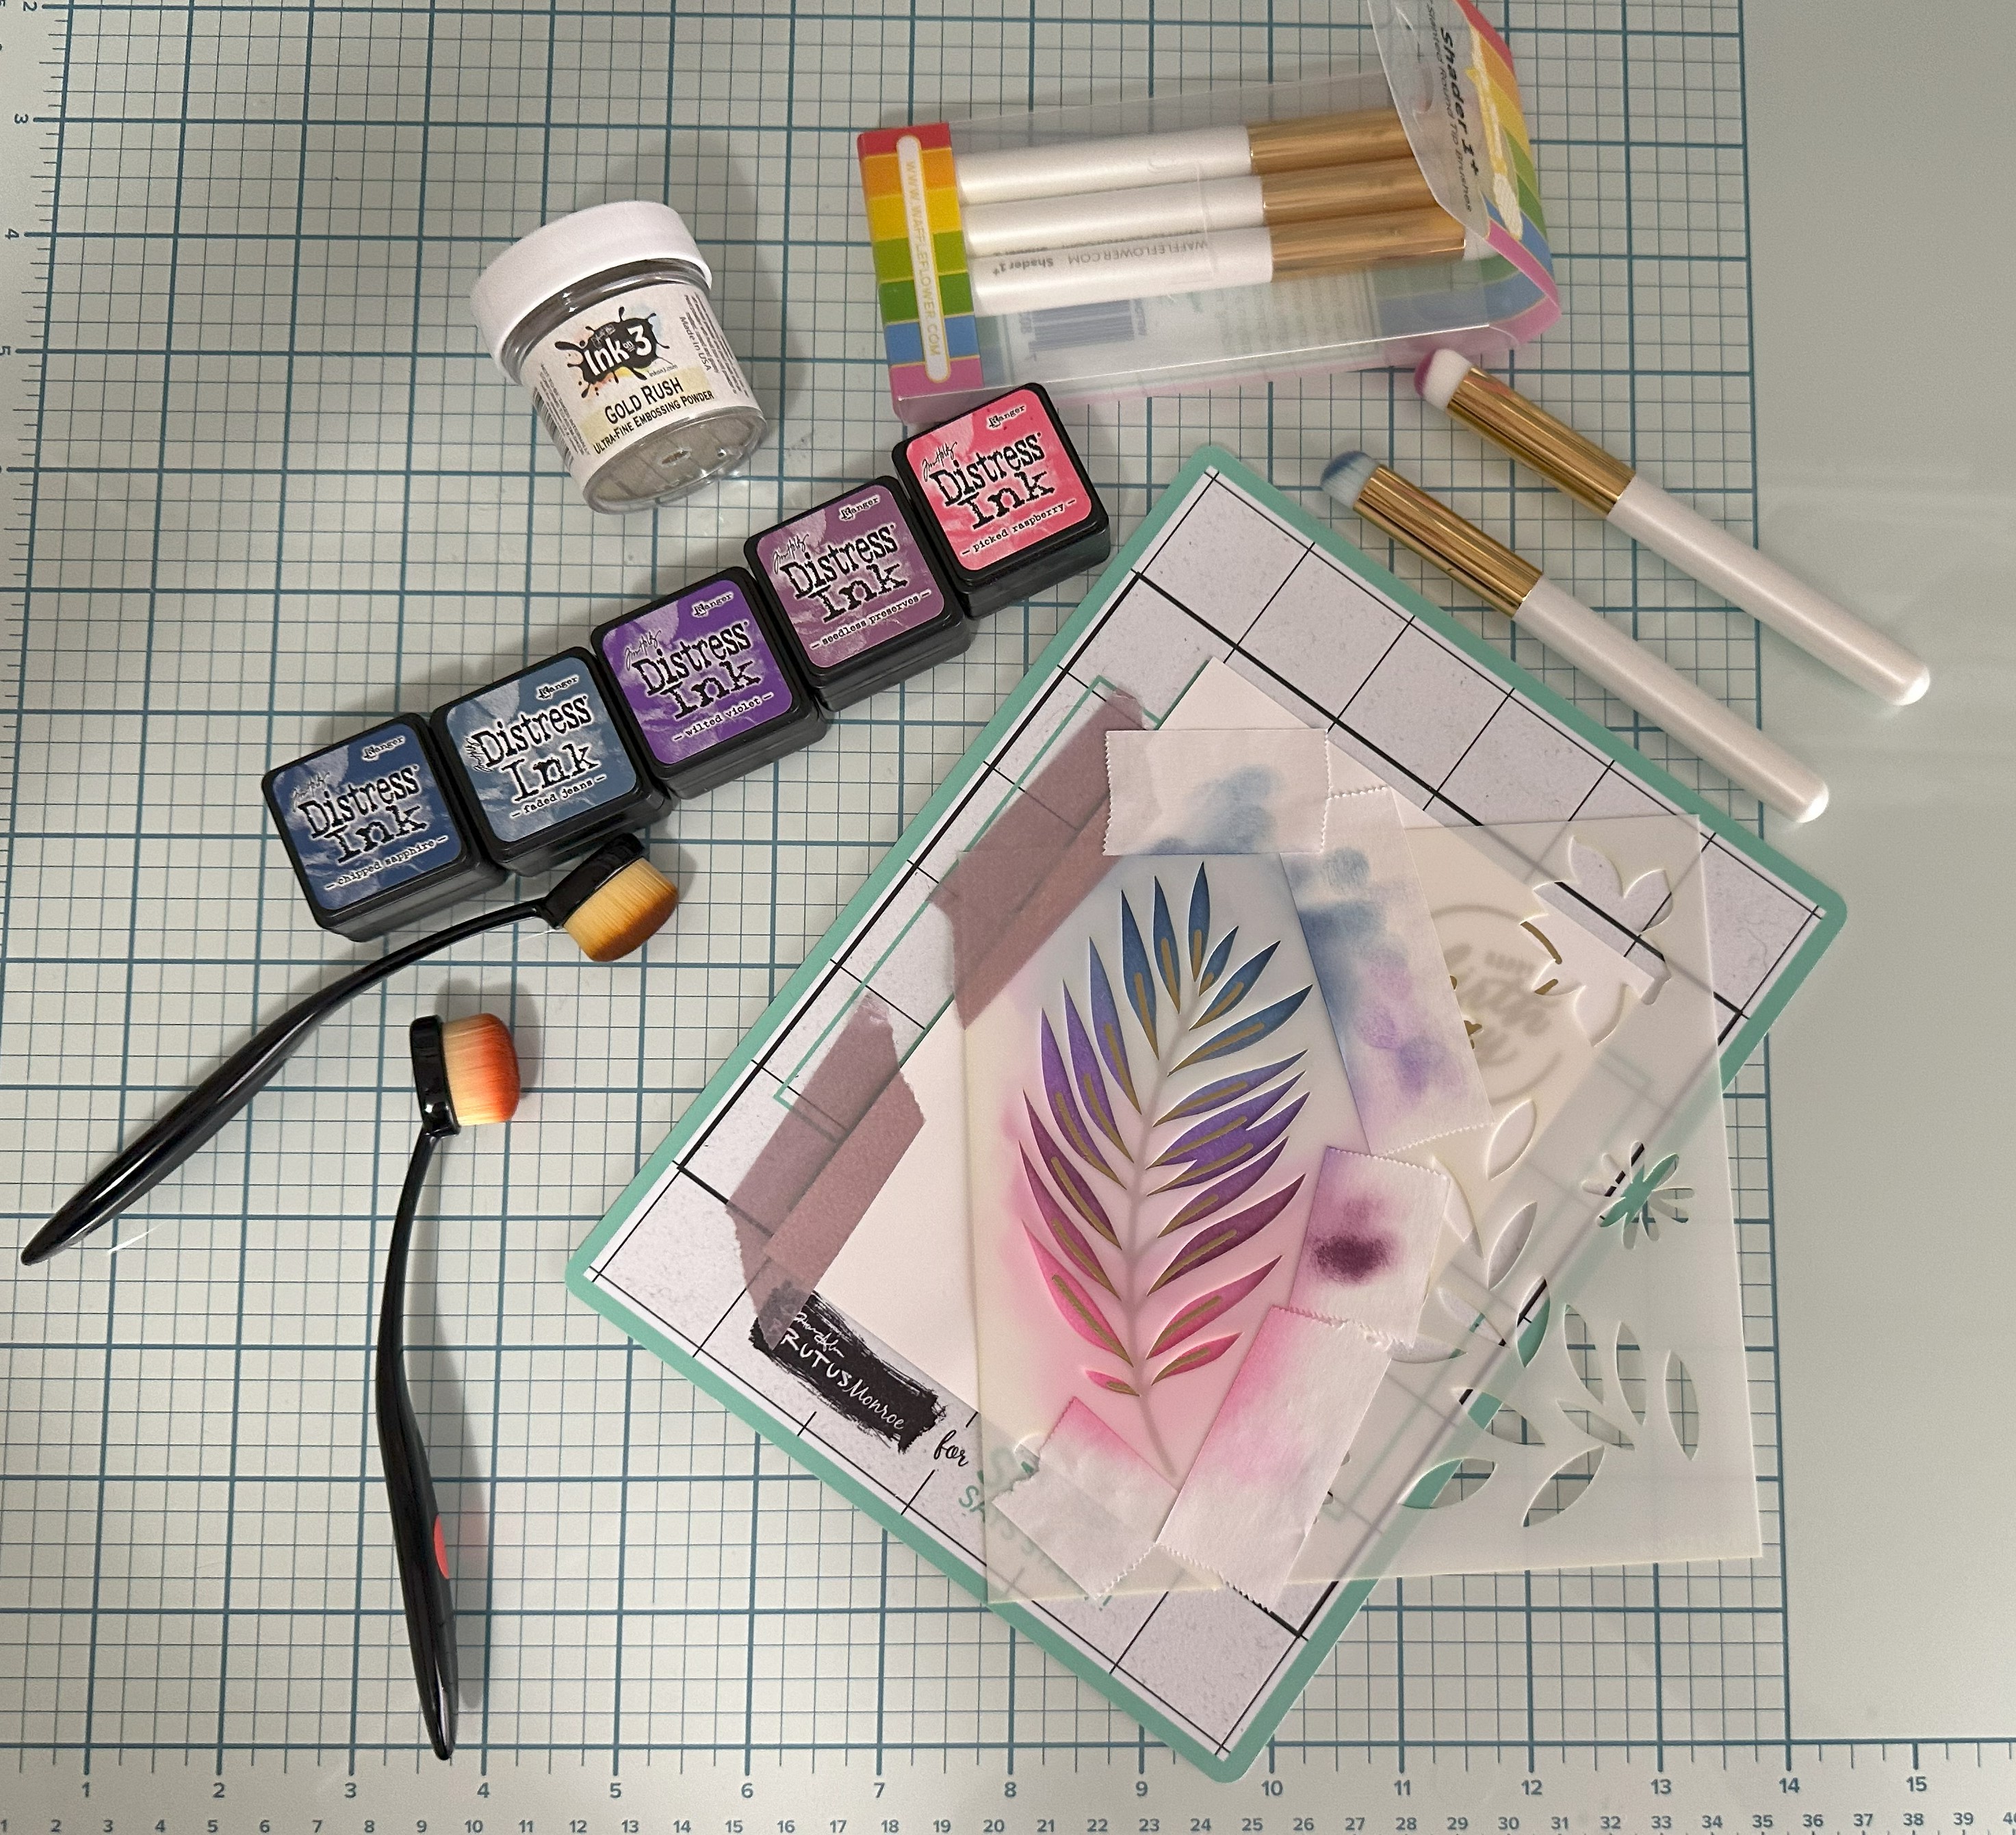
Today's card uses a fantastic set I stumbled upon at Simon Says Stamp. It is called Fantastic Flowers and when I purchased it (on sale!) it came with stamps, dies AND a stencil set. Now, that's winning. Currently only the stencils and dies are available. I've been watching oodles of Jennifer McGuire videos and she's done so much ink blending through stencils that the technique called my name.
I first stamped the palm frond stem in Versamark on Hammermill 80lb white cardstock (later I glued this to a 110lb Neenah Solar White Classic Crest piece after they were both die cut - gave it some real heft). I also stamped the Happy Birthday from Simon Says Stamp's Circle Sayings Stamp set in Versamark. I used my Ink on Three Gold Rush gold embossing powder (five stars, highly recommend) to heat emboss both images. Next, I put down the stencil and blended Tim Holtz Distress Ink in Picked Raspberry, Seedless Preserves, Wilted Violet, Faded Jeans and Chipped Sapphire together. I was thrilled with the results and I know I will make more because it was so fun. (A thanks to Cathy Zielske or I would never have thought to do the stem before the stenciling but it worked perfectly).


I used the matching die to cut the stenciled image and a "shadow" from Stampin' Up's Berry Burst cardstock. I glued both these down onto 110lb Neenah cardstock. I die cut the circle saying with a circle die from Trinity Stamps and popped it up with some foam tape. The wonderful hole-free sequins are in a brushed gold and from Spellbinders. Pretty simple card that was really fun to make.
I'm going to enter this at Paper Players Tic-Tac-Toe Challenge PP731. I think it meets the criteria of sentiment, lavender, and glitter.
I hope to get back here with more cards but I know I will post more on my Instagram too. Thanks for reading this and happy crafting.
Yes, I'm still here. Like much of the blogosphere, I got busy with life. Since I am not trying to monetize this blog nor any of my social media, there is always other things pulling my attention. However, rest assured, I am creating almost everyday. Somedays it is an ink swatch book, other days a card, other days I am working on my daughter's wedding album.
Today's card uses a fantastic set I stumbled upon at Simon Says Stamp. It is called Fantastic Flowers and when I purchased it (on sale!) it came with stamps, dies AND a stencil set. Now, that's winning. Currently only the stencils and dies are available. I've been watching oodles of Jennifer McGuire videos and she's done so much ink blending through stencils that the technique called my name.
I first stamped the palm frond stem in Versamark on Hammermill 80lb white cardstock (later I glued this to a 110lb Neenah Solar White Classic Crest piece after they were both die cut - gave it some real heft). I also stamped the Happy Birthday from Simon Says Stamp's Circle Sayings Stamp set in Versamark. I used my Ink on Three Gold Rush gold embossing powder (five stars, highly recommend) to heat emboss both images. Next, I put down the stencil and blended Tim Holtz Distress Ink in Picked Raspberry, Seedless Preserves, Wilted Violet, Faded Jeans and Chipped Sapphire together. I was thrilled with the results and I know I will make more because it was so fun. (A thanks to Cathy Zielske or I would never have thought to do the stem before the stenciling but it worked perfectly).
I used the matching die to cut the stenciled image and a "shadow" from Stampin' Up's Berry Burst cardstock. I glued both these down onto 110lb Neenah cardstock. I die cut the circle saying with a circle die from Trinity Stamps and popped it up with some foam tape. The wonderful hole-free sequins are in a brushed gold and from Spellbinders. Pretty simple card that was really fun to make.
I'm going to enter this at Paper Players Tic-Tac-Toe Challenge PP731. I think it meets the criteria of sentiment, lavender, and glitter.
I hope to get back here with more cards but I know I will post more on my Instagram too. Thanks for reading this and happy crafting.

If this card looks familiar it’s because it is a carefully made CASE of a card posted by the uber talented Martin Stone of @martinmayhem on February 4. His blog post on it is here. Instagram post is here.
You’ve probably had it happen to you where you see something and HAVE TO make it. I went so far as to get the retired stamp and die set, called Happiness Abounds, off eBay (very reasonable price, thank goodness) in order to make this card. Since then I have made other cards with the stamps and dies. I think if I were stuck on a deserted island with my craft supplies I'd take this stamp and die set with me, it's so good.
One game-changing idea I learned from Martin’s Mayhem is how to alter a diecut to better match the color of your card. When you stamp an image on white cardstock, color it, and die cut it, you end up with a white outline around the image. Sometimes it works with your design and sometimes the white is just too stark. On this card, Martin colored the white outline with alcohol ink markers to fit in better with his card. Now I've started doing that (I used watercolor here) and I'm loving the results.

I stamped the flowers from Happiness Abounds (retired) on watercolor cardstock with black Distress Archival Ink and watercolored the inside of the images with Zig Clean Color Real Brush markers (I know Dull Blue was one of the colors). I used a waterbrush with Fossilized Amber Distress Ink to color the leaves, and then with Misty Moonlight ink to color the outside edge of the images, just before I die cut them. After this, I splattered the image with white ink. Specifically, I used Dr. Ph. Martin's Pen-White ink. I am splatter-impaired and both the black and white ink from Dr. Ph. Martin's allows me to use a small paintbrush to make tiny splatters with NO giant blobs falling on my paper. It dries super fast and I think I am "cured" from my impairment.
I stamped the sentiment from another amazing SU stamp set called Good Feelings with black Memento ink onto 80lb white cardstock, and used one of the dies in the Happiness Abounds stamp set to get the spiral notebook edge at the top.
I assembled it to copy his card as best I could, adding lots of different bling when I was done. I was very happy with the results. Thanks, Martin.
What I've used here :
Cardstock: Watercolor paper, 80lb Hammermill Premium Color Copy Cover, Stampin’ Up! Misty Moonlight
Stamps: Happiness Abounds (plus matching dies), Good Feelings, both by Stampin' Up!
Ink: Distress Archival Ink in Black Soot, Memento Black Tuxedo Ink, Distress Ink Fossilized Amber
Other: Zig Clean Color Real Brush Markers, Dr. Ph. Martin's Pen-White ink for white splatter.
If this card looks familiar it’s because it is a carefully made CASE of a card posted by the uber talented Martin Stone of @martinmayhem on February 4. His blog post on it is here. Instagram post is here.
You’ve probably had it happen to you where you see something and HAVE TO make it. I went so far as to get the retired stamp and die set, called Happiness Abounds, off eBay (very reasonable price, thank goodness) in order to make this card. Since then I have made other cards with the stamps and dies. I think if I were stuck on a deserted island with my craft supplies I'd take this stamp and die set with me, it's so good.
One game-changing idea I learned from Martin’s Mayhem is how to alter a diecut to better match the color of your card. When you stamp an image on white cardstock, color it, and die cut it, you end up with a white outline around the image. Sometimes it works with your design and sometimes the white is just too stark. On this card, Martin colored the white outline with alcohol ink markers to fit in better with his card. Now I've started doing that (I used watercolor here) and I'm loving the results.
I stamped the flowers from Happiness Abounds (retired) on watercolor cardstock with black Distress Archival Ink and watercolored the inside of the images with Zig Clean Color Real Brush markers (I know Dull Blue was one of the colors). I used a waterbrush with Fossilized Amber Distress Ink to color the leaves, and then with Misty Moonlight ink to color the outside edge of the images, just before I die cut them. After this, I splattered the image with white ink. Specifically, I used Dr. Ph. Martin's Pen-White ink. I am splatter-impaired and both the black and white ink from Dr. Ph. Martin's allows me to use a small paintbrush to make tiny splatters with NO giant blobs falling on my paper. It dries super fast and I think I am "cured" from my impairment.
I stamped the sentiment from another amazing SU stamp set called Good Feelings with black Memento ink onto 80lb white cardstock, and used one of the dies in the Happiness Abounds stamp set to get the spiral notebook edge at the top.
I assembled it to copy his card as best I could, adding lots of different bling when I was done. I was very happy with the results. Thanks, Martin.
What I've used here :
Cardstock: Watercolor paper, 80lb Hammermill Premium Color Copy Cover, Stampin’ Up! Misty Moonlight
Stamps: Happiness Abounds (plus matching dies), Good Feelings, both by Stampin' Up!
Ink: Distress Archival Ink in Black Soot, Memento Black Tuxedo Ink, Distress Ink Fossilized Amber
Other: Zig Clean Color Real Brush Markers, Dr. Ph. Martin's Pen-White ink for white splatter.
My last September dog card celebrating the season of Halloween and trick-or-treaters.

I like layered cards because I enjoy the dimension and shadow they provide.
Here are all the supplies I used for the three cards:
Cardstock: Neenah Classic Crest Solar White 110lb cover stock, Stampin’ Up! Basic Black, Soft Suede (retired), Hello Honey (r), Pumpkin Pie.
Ink: Memento Tuxedo Black
Stamps: Stamps by Judith & Heather - Scruffy Pup, Trick-or-Treat Pumpkin, all tiny “stubby” stamps; Sentiments - Happy Halloween from SU’s And Many More, Autumn Greetings from Autumn Wreath set by Pretty Pink Posh
Patterned Paper: All from My Favorite Things
Die: Mini Slimline Stitched Layers by Popsiclesticks (Etsy store)
Markers: Mostly Copic, a few are Spectrum Noir.
Embellishment: Tim Holtz Tiny Attacher, black gel pen to add movement lines
These were fun to make, except for the fussy cutting it took to make itty bitty leaf and candy corn masks.
I am entering all three cards in the Sept 11 Simon Says Stamp Wednesday Challenge featuring Four Legged Friends, the Tic Tac Toe 256 Challenge, and the As You Like It Challenge.
My last September dog card celebrating the season of Halloween and trick-or-treaters.
I like layered cards because I enjoy the dimension and shadow they provide.
Here are all the supplies I used for the three cards:
Cardstock: Neenah Classic Crest Solar White 110lb cover stock, Stampin’ Up! Basic Black, Soft Suede (retired), Hello Honey (r), Pumpkin Pie.
Ink: Memento Tuxedo Black
Stamps: Stamps by Judith & Heather - Scruffy Pup, Trick-or-Treat Pumpkin, all tiny “stubby” stamps; Sentiments - Happy Halloween from SU’s And Many More, Autumn Greetings from Autumn Wreath set by Pretty Pink Posh
Patterned Paper: All from My Favorite Things
Die: Mini Slimline Stitched Layers by Popsiclesticks (Etsy store)
Markers: Mostly Copic, a few are Spectrum Noir.
Embellishment: Tim Holtz Tiny Attacher, black gel pen to add movement lines
These were fun to make, except for the fussy cutting it took to make itty bitty leaf and candy corn masks.
I am entering all three cards in the Sept 11 Simon Says Stamp Wednesday Challenge featuring Four Legged Friends, the Tic Tac Toe 256 Challenge, and the As You Like It Challenge.
My second Halloween Doggy Card is featured here.

Here are all the supplies I used:
Cardstock: Neenah Classic Crest Solar White 110lb cover stock, Stampin’ Up! Basic Black, Soft Suede (retired), Hello Honey (r), Pumpkin Pie.
Ink: Memento Tuxedo Black
Stamps: Stamps by Judith & Heather - Scruffy Pup, Trick-or-Treat Pumpkin, all tiny “stubby” stamps; Sentiments - Happy Halloween from SU’s And Many More, Autumn Greetings from Autumn Wreath set by Pretty Pink Posh
Patterned Paper: All from My Favorite Things
Die: Mini Slimline Stitched Layers by Popsiclesticks (Etsy store)
Markers: Mostly Copic, a few are Spectrum Noir.
Embellishment: Tim Holtz Tiny Attacher, black gel pen to add movement lines
These were fun to make, except for the fussy cutting it took to make itty bitty leaf and candy corn masks.
I am entering all three cards in the Sept 11 Simon Says Stamp Wednesday Challenge featuring Four Legged Friends, and the Tic Tac Toe C256 Challenge and the As You Like It Challenge.
My second Halloween Doggy Card is featured here.
Here are all the supplies I used:
Cardstock: Neenah Classic Crest Solar White 110lb cover stock, Stampin’ Up! Basic Black, Soft Suede (retired), Hello Honey (r), Pumpkin Pie.
Ink: Memento Tuxedo Black
Stamps: Stamps by Judith & Heather - Scruffy Pup, Trick-or-Treat Pumpkin, all tiny “stubby” stamps; Sentiments - Happy Halloween from SU’s And Many More, Autumn Greetings from Autumn Wreath set by Pretty Pink Posh
Patterned Paper: All from My Favorite Things
Die: Mini Slimline Stitched Layers by Popsiclesticks (Etsy store)
Markers: Mostly Copic, a few are Spectrum Noir.
Embellishment: Tim Holtz Tiny Attacher, black gel pen to add movement lines
These were fun to make, except for the fussy cutting it took to make itty bitty leaf and candy corn masks.
I am entering all three cards in the Sept 11 Simon Says Stamp Wednesday Challenge featuring Four Legged Friends, and the Tic Tac Toe C256 Challenge and the As You Like It Challenge.

Back on the blog after a long while. Just got busy with life stuff over the summer. I know you know what I mean.
I am back with not one, but three cards all for Autumn and Halloween. In between working on birthday and Christmas cards, I’ve continued to play with my Stamps by Judith & Heather. I enjoy adding layers to even a flat design as I just love the dimension and "shadow" it adds to a card.


Here are all the supplies I used:
Cardstock: Neenah Classic Crest Solar White 110lb cover stock, Stampin’ Up! Basic Black, Soft Suede (retired), Hello Honey (r), Pumpkin Pie.
Ink: Memento Tuxedo Black
Stamps: Stamps by Judith & Heather - Scruffy Pup, Trick-or-Treat Pumpkin, all tiny “stubby” stamps; Sentiments - Happy Halloween from SU’s And Many More, Autumn Greetings from Autumn Wreath set by Pretty Pink Posh
Patterned Paper: All from My Favorite Things
Die: Mini Slimline Stitched Layers by Popsiclesticks (Etsy store)
Markers: Mostly Copic, a few are Spectrum Noir.
Embellishment: Tim Holtz Tiny Attacher, black gel pen to add movement lines
These were fun to make, except for the fussy cutting it took to make itty bitty leaf and candy corn masks.
I am entering all three cards in the Sept 11 Simon Says Stamp Wednesday Challenge featuring Four Legged Friends, and the Tic Tac Toe C256 Challenge. I am also entering the autumn themed card in the Sept 5 As You Like It Challenge.
Back on the blog after a long while. Just got busy with life stuff over the summer. I know you know what I mean.
I am back with not one, but three cards all for Autumn and Halloween. In between working on birthday and Christmas cards, I’ve continued to play with my Stamps by Judith & Heather. I enjoy adding layers to even a flat design as I just love the dimension and "shadow" it adds to a card.
Here are all the supplies I used:
Cardstock: Neenah Classic Crest Solar White 110lb cover stock, Stampin’ Up! Basic Black, Soft Suede (retired), Hello Honey (r), Pumpkin Pie.
Ink: Memento Tuxedo Black
Stamps: Stamps by Judith & Heather - Scruffy Pup, Trick-or-Treat Pumpkin, all tiny “stubby” stamps; Sentiments - Happy Halloween from SU’s And Many More, Autumn Greetings from Autumn Wreath set by Pretty Pink Posh
Patterned Paper: All from My Favorite Things
Die: Mini Slimline Stitched Layers by Popsiclesticks (Etsy store)
Markers: Mostly Copic, a few are Spectrum Noir.
Embellishment: Tim Holtz Tiny Attacher, black gel pen to add movement lines
These were fun to make, except for the fussy cutting it took to make itty bitty leaf and candy corn masks.
I am entering all three cards in the Sept 11 Simon Says Stamp Wednesday Challenge featuring Four Legged Friends, and the Tic Tac Toe C256 Challenge. I am also entering the autumn themed card in the Sept 5 As You Like It Challenge.
Whew, June has been a whirlwind. My family was in Denver on June 1 for my niece's lovely wedding. I've attended a scrapbooking convention in Denton, TX and had a fun four days with some dear friends from high school, most recently.
A little family-run stamp company (at least 35 years old) called Stamps by Judith & Heather is always at these conventions. They make hand-drawn stamps that are all meant for scene building. Many of their stamps are woodblock, especially the small ones that are mounted on the end of a wooden dowel - you know, peg stamps, also known as "stubbies." The fact that you can mix and match hundreds of different images (lots of florals, animals, cute containers, insects, scenery and more) is what makes their stamps so unique and fun.
You can find some of their videos on Facebook and some older ones on YouTube. The stamping goes FAST, which is fun. Heather does ALL her coloring on 22lb copy paper (later glued to cardstock) and then colors with Tombow water-based markers and a blender pen.


I used a scruffy dog, grass, a tin bucket, leaves, mushrooms, a small green plant, a pumpkin and a little heart to build my scene. I used Post-It masking with the bucket, dog, pumpkins and mushrooms to make them appear layered like I wanted. I colored with Copics, Spectrum Noir markers and Dick Blick alcohol ink markers. I added the dots line at the end and added a Simon Says Stamp sentiment strip along with a tiny strip of Stampin' Up's Poppy Parade CS, with a Tiny Attacher by Tim Holtz in the left top corner.

Cardstock was Neenah Solar White Classic Crest 110lb, plus Stampin' Up's Mossy Meadow. I die cut the card front panels with mini slimline dies by Popsicle Sticks from Etsy. Rest assured, I'll be using more and more of these stamps on my cards.

I am entering this card at Addicted to Stamps & More #471, The Outlawz Challenges, and Double Trouble.
Whew, June has been a whirlwind. My family was in Denver on June 1 for my niece's lovely wedding. I've attended a scrapbooking convention in Denton, TX and had a fun four days with some dear friends from high school, most recently.
A little family-run stamp company (at least 35 years old) called Stamps by Judith & Heather is always at these conventions. They make hand-drawn stamps that are all meant for scene building. Many of their stamps are woodblock, especially the small ones that are mounted on the end of a wooden dowel - you know, peg stamps, also known as "stubbies." The fact that you can mix and match hundreds of different images (lots of florals, animals, cute containers, insects, scenery and more) is what makes their stamps so unique and fun.
You can find some of their videos on Facebook and some older ones on YouTube. The stamping goes FAST, which is fun. Heather does ALL her coloring on 22lb copy paper (later glued to cardstock) and then colors with Tombow water-based markers and a blender pen.
I used a scruffy dog, grass, a tin bucket, leaves, mushrooms, a small green plant, a pumpkin and a little heart to build my scene. I used Post-It masking with the bucket, dog, pumpkins and mushrooms to make them appear layered like I wanted. I colored with Copics, Spectrum Noir markers and Dick Blick alcohol ink markers. I added the dots line at the end and added a Simon Says Stamp sentiment strip along with a tiny strip of Stampin' Up's Poppy Parade CS, with a Tiny Attacher by Tim Holtz in the left top corner.
Cardstock was Neenah Solar White Classic Crest 110lb, plus Stampin' Up's Mossy Meadow. I die cut the card front panels with mini slimline dies by Popsicle Sticks from Etsy. Rest assured, I'll be using more and more of these stamps on my cards.
I am entering this card at Addicted to Stamps & More #471, The Outlawz Challenges, and Double Trouble.


I used quite a bit of retired Stampin’ Up! materials on this card. The stamp is from So Sentimental and the matching label die is one from the Tasteful Labels die set. The cardstock used for the flowers is Primrose Petals, Pink Pirouette, Pear Pizzazz, and Old Olive. The dark rose mat is actually Red Rose designer series paper from many years ago.
The flower dies are all from the Poppystamps’ Floral Pop Up Easel Set. I stamped the sentiment with Memento black ink and popped it up with foam tape.
I used quite a bit of retired Stampin’ Up! materials on this card. The stamp is from So Sentimental and the matching label die is one from the Tasteful Labels die set. The cardstock used for the flowers is Primrose Petals, Pink Pirouette, Pear Pizzazz, and Old Olive. The dark rose mat is actually Red Rose designer series paper from many years ago.
The flower dies are all from the Poppystamps’ Floral Pop Up Easel Set. I stamped the sentiment with Memento black ink and popped it up with foam tape.

Here with another slimline card. This one has all sorts of ingredients in it. I'll go front to back. First up is a leaf created with the Tim Holtz Leaf Fragments die set (awesome set). I cut it from watercolor paper and used first some Uncharted Mariner Distress Spray Stain, then added Winter Frost Distress Mica Spray on top. The three-layer piece beneath the leaf is tied up with some linen thread from Stampin' Up! The layers consist of a piece of orange Core'dinations cardstock that has been dry embossed with a Fun Stampers Journey embossing folder called Wind and Water. Underneath that is a scrap of Stamperia paper from the Cosmos paper pad. Beneath that is a piece of Tim Holtz's Black Kraft Heavystock that was embossed with the Fun Stampers Journey embossing folder called Diamond Netting. I sanded this one a little to bring the kraft part out.

And speaking of kraft. These pieces all sit on top of a piece of Stampin' Up! Crumb Cake stamped with my favorite Tim Holtz Stamp set called Floral Outlines in black ink. The card base is (I think) Stampin' Up! Dapper Denim. I used some Tim Holtz Distress Black Soot paint to splatter on the card. I enjoyed using this many layers. Thanks for looking. Happy 20th anniversary to Distress inks! #sss20yearsofdistress
Here with another slimline card. This one has all sorts of ingredients in it. I'll go front to back. First up is a leaf created with the Tim Holtz Leaf Fragments die set (awesome set). I cut it from watercolor paper and used first some Uncharted Mariner Distress Spray Stain, then added Winter Frost Distress Mica Spray on top. The three-layer piece beneath the leaf is tied up with some linen thread from Stampin' Up! The layers consist of a piece of orange Core'dinations cardstock that has been dry embossed with a Fun Stampers Journey embossing folder called Wind and Water. Underneath that is a scrap of Stamperia paper from the Cosmos paper pad. Beneath that is a piece of Tim Holtz's Black Kraft Heavystock that was embossed with the Fun Stampers Journey embossing folder called Diamond Netting. I sanded this one a little to bring the kraft part out.
And speaking of kraft. These pieces all sit on top of a piece of Stampin' Up! Crumb Cake stamped with my favorite Tim Holtz Stamp set called Floral Outlines in black ink. The card base is (I think) Stampin' Up! Dapper Denim. I used some Tim Holtz Distress Black Soot paint to splatter on the card. I enjoyed using this many layers. Thanks for looking. Happy 20th anniversary to Distress inks! #sss20yearsofdistress

And I am ever so grateful to one of the best cardmakers out there, Inge Groot, for telling me about the S-Lon Tex 210 Beading Cord. I bought some on Etsy and I love it!.
And I am ever so grateful to one of the best cardmakers out there, Inge Groot, for telling me about the S-Lon Tex 210 Beading Cord. I bought some on Etsy and I love it!.

My favorite Christmas make this season. I used the 2021 Die-cember die from Simon Says Stamp and Tim Holtz called Dash Away All. I die cut it from from heavyweight black cardstock. I liberally blended two Distress Oxide inks in Uncharted Mariner and Tumbled Glass on Neenah 110lb Classic Crest Solar White. I spritzed a very small amount of water on the inked panel to make it look like stars. Next, I flicked silver watercolor paint onto the panel from my Kuretake Gansai Tambi Starry watercolor set.

I used the other dies in the same set to cut out the moon and the stars from the background. Then I made a cardbase from the same Neenah cardstock and adhered a piece of Stampin' Up!'s So Saffron yellow cardstock to it in a size smaller than my inked panel. I popped up the black Santa and sleigh with foam adhesive and adhered it in place, then used the same adhesive to pop up the entire panel over the So Saffron cardstock on the front of the card.
Finally, I heat embossed Merry Christmas from Taylored Expressions Modern Holiday Greetings with white embossing powder on black cardstock (always tricky for me). I trimmed the sentiment and adhered it with foam adhesive.
I hope you have a fantastic holiday season and a wonderful and relaxing New Year.
My favorite Christmas make this season. I used the 2021 Die-cember die from Simon Says Stamp and Tim Holtz called Dash Away All. I die cut it from from heavyweight black cardstock. I liberally blended two Distress Oxide inks in Uncharted Mariner and Tumbled Glass on Neenah 110lb Classic Crest Solar White. I spritzed a very small amount of water on the inked panel to make it look like stars. Next, I flicked silver watercolor paint onto the panel from my Kuretake Gansai Tambi Starry watercolor set.
I used the other dies in the same set to cut out the moon and the stars from the background. Then I made a cardbase from the same Neenah cardstock and adhered a piece of Stampin' Up!'s So Saffron yellow cardstock to it in a size smaller than my inked panel. I popped up the black Santa and sleigh with foam adhesive and adhered it in place, then used the same adhesive to pop up the entire panel over the So Saffron cardstock on the front of the card.
Finally, I heat embossed Merry Christmas from Taylored Expressions Modern Holiday Greetings with white embossing powder on black cardstock (always tricky for me). I trimmed the sentiment and adhered it with foam adhesive.
I hope you have a fantastic holiday season and a wonderful and relaxing New Year.


