

I loved the July 6, 2026 Simon Says Stamp Monday Challenge of using 49 & Market products to celebrate Back to School. Of all the wonderful and gorgeous scrapbook paper and ephemera manufacturers out there, 49 & Market is my absolute favorite. Recently, I purchased the Toddler Time line from Simple Pleasures Stamp & Scrapbook store in Colorado Spring, CO. I think of that store as The Mothership, as I have never seen anything like it in terms of selection.

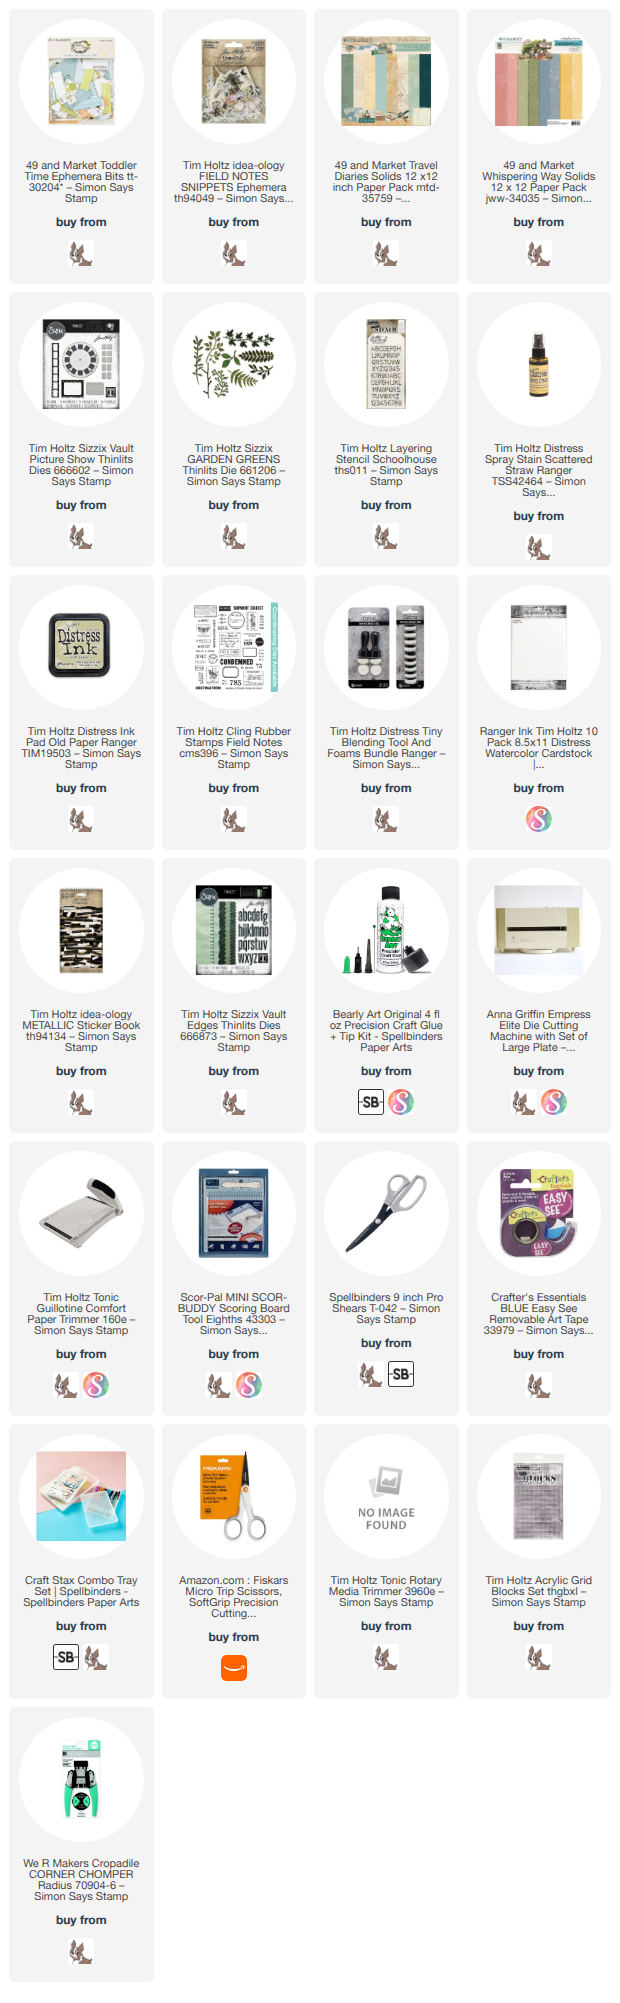
I used Ephemera Snippets from the line, including a premade tag, along with several pieces of 49 & Market paper on this card. I combined this with the Tim Holtz Schoolhouse stencil and his Ideology Field Notes Snippets, Field Notes stamp set, Garden Greens & Vault Picture Show dies. I used an old MFT die set to create the notebook edge on top of the blue 49 & Market paper. This is long retired, but Tim Holtz Vault Edges would make a great substitute.
As I said, I am entering this into the Simon Says Stamp Monday Challenge.
Affiliate links are used in this post at no cost to you. This means I may receive a small commission when you click through and shop using the links I provide. This helps support me in creating and posting my crafts. Items marked with an asterisk * at first mention were provided by a store or manufacturer. Otherwise, all items were purchased by me.
I loved the July 6, 2026 Simon Says Stamp Monday Challenge of using 49 & Market products to celebrate Back to School. Of all the wonderful and gorgeous scrapbook paper and ephemera manufacturers out there, 49 & Market is my absolute favorite. Recently, I purchased the Toddler Time line from Simple Pleasures Stamp & Scrapbook store in Colorado Spring, CO. I think of that store as The Mothership, as I have never seen anything like it in terms of selection.
I used Ephemera Snippets from the line, including a premade tag, along with several pieces of 49 & Market paper on this card. I combined this with the Tim Holtz Schoolhouse stencil and his Ideology Field Notes Snippets, Field Notes stamp set, Garden Greens & Vault Picture Show dies. I used an old MFT die set to create the notebook edge on top of the blue 49 & Market paper. This is long retired, but Tim Holtz Vault Edges would make a great substitute.
As I said, I am entering this into the Simon Says Stamp Monday Challenge.
Affiliate links are used in this post at no cost to you. This means I may receive a small commission when you click through and shop using the links I provide. This helps support me in creating and posting my crafts. Items marked with an asterisk * at first mention were provided by a store or manufacturer. Otherwise, all items were purchased by me.

I recently got several packages of Tim Holtz’s Palette Paper Collection. It is absolutely dreamy. I’m so glad I got the Orange Tim Holtz 8x8 Palette Paper Collection, because it made the most ideal carrots. I used the Tim Holtz Abstract Elements die set to cut out 3 different sizes of carrots and then I edged them with Rusty Hinge Distress Ink to really make the orange pop. I used one die from Trinity Stamps Wildflower Clippings die set to create the carrot tops, cut from watercolor paper sprayed with Peeled Paint Distress Spray Stain.
I created Mr. McGregor’s Garden by taking Canson XL watercolor paper and dipping and drying it in a series of inks and sprays: Vintage Photo and Ground Espresso inkpads along with Frayed Burlap and Walnut Stain Spray Stains. I made dirt! I die cut this one large piece using the Lawn Fawn Puffy Clouds Border dies and a die from the retired Mama Elephant Slim Window Dressings Die Set. It was a bit of a trick getting the carrots glued just where I wanted them and then gluing the levels of dirt all together. I’m sure I did it the hard way.

I computer printed the “Mr. McGregor’s Garden” text onto Stampin’ Up! Crumb Cake paper and then cut it out (along with some green cardstock) using the sign dies out of the Tim Holtz Road Trip die set.
I made a tiny sentiment from the old Colorado Craft Company Bunnies and Robin stamp set.
I used a homemade cloud stencil along with Tumbled Glass Distress Ink to inkblend clouds in the sky.
I adhered the entire garden scene with foam tape on top of the cloud background. I was happy with how my garden grew. ;-) I am entering this in the Pick Three Challenge using text, slimline, and die cuts.
Affiliate links are used in this post at no cost to you. This means I may receive a small commission when you click through and shop using the links I provide. This helps support me in creating and posting my crafts. Items marked with an asterisk * at first mention were provided by a store or manufacturer. Otherwise, all items were purchased by me. I do not get paid to promote any products.
I recently got several packages of Tim Holtz’s Palette Paper Collection. It is absolutely dreamy. I’m so glad I got the Orange Tim Holtz 8x8 Palette Paper Collection, because it made the most ideal carrots. I used the Tim Holtz Abstract Elements die set to cut out 3 different sizes of carrots and then I edged them with Rusty Hinge Distress Ink to really make the orange pop. I used one die from Trinity Stamps Wildflower Clippings die set to create the carrot tops, cut from watercolor paper sprayed with Peeled Paint Distress Spray Stain.
I created Mr. McGregor’s Garden by taking Canson XL watercolor paper and dipping and drying it in a series of inks and sprays: Vintage Photo and Ground Espresso inkpads along with Frayed Burlap and Walnut Stain Spray Stains. I made dirt! I die cut this one large piece using the Lawn Fawn Puffy Clouds Border dies and a die from the retired Mama Elephant Slim Window Dressings Die Set. It was a bit of a trick getting the carrots glued just where I wanted them and then gluing the levels of dirt all together. I’m sure I did it the hard way.
I computer printed the “Mr. McGregor’s Garden” text onto Stampin’ Up! Crumb Cake paper and then cut it out (along with some green cardstock) using the sign dies out of the Tim Holtz Road Trip die set.
I made a tiny sentiment from the old Colorado Craft Company Bunnies and Robin stamp set.
I used a homemade cloud stencil along with Tumbled Glass Distress Ink to inkblend clouds in the sky.
I adhered the entire garden scene with foam tape on top of the cloud background. I was happy with how my garden grew. ;-) I am entering this in the Pick Three Challenge using text, slimline, and die cuts.
Affiliate links are used in this post at no cost to you. This means I may receive a small commission when you click through and shop using the links I provide. This helps support me in creating and posting my crafts. Items marked with an asterisk * at first mention were provided by a store or manufacturer. Otherwise, all items were purchased by me. I do not get paid to promote any products.
Well, here we are after all this time. 2026 is starting off with a bang and bucket list items. I attended the 2026 Rose Parade in Pasadena, CA (lots of rain and lots of fun). And on January 19, I became a grandmother for the first time to a little baby boy. I feel like I've already had a full year!
I had fun over the past 6 weeks working on 3 different Valentine designs.
The first is a CASE of a Tammy C. Wilson card. It features a retired stamp and die set by Stampin' Up called Sweet Conversations and Sweet Hearts, respectively. I used an old woodgrain 2D Sizzix embossing folder. Ink is Wisteria Wonder, Sweet Sugarplum, and Versamark. Embossing Powder is the wonderful Brutus Monroe Alabaster. Patterned paper was also retired from Stampin' Up! The splatter pattern was made with a spatter stamp from MFT. Cardstock is SU's Wisteria Wonder, Sweet Sugarplum (both retired) and Rich Razzleberry. Embellishments are from my stash.


The next card features a Honey Bee Stamps 3D embossing folder called Spring Medley. I used Pinkfresh Studio's Shaker Hearts dies, their Breezy Blossoms stamp, die and stencil sets, and their All Kinds of Wonderful stamp and die set for the sentiment. Inks I wasn't so good about keeping up with. I know I used Concord & 9th's Nectar and Grapefruit and then I used an orangish-red ink for the darkest color. The greens are very blue-green inks such as Distress Evergreen Bough. I used my handy color wheel to pick the greens and I was not disappointed.


The last card features the super cute Simon Says Stamp die set called Mail Call along with Taylored Expression's Papaya cardstock and Stampin' Up's Pretty Peacock. The sentiment is computer generated. The background uses Waffle Flower Love Postage Collage stamps along with the original WF Postage Collage stamps, all stamped with Concord & 9th's Powder dye ink. The arch dies are Spellbinder's Essential Arches. (Can you tell how much I like the coral-teal color combos?)


I am entering the Just Add Ink Challenge, the Cut It Up challenge, and the Alphabet Challenge.
Well, here we are after all this time. 2026 is starting off with a bang and bucket list items. I attended the 2026 Rose Parade in Pasadena, CA (lots of rain and lots of fun). And on January 19, I became a grandmother for the first time to a little baby boy. I feel like I've already had a full year!
I had fun over the past 6 weeks working on 3 different Valentine designs.
The first is a CASE of a Tammy C. Wilson card. It features a retired stamp and die set by Stampin' Up called Sweet Conversations and Sweet Hearts, respectively. I used an old woodgrain 2D Sizzix embossing folder. Ink is Wisteria Wonder, Sweet Sugarplum, and Versamark. Embossing Powder is the wonderful Brutus Monroe Alabaster. Patterned paper was also retired from Stampin' Up! The splatter pattern was made with a spatter stamp from MFT. Cardstock is SU's Wisteria Wonder, Sweet Sugarplum (both retired) and Rich Razzleberry. Embellishments are from my stash.
The next card features a Honey Bee Stamps 3D embossing folder called Spring Medley. I used Pinkfresh Studio's Shaker Hearts dies, their Breezy Blossoms stamp, die and stencil sets, and their All Kinds of Wonderful stamp and die set for the sentiment. Inks I wasn't so good about keeping up with. I know I used Concord & 9th's Nectar and Grapefruit and then I used an orangish-red ink for the darkest color. The greens are very blue-green inks such as Distress Evergreen Bough. I used my handy color wheel to pick the greens and I was not disappointed.
The last card features the super cute Simon Says Stamp die set called Mail Call along with Taylored Expression's Papaya cardstock and Stampin' Up's Pretty Peacock. The sentiment is computer generated. The background uses Waffle Flower Love Postage Collage stamps along with the original WF Postage Collage stamps, all stamped with Concord & 9th's Powder dye ink. The arch dies are Spellbinder's Essential Arches. (Can you tell how much I like the coral-teal color combos?)
I am entering the Just Add Ink Challenge, the Cut It Up challenge, and the Alphabet Challenge.

Here with another slimline card. This one has all sorts of ingredients in it. I'll go front to back. First up is a leaf created with the Tim Holtz Leaf Fragments die set (awesome set). I cut it from watercolor paper and used first some Uncharted Mariner Distress Spray Stain, then added Winter Frost Distress Mica Spray on top. The three-layer piece beneath the leaf is tied up with some linen thread from Stampin' Up! The layers consist of a piece of orange Core'dinations cardstock that has been dry embossed with a Fun Stampers Journey embossing folder called Wind and Water. Underneath that is a scrap of Stamperia paper from the Cosmos paper pad. Beneath that is a piece of Tim Holtz's Black Kraft Heavystock that was embossed with the Fun Stampers Journey embossing folder called Diamond Netting. I sanded this one a little to bring the kraft part out.

And speaking of kraft. These pieces all sit on top of a piece of Stampin' Up! Crumb Cake stamped with my favorite Tim Holtz Stamp set called Floral Outlines in black ink. The card base is (I think) Stampin' Up! Dapper Denim. I used some Tim Holtz Distress Black Soot paint to splatter on the card. I enjoyed using this many layers. Thanks for looking. Happy 20th anniversary to Distress inks! #sss20yearsofdistress
Here with another slimline card. This one has all sorts of ingredients in it. I'll go front to back. First up is a leaf created with the Tim Holtz Leaf Fragments die set (awesome set). I cut it from watercolor paper and used first some Uncharted Mariner Distress Spray Stain, then added Winter Frost Distress Mica Spray on top. The three-layer piece beneath the leaf is tied up with some linen thread from Stampin' Up! The layers consist of a piece of orange Core'dinations cardstock that has been dry embossed with a Fun Stampers Journey embossing folder called Wind and Water. Underneath that is a scrap of Stamperia paper from the Cosmos paper pad. Beneath that is a piece of Tim Holtz's Black Kraft Heavystock that was embossed with the Fun Stampers Journey embossing folder called Diamond Netting. I sanded this one a little to bring the kraft part out.
And speaking of kraft. These pieces all sit on top of a piece of Stampin' Up! Crumb Cake stamped with my favorite Tim Holtz Stamp set called Floral Outlines in black ink. The card base is (I think) Stampin' Up! Dapper Denim. I used some Tim Holtz Distress Black Soot paint to splatter on the card. I enjoyed using this many layers. Thanks for looking. Happy 20th anniversary to Distress inks! #sss20yearsofdistress

My favorite Christmas make this season. I used the 2021 Die-cember die from Simon Says Stamp and Tim Holtz called Dash Away All. I die cut it from from heavyweight black cardstock. I liberally blended two Distress Oxide inks in Uncharted Mariner and Tumbled Glass on Neenah 110lb Classic Crest Solar White. I spritzed a very small amount of water on the inked panel to make it look like stars. Next, I flicked silver watercolor paint onto the panel from my Kuretake Gansai Tambi Starry watercolor set.

I used the other dies in the same set to cut out the moon and the stars from the background. Then I made a cardbase from the same Neenah cardstock and adhered a piece of Stampin' Up!'s So Saffron yellow cardstock to it in a size smaller than my inked panel. I popped up the black Santa and sleigh with foam adhesive and adhered it in place, then used the same adhesive to pop up the entire panel over the So Saffron cardstock on the front of the card.
Finally, I heat embossed Merry Christmas from Taylored Expressions Modern Holiday Greetings with white embossing powder on black cardstock (always tricky for me). I trimmed the sentiment and adhered it with foam adhesive.
I hope you have a fantastic holiday season and a wonderful and relaxing New Year.
My favorite Christmas make this season. I used the 2021 Die-cember die from Simon Says Stamp and Tim Holtz called Dash Away All. I die cut it from from heavyweight black cardstock. I liberally blended two Distress Oxide inks in Uncharted Mariner and Tumbled Glass on Neenah 110lb Classic Crest Solar White. I spritzed a very small amount of water on the inked panel to make it look like stars. Next, I flicked silver watercolor paint onto the panel from my Kuretake Gansai Tambi Starry watercolor set.
I used the other dies in the same set to cut out the moon and the stars from the background. Then I made a cardbase from the same Neenah cardstock and adhered a piece of Stampin' Up!'s So Saffron yellow cardstock to it in a size smaller than my inked panel. I popped up the black Santa and sleigh with foam adhesive and adhered it in place, then used the same adhesive to pop up the entire panel over the So Saffron cardstock on the front of the card.
Finally, I heat embossed Merry Christmas from Taylored Expressions Modern Holiday Greetings with white embossing powder on black cardstock (always tricky for me). I trimmed the sentiment and adhered it with foam adhesive.
I hope you have a fantastic holiday season and a wonderful and relaxing New Year.

T'is the Season. Christmas is typically a very busy time in most households that celebrate the holiday. But this year, mine is extra busy. I am planning my daughter's January wedding and I'm swamped with a To Do list longer than Santa's Naughty list. Fortunately, very early this year I began making some Christmas cards. I chose 5 designs and made 7 of each. I saw this design somewhere - perhaps Instagram, using the now-retired Tim Holtz Snowflake Impresslit. If you're not familiar with them, at one time Sizzix produced these small embossing folders that both cut and embossed an image at the same time. They are all retired now, so I am holding on to the ones I have. The oak leaves one is my favorite.

I used Neenah's Classic Crest Solar White 110lb cardstock (spritzed with water) to make the snowflake. Next, I used a Bazzill Kraft stock (maybe Peanut Cluster color) and embossed it with the Sizzix embossing folder called Nordic Pattern by Olivia Rose. I just adore the imagery. I very lightly swiped Picket Fence Distress Ink over the raised areas using a domed foam blender.
Finally, I embossed Merry Christmas using Taylored Expressions Modern Holiday Greetings stamp set. It's a fantastic set with lots of "clean" Christmas sentiments. By clean, I mean there are no flourishes and everything is sans serif. Lots to choose from.
I put it all together on a cardbase using the same Neenah cardstock. Just dropped this card, along with about 40 others at the post office.
Happy Holidays, y'all!
T'is the Season. Christmas is typically a very busy time in most households that celebrate the holiday. But this year, mine is extra busy. I am planning my daughter's January wedding and I'm swamped with a To Do list longer than Santa's Naughty list. Fortunately, very early this year I began making some Christmas cards. I chose 5 designs and made 7 of each. I saw this design somewhere - perhaps Instagram, using the now-retired Tim Holtz Snowflake Impresslit. If you're not familiar with them, at one time Sizzix produced these small embossing folders that both cut and embossed an image at the same time. They are all retired now, so I am holding on to the ones I have. The oak leaves one is my favorite.
I used Neenah's Classic Crest Solar White 110lb cardstock (spritzed with water) to make the snowflake. Next, I used a Bazzill Kraft stock (maybe Peanut Cluster color) and embossed it with the Sizzix embossing folder called Nordic Pattern by Olivia Rose. I just adore the imagery. I very lightly swiped Picket Fence Distress Ink over the raised areas using a domed foam blender.
Finally, I embossed Merry Christmas using Taylored Expressions Modern Holiday Greetings stamp set. It's a fantastic set with lots of "clean" Christmas sentiments. By clean, I mean there are no flourishes and everything is sans serif. Lots to choose from.
I put it all together on a cardbase using the same Neenah cardstock. Just dropped this card, along with about 40 others at the post office.
Happy Holidays, y'all!

You might be the same as me on this. Sometimes I see a card so beautiful and perfect I just have to copy it. Last October, Barbara Schiassi @barbarayaya, one of Tim Holtz's amazing makers, created a poinsettia card using his Tree Rings 3D Embossing Folder by Sizzix and Holiday Brushstrokes #3. I just adored it. Since I had just gotten his Tree Rings 3D folder and I had his Festive Bouquet die set, I decided I wanted to make some Christmas cards using both, sort of mimicking her design.


You might be the same as me on this. Sometimes I see a card so beautiful and perfect I just have to copy it. Last October, Barbara Schiassi @barbarayaya, one of Tim Holtz's amazing makers, created a poinsettia card using his Tree Rings 3D Embossing Folder by Sizzix and Holiday Brushstrokes #3. I just adored it. Since I had just gotten his Tree Rings 3D folder and I had his Festive Bouquet die set, I decided I wanted to make some Christmas cards using both, sort of mimicking her design.


Oh, how I love Halloween! While I don't have little ones to take trick-or-treating any longer, the spooky crafts are still a huge source of enjoyment. I used the new Poppystamps' Neighborhood Home Pop Up Easel Set to create this creaky, wooden house where a lot of eerie things live. The house itself is made from Stampin' Up's Soft Sable brown cardstock that I embossed with Tim Holtz's Tree Rings 3D embossing folder. I swiped a little brown ink over the raised surface and then splattered with Distress Oxide Spray in Iced Spruce.
The curtains were cut from watercolor cardstock dyed with Distress Spray Stain in Seedless Preserves and glued to the back of the brown house. Next, I cut the background from Stampin' Up's Crushed Curry cardstock (to resemble light inside the house) and adhered the house with the curtains onto it. The two rooflines and all seven window frames were cut and embossed from black cardstock. I swiped a gray Distress Crayon over the big roof and rubbed it in with my fingers just to allow the texture to show through more.
I also used foam adhesive on the back of the big roof to make it stand out. I had a piece of olive green cardstock with a kraft core that I used to cut the door from and then sand the edges of it. I swiped a little Walnut Stain Distress crayon over the door and glued it in place. I also glued the window frames in place.
I cut the broom from the Whittle Witch die set and used a brown marker to color the top of it. I glued it on to make it look like it was leaning against the front door. I cut the ghosts from the new Whittle Scary Guys set in white cardstock and adhered a tiny piece of black cardstock behind for the eyes. I mounted these on the house with foam adhesive. I used a sheet of 110lb purple glitter cardstock from the Memory Box 6x6 Glitzy Glitter Pad and cut the Boo Poe Script from it and mounted it to the roof. I used black cardstock to cut a spider web from the Halloween Assemblage die set. Finally, I cut the easel portion from Stampin' Up!'s Crumb Cake cardstock, adhered the entire house onto the proper tab, and then adhered the spider web, so the easel would hold it upright when opened.
This was lots of fun to create. I hope your Halloween is happily haunted.
Oh, how I love Halloween! While I don't have little ones to take trick-or-treating any longer, the spooky crafts are still a huge source of enjoyment. I used the new Poppystamps' Neighborhood Home Pop Up Easel Set to create this creaky, wooden house where a lot of eerie things live. The house itself is made from Stampin' Up's Soft Sable brown cardstock that I embossed with Tim Holtz's Tree Rings 3D embossing folder. I swiped a little brown ink over the raised surface and then splattered with Distress Oxide Spray in Iced Spruce.
The curtains were cut from watercolor cardstock dyed with Distress Spray Stain in Seedless Preserves and glued to the back of the brown house. Next, I cut the background from Stampin' Up's Crushed Curry cardstock (to resemble light inside the house) and adhered the house with the curtains onto it. The two rooflines and all seven window frames were cut and embossed from black cardstock. I swiped a gray Distress Crayon over the big roof and rubbed it in with my fingers just to allow the texture to show through more.
I also used foam adhesive on the back of the big roof to make it stand out. I had a piece of olive green cardstock with a kraft core that I used to cut the door from and then sand the edges of it. I swiped a little Walnut Stain Distress crayon over the door and glued it in place. I also glued the window frames in place.
I cut the broom from the Whittle Witch die set and used a brown marker to color the top of it. I glued it on to make it look like it was leaning against the front door. I cut the ghosts from the new Whittle Scary Guys set in white cardstock and adhered a tiny piece of black cardstock behind for the eyes. I mounted these on the house with foam adhesive. I used a sheet of 110lb purple glitter cardstock from the Memory Box 6x6 Glitzy Glitter Pad and cut the Boo Poe Script from it and mounted it to the roof. I used black cardstock to cut a spider web from the Halloween Assemblage die set. Finally, I cut the easel portion from Stampin' Up!'s Crumb Cake cardstock, adhered the entire house onto the proper tab, and then adhered the spider web, so the easel would hold it upright when opened.
This was lots of fun to create. I hope your Halloween is happily haunted.

When does a Tim Holtz Moon Mask not make a moon? When you use it to make the Earth!
This one was a doozy of a make. I had an idea and I ran with it -- but it was a marathon. I'll describe all the layers from bottom up, okay? The bottom layer is a piece of Bazzill cardstock in a taupe brown. With the exception of a little foam tape, I used my trusty Bearly Arts glue on every layer and flower. The next layer was a scrap from the Tim Holtz Paper Stash Wallflowers 12x12 paper pad.

Ideaology no longer makes these but you can still find them online. I cut the piece into a tag shape by simply snipping the corners of a long rectangular piece. I inked the edges with Frayed Burlap Distress Ink, splattered some Frayed Burlap Distress Spray Stain on, then stitched with a dark brown thread around the edge. I made some tiny rips on the edges to add to the aged look. Next, I stamped the Don't Forget and the April 22 with a Point Planners roller stamp by American Crafts. Finally, I went back to stitch on the Ideaology tag.

The Earth was created with watercolor paper and the large and medium Tim Holtz Moon Masks by Stamper's Anonymous. I dusted my paper with anti-static powder, then smashed a Versamark embossing ink pad through the largest moon mask onto the watercolor paper. I applied Peeled Paint Distress Embossing Glaze and heat set it. Next, I masked off a portion of the medium moon mask so that I wouldn't catch any edges, just the blobs. I positioned it where I wanted it and did the same technique with the Versamark and the embossing glaze. I used my dear old Coluzzle cutting tool to cut a circle around the green blobs.


When does a Tim Holtz Moon Mask not make a moon? When you use it to make the Earth!
This one was a doozy of a make. I had an idea and I ran with it -- but it was a marathon. I'll describe all the layers from bottom up, okay? The bottom layer is a piece of Bazzill cardstock in a taupe brown. With the exception of a little foam tape, I used my trusty Bearly Arts glue on every layer and flower. The next layer was a scrap from the Tim Holtz Paper Stash Wallflowers 12x12 paper pad.
Ideaology no longer makes these but you can still find them online. I cut the piece into a tag shape by simply snipping the corners of a long rectangular piece. I inked the edges with Frayed Burlap Distress Ink, splattered some Frayed Burlap Distress Spray Stain on, then stitched with a dark brown thread around the edge. I made some tiny rips on the edges to add to the aged look. Next, I stamped the Don't Forget and the April 22 with a Point Planners roller stamp by American Crafts. Finally, I went back to stitch on the Ideaology tag.
The Earth was created with watercolor paper and the large and medium Tim Holtz Moon Masks by Stamper's Anonymous. I dusted my paper with anti-static powder, then smashed a Versamark embossing ink pad through the largest moon mask onto the watercolor paper. I applied Peeled Paint Distress Embossing Glaze and heat set it. Next, I masked off a portion of the medium moon mask so that I wouldn't catch any edges, just the blobs. I positioned it where I wanted it and did the same technique with the Versamark and the embossing glaze. I used my dear old Coluzzle cutting tool to cut a circle around the green blobs.

I'm loving both Tim Holtz's new Ideaology Backdrops Volume 5 TH94309 and the Alphanumeric Bulletin dies #666281.

I'm loving both Tim Holtz's new Ideaology Backdrops Volume 5 TH94309 and the Alphanumeric Bulletin dies #666281.

"Never underestimate the power of a die," Tim Holtz said. Indeed, this typically-Christmas die turned into just what I wanted for a winter baby shower card.

I used the Sizzix Countryside die by Tim Holtz, along with colored Stampin' Up! cardstock including Pink Pirouette, So Saffron, and Purple Posy. Background cardstock behind the image is SU's glossy white, giving the snow a shine (hard to see in photo). Pale blue is Bazzill's Icy Mint smooth cardstock. White background is Neenah Classic Crest Solar White 110lb.
Stitched rectangle is part of Paper Rose nested stitched rectangle dies. The saying is my own creation printed from a laser printer.
I'm entering this at Inkspirational Challenges #281 using the theme New/Welcome.
"Never underestimate the power of a die," Tim Holtz said. Indeed, this typically-Christmas die turned into just what I wanted for a winter baby shower card.
I used the Sizzix Countryside die by Tim Holtz, along with colored Stampin' Up! cardstock including Pink Pirouette, So Saffron, and Purple Posy. Background cardstock behind the image is SU's glossy white, giving the snow a shine (hard to see in photo). Pale blue is Bazzill's Icy Mint smooth cardstock. White background is Neenah Classic Crest Solar White 110lb.
Stitched rectangle is part of Paper Rose nested stitched rectangle dies. The saying is my own creation printed from a laser printer.
I'm entering this at Inkspirational Challenges #281 using the theme New/Welcome.

