

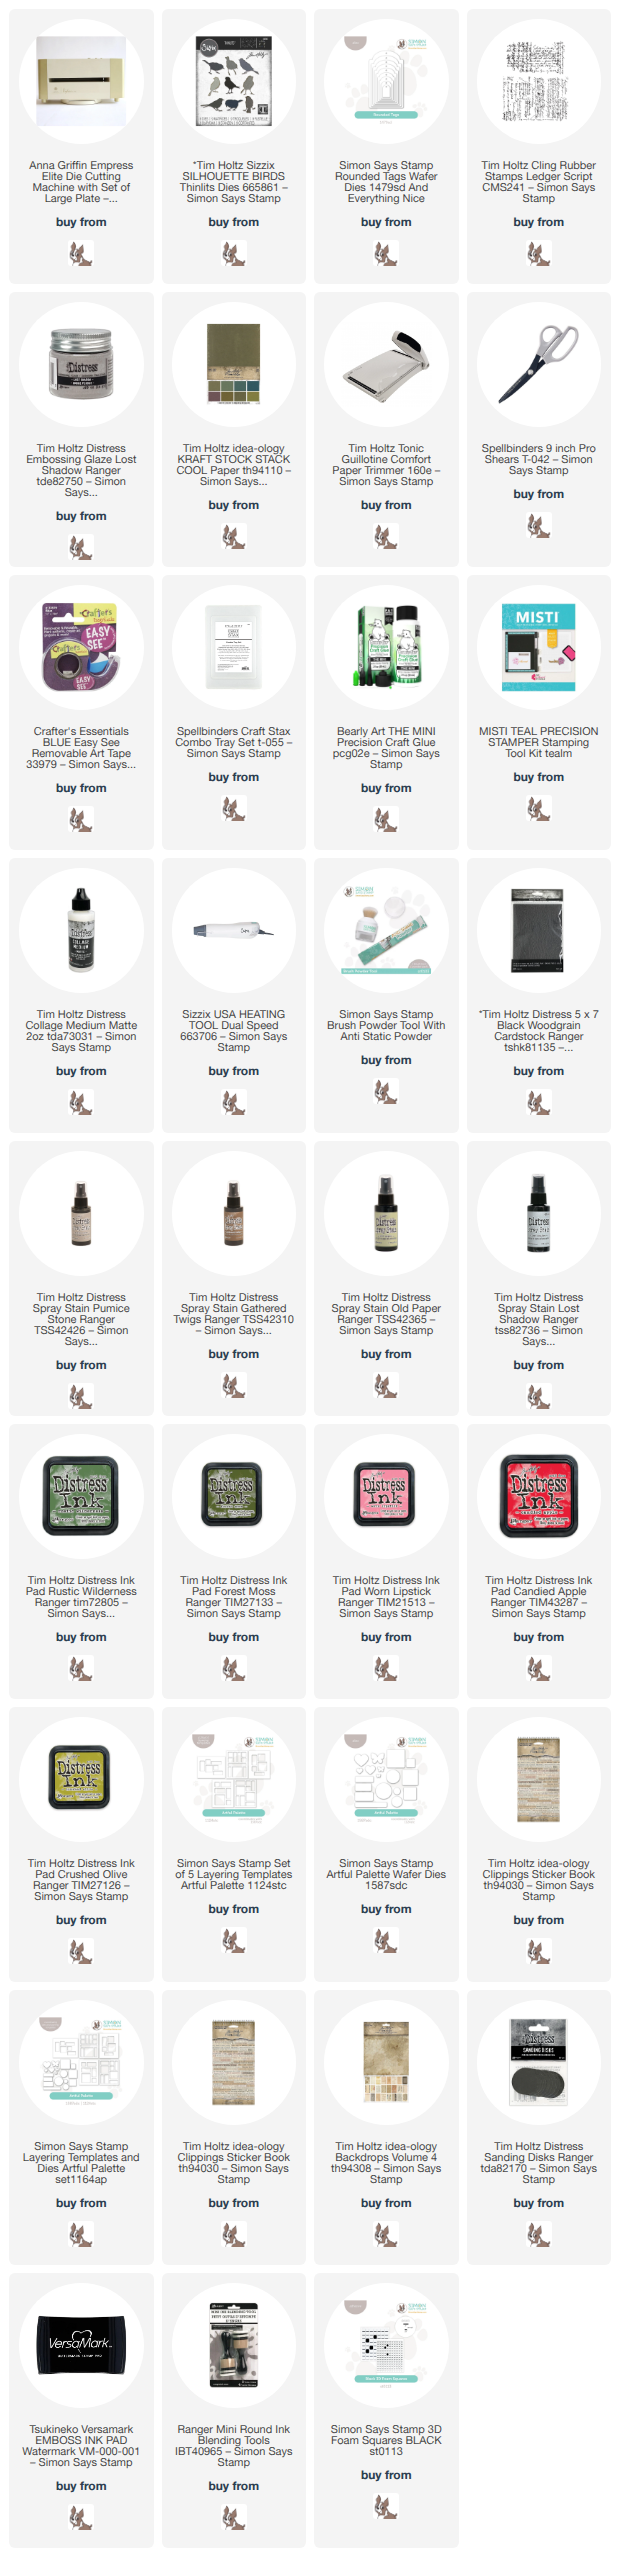
I was inspired by today’s Simon Says Stamp Wednesday Challenge to use texture and Tim Holtz products. Problem: there are too many choices! From pastes and stencils and Idea-ology to dies and so much else, how do you choose the products you’ll use. I’ve always loved his Silhouette Birds dies and don’t use them as often as I would like, so I started there. I adore his Picture Show die set too and decided to incorporate that.

Strangely, I worked from the middle out. I took a piece of his Distress Watercolor Paper and stamped with his Ledger Script stamp set with Versamark. I heat embossed using the Lost Shadow Embossing Glaze (excellent when you don’t want the harsh white of using clear powder). Then I dipped and dried the paper using Lost Shadow, Pumice Stone (mostly), and Old Paper Distress Spray Stain. I die cut the “Viewmaster” round slide reel die from this paper. Next, I took some of his Collage Paper - I don’t know what print it is, but it is old and was just a sheet given to me by a friend. I fan-folded it and then trimmed the ends (using no precision at all) and used collage medium to make it stay in a rosette form. Before I glued this to the center of the round slide reel, I dipped piece into a very small amount Forest Moss and Rustic Wilderness Distress ink smushed on a mat and mixed with a lot of water. I knew I was moving toward using some green and I wanted a cohesive color look.
I die cut the largest tag from the Simon Says Stamp rounded tags die set out of one of his Backdrops. I dipped the edges in some watered down Pumice Stone Distress Spray Stain and then inked the edges in the same color ink. I also glued this tag to an identical one cut from dark brown paper only for stability.
Next, I took a dark green piece of Tim’s Kraft Stock Stack Cool Paper and dry embossed it with a very old and retired 2D TH embossing folder called Blueprint. I sanded the top of this to reveal the kraft paper. Next, I used the Simon Says Stamp Artful Palette Dies to cut out rounded squares and rectangles. I lightly inked the edges with Pumice Stone ink and adhered them with foam adhesive to the tag, using one of the coordinating templates.
I glued the round slide reel with the collage paper rosette to the middle of the tag, on top of the kraft pieces. I added a thread nest in dark brown. I glued on 2 previously made die cuts from the retired Holiday Greens die set. I think these are inked with Rustic Wilderness and Crushed Olive Distress ink. I cut a Silhouette Bird from previously inked watercolor paper (this could be Worn Lipstick mixed with a little Candied Apple and flicked with some Gathered Twigs) and lightly inked the edges with Pumice Stone. I glued this on to the greenery pieces.
Finally, I adhered one of his Idea-ology Clippings to a small piece of his black woodgrain cardstock and glued it to the top of the tag.
I completed the tag with a piece of wrinkled seam binding I had in my stash.
I am also entering this into the Little Red Wagon Challenge to use a stamp.
If you shop from the links below. I may receive a small commission at no cost to you. It is much appreciated and helps fund my crafting. Also, any item first marked with an asterisk * was provided by an online store. Otherwise, I bought my supplies.
I was inspired by today’s Simon Says Stamp Wednesday Challenge to use texture and Tim Holtz products. Problem: there are too many choices! From pastes and stencils and Idea-ology to dies and so much else, how do you choose the products you’ll use. I’ve always loved his Silhouette Birds dies and don’t use them as often as I would like, so I started there. I adore his Picture Show die set too and decided to incorporate that.
Strangely, I worked from the middle out. I took a piece of his Distress Watercolor Paper and stamped with his Ledger Script stamp set with Versamark. I heat embossed using the Lost Shadow Embossing Glaze (excellent when you don’t want the harsh white of using clear powder). Then I dipped and dried the paper using Lost Shadow, Pumice Stone (mostly), and Old Paper Distress Spray Stain. I die cut the “Viewmaster” round slide reel die from this paper. Next, I took some of his Collage Paper - I don’t know what print it is, but it is old and was just a sheet given to me by a friend. I fan-folded it and then trimmed the ends (using no precision at all) and used collage medium to make it stay in a rosette form. Before I glued this to the center of the round slide reel, I dipped piece into a very small amount Forest Moss and Rustic Wilderness Distress ink smushed on a mat and mixed with a lot of water. I knew I was moving toward using some green and I wanted a cohesive color look.
I die cut the largest tag from the Simon Says Stamp rounded tags die set out of one of his Backdrops. I dipped the edges in some watered down Pumice Stone Distress Spray Stain and then inked the edges in the same color ink. I also glued this tag to an identical one cut from dark brown paper only for stability.
Next, I took a dark green piece of Tim’s Kraft Stock Stack Cool Paper and dry embossed it with a very old and retired 2D TH embossing folder called Blueprint. I sanded the top of this to reveal the kraft paper. Next, I used the Simon Says Stamp Artful Palette Dies to cut out rounded squares and rectangles. I lightly inked the edges with Pumice Stone ink and adhered them with foam adhesive to the tag, using one of the coordinating templates.
I glued the round slide reel with the collage paper rosette to the middle of the tag, on top of the kraft pieces. I added a thread nest in dark brown. I glued on 2 previously made die cuts from the retired Holiday Greens die set. I think these are inked with Rustic Wilderness and Crushed Olive Distress ink. I cut a Silhouette Bird from previously inked watercolor paper (this could be Worn Lipstick mixed with a little Candied Apple and flicked with some Gathered Twigs) and lightly inked the edges with Pumice Stone. I glued this on to the greenery pieces.
Finally, I adhered one of his Idea-ology Clippings to a small piece of his black woodgrain cardstock and glued it to the top of the tag.
I completed the tag with a piece of wrinkled seam binding I had in my stash.
I am also entering this into the Little Red Wagon Challenge to use a stamp.
If you shop from the links below. I may receive a small commission at no cost to you. It is much appreciated and helps fund my crafting. Also, any item first marked with an asterisk * was provided by an online store. Otherwise, I bought my supplies.


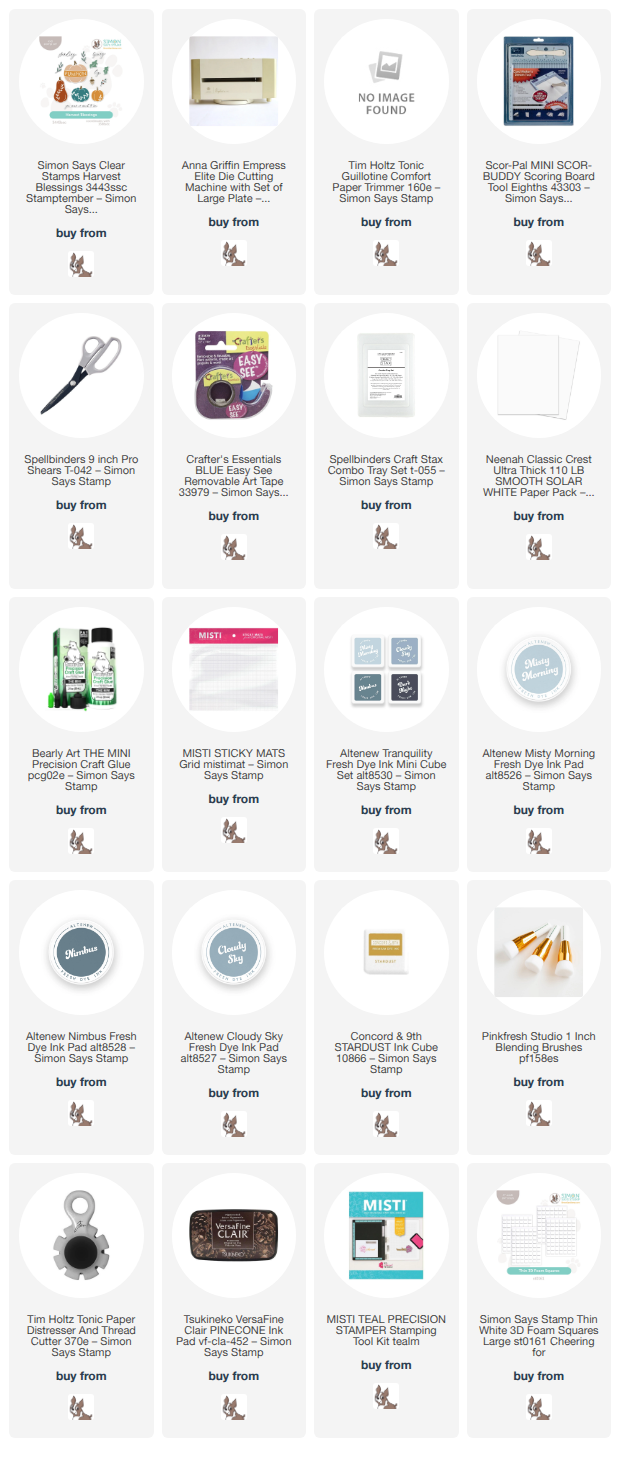
Welcome! This was a fun card to make. Even though I am “the Crazy Pumpkin Lady” and decorate my home with countless pumpkins in autumn, I don’t have any blue pumpkins (I do have a teal one, however). The ideal range of colors come from Altenew’s Tranquility line of inks, a gorgeous set of blue-gray colors that include Cloudy Sky, Nimbus, and Misty Morning. I used Altenew’s Misty Morning for the lightest blue and smallest pumpkin. Since I need to reink my Altenew pads, I chose 2 other blues very similar to Altenew's for the darker pumpkins. I first stamped the largest pumpkin in 2 steps: first the blue pumpkin and then the Thanks phrase in the middle using Hero Arts Wet Cement.

I used Hero Arts Wet Cement inkpad for the stems. I used Concord & 9th’s Stardust for the leaves and acorn bottom. I fussy cut all the images and glued the gourds together with the yellow leaves. I lightly ink blended a white cardstock panel with one of my blue inks (can’t remember which one but probably Misty Morning). I stamped the ‘you mean so much to me’ sentiment in Versa Fine Clair ink in Pinecone to get a super crisp, dark brown image. The white leaves in the background all come from Trinity Stamps’ Wildflower Clippings die set. I used a tan thread nest behind this.
The textured background comes from a very old Tim Holtz embossing folder called Gridlock (retired, but eBay has several at good prices). I edged the 2 white background pieces with my Tim Holtz Tonic Paper Distresser. I assembled everything as shown, using both foam tape and glue, attaching the tiny acorn to sit just over my sentiment.
If you shop from the links below. I may receive a small commission at no cost to you. It is much appreciated and helps fund my crafting. Also, any item first marked with an asterisk * was provided by an online store. Otherwise, I bought my supplies.
Welcome! This was a fun card to make. Even though I am “the Crazy Pumpkin Lady” and decorate my home with countless pumpkins in autumn, I don’t have any blue pumpkins (I do have a teal one, however). The ideal range of colors come from Altenew’s Tranquility line of inks, a gorgeous set of blue-gray colors that include Cloudy Sky, Nimbus, and Misty Morning. I used Altenew’s Misty Morning for the lightest blue and smallest pumpkin. Since I need to reink my Altenew pads, I chose 2 other blues very similar to Altenew's for the darker pumpkins. I first stamped the largest pumpkin in 2 steps: first the blue pumpkin and then the Thanks phrase in the middle using Hero Arts Wet Cement.
I used Hero Arts Wet Cement inkpad for the stems. I used Concord & 9th’s Stardust for the leaves and acorn bottom. I fussy cut all the images and glued the gourds together with the yellow leaves. I lightly ink blended a white cardstock panel with one of my blue inks (can’t remember which one but probably Misty Morning). I stamped the ‘you mean so much to me’ sentiment in Versa Fine Clair ink in Pinecone to get a super crisp, dark brown image. The white leaves in the background all come from Trinity Stamps’ Wildflower Clippings die set. I used a tan thread nest behind this.
The textured background comes from a very old Tim Holtz embossing folder called Gridlock (retired, but eBay has several at good prices). I edged the 2 white background pieces with my Tim Holtz Tonic Paper Distresser. I assembled everything as shown, using both foam tape and glue, attaching the tiny acorn to sit just over my sentiment.
If you shop from the links below. I may receive a small commission at no cost to you. It is much appreciated and helps fund my crafting. Also, any item first marked with an asterisk * was provided by an online store. Otherwise, I bought my supplies.

Happy STAMPtember from me to you! It’s a thrill to be participating as a member of the Simon Says Stamp Designer Family in my first STAMPtember. All my projects will use the elegant and easy-to-use Harvest Blessings stamp set*. When I opened my up my package from Simon Says Stamp and I saw all the pumpkins and gourds on the stamp set, I thought “they know me!” You see, I LOVE pumpkins. I decorate my home for fall in almost every room. I have pumpkins made of ceramic, glass, wicker, wood, plastic, and sweater material. I have a giant ivory-colored pumpkin platter (from Crate & Barrel eons ago) that sits on a shelf in my kitchen almost year round, except for December. I have a coffee mug that says “Crazy Pumpkin Lady” that I bought from Joann’s (#RIP).

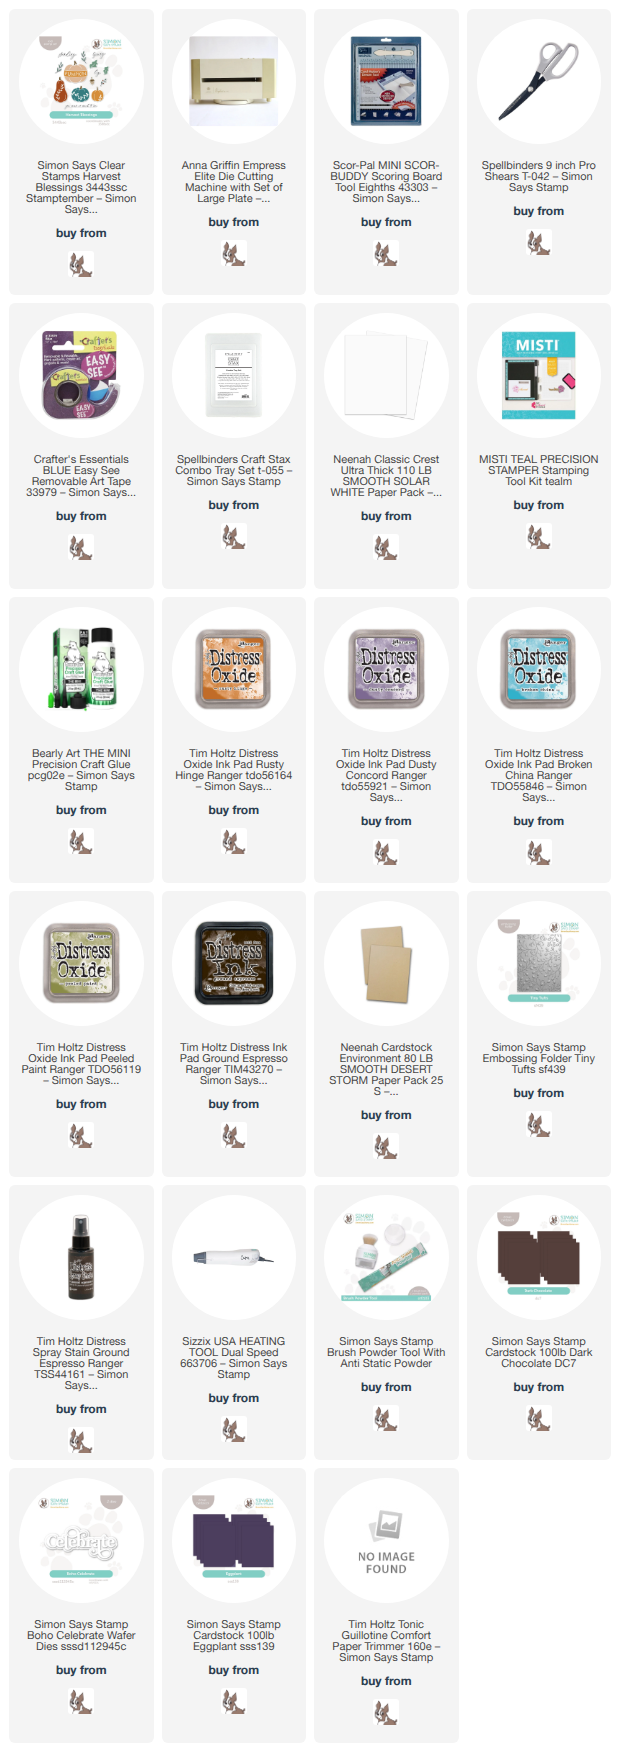
Anyway, it was easy to come up with ideas for this set. For this first card, I decided to treat the solid-image stamps to my Distress Oxide inks. So that I could overlap the images, I used masks made from Post-It Notes to cover the images I stamped and didn’t want to stamp on top of. I used Rusty Hinge, Dusty Concord, Broken China, and Peeled Paint, along with Ground Espresso Distress Ink for the stems. After doing this stamping in a vertical line on a piece of Neenah Desert Storm cardstock, I splattered it with my Dr. Ph. Martin Bombay India Ink in Sepia. However, an equally good choice for this dark brown splatter is Tim Holtz’s Distress Spray in Ground Espresso. Just flick it from the little straw inside the bottle, instead of spraying it.
When my ink and my splatter were dry, I fussy cut the right edge of the stacked gourds as shown. I laid this edge down on some dark brown cardstock and traced it with a pencil. Next, I fussy cut the edge of the brown paper so I could make the shadow behind the gourds. I glued this thin piece behind the gourd piece.
Next came the leaves. I stamped the 2 leaf shapes in the stamp set onto the same Desert Storm cardstock with Versamark and heat embossed them with Lindy’s Gang Twilight Bronze embossing powder. If you have trouble finding this one, any dark, metallic embossing powder would work great. Gold would work perfectly too. I glued the leaves as shown onto my stamped piece.
I took a piece of purple cardstock (my best match for the Dusty Concord Distress Ink, I’ve linked to the Simon Says Stamp Eggplant cardstock below as I think it would be ideal) and dry embossed a piece of 4.5 x 6” cardstock with a favorite: Simon Says Stamp’s Tiny Tufts embossing folder. I purposedly used a larger than A2 piece for this as the dry embossing sort of “shrinks” the size of the paper because of the impressions it makes. Next, I cut it to an A2 size of 4.25” x 5.5”.
I built this card in an odd way - I took the purple piece and glued it to a cardbase made of Neenah Classic Crest 110lb cover stock in white. Then, I took the stamped piece (with the brown glued on the back) and scored it and folded it over the left side of the card. It made it kinda chunky and I might do this differently next time.
I then die cut Simon Says Stamp’s Boho Celebrate die three times from dark brown cardstock. I stacked two of them and glued them together, and then smooshed my Versamark inkpad onto the top one and again heat embossed with the same Twilight Bronze embossing powder. I cut the third die cut in half and glued only the right half onto the back of the word. I did this because the word was going to be glued down on the higher left side, and then hang over the lower embossed purple panel (I really hope that made sense [said no AI ever]). I was happy with how it all worked out.
Enjoy this Stamptember month at Simons Says Stamp and tune it every day for some fun surprises. By the way, the Harvest Blessings stamp set WILL be available past Stamptember.
Thanks!
Happy STAMPtember from me to you! It’s a thrill to be participating as a member of the Simon Says Stamp Designer Family in my first STAMPtember. All my projects will use the elegant and easy-to-use Harvest Blessings stamp set*. When I opened my up my package from Simon Says Stamp and I saw all the pumpkins and gourds on the stamp set, I thought “they know me!” You see, I LOVE pumpkins. I decorate my home for fall in almost every room. I have pumpkins made of ceramic, glass, wicker, wood, plastic, and sweater material. I have a giant ivory-colored pumpkin platter (from Crate & Barrel eons ago) that sits on a shelf in my kitchen almost year round, except for December. I have a coffee mug that says “Crazy Pumpkin Lady” that I bought from Joann’s (#RIP).
Anyway, it was easy to come up with ideas for this set. For this first card, I decided to treat the solid-image stamps to my Distress Oxide inks. So that I could overlap the images, I used masks made from Post-It Notes to cover the images I stamped and didn’t want to stamp on top of. I used Rusty Hinge, Dusty Concord, Broken China, and Peeled Paint, along with Ground Espresso Distress Ink for the stems. After doing this stamping in a vertical line on a piece of Neenah Desert Storm cardstock, I splattered it with my Dr. Ph. Martin Bombay India Ink in Sepia. However, an equally good choice for this dark brown splatter is Tim Holtz’s Distress Spray in Ground Espresso. Just flick it from the little straw inside the bottle, instead of spraying it.
When my ink and my splatter were dry, I fussy cut the right edge of the stacked gourds as shown. I laid this edge down on some dark brown cardstock and traced it with a pencil. Next, I fussy cut the edge of the brown paper so I could make the shadow behind the gourds. I glued this thin piece behind the gourd piece.
Next came the leaves. I stamped the 2 leaf shapes in the stamp set onto the same Desert Storm cardstock with Versamark and heat embossed them with Lindy’s Gang Twilight Bronze embossing powder. If you have trouble finding this one, any dark, metallic embossing powder would work great. Gold would work perfectly too. I glued the leaves as shown onto my stamped piece.
I took a piece of purple cardstock (my best match for the Dusty Concord Distress Ink, I’ve linked to the Simon Says Stamp Eggplant cardstock below as I think it would be ideal) and dry embossed a piece of 4.5 x 6” cardstock with a favorite: Simon Says Stamp’s Tiny Tufts embossing folder. I purposedly used a larger than A2 piece for this as the dry embossing sort of “shrinks” the size of the paper because of the impressions it makes. Next, I cut it to an A2 size of 4.25” x 5.5”.
I built this card in an odd way - I took the purple piece and glued it to a cardbase made of Neenah Classic Crest 110lb cover stock in white. Then, I took the stamped piece (with the brown glued on the back) and scored it and folded it over the left side of the card. It made it kinda chunky and I might do this differently next time.
I then die cut Simon Says Stamp’s Boho Celebrate die three times from dark brown cardstock. I stacked two of them and glued them together, and then smooshed my Versamark inkpad onto the top one and again heat embossed with the same Twilight Bronze embossing powder. I cut the third die cut in half and glued only the right half onto the back of the word. I did this because the word was going to be glued down on the higher left side, and then hang over the lower embossed purple panel (I really hope that made sense [said no AI ever]). I was happy with how it all worked out.
Enjoy this Stamptember month at Simons Says Stamp and tune it every day for some fun surprises. By the way, the Harvest Blessings stamp set WILL be available past Stamptember.
Thanks!

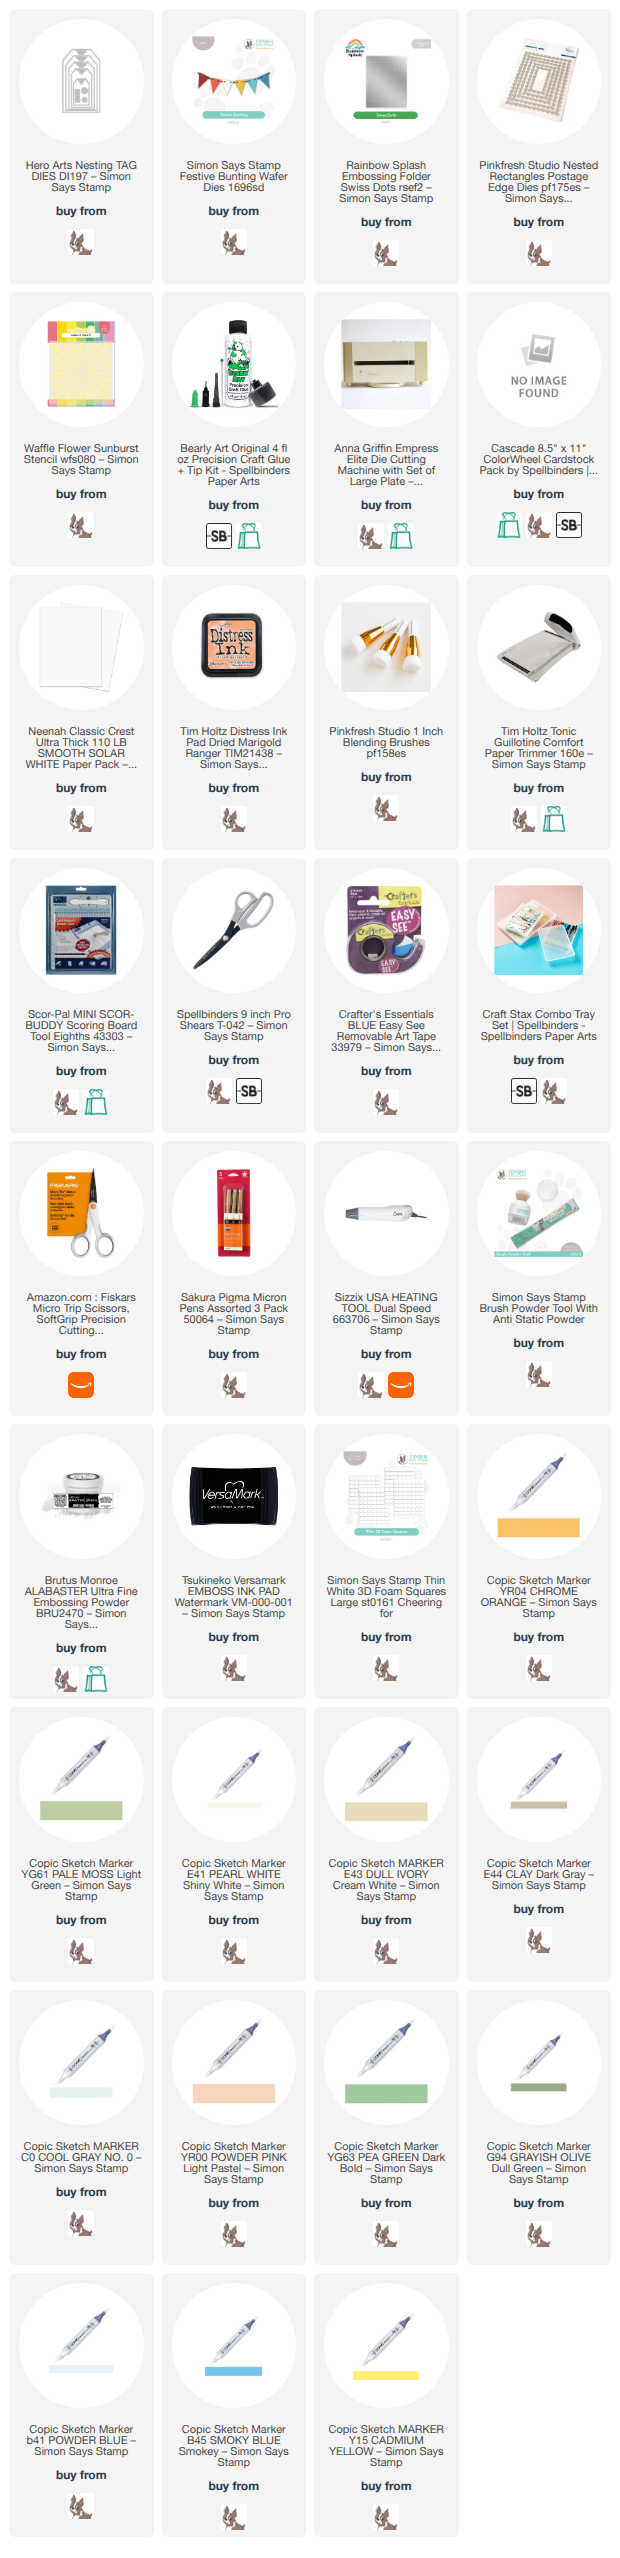
This card was inspired by one of my favorite card makers, Inge Groot. I used the wonderful Coffee with Friends* stamp set from the new Every Happiness release from Simon Says Stamp. I Copic colored the bear and the tree using E41, E43, E44, Y15, YR04, C0, B41, B45, G94, YG61, YG63, YR00. The remaining colors I used were Dick Blick Brush Markers and Spectrum Noir markers. I highlighted everything using a Gelly Roll white pen.

I used an old Sizzix Swiss Dot embossing folder (it's retired and I've linked to one by Simon Says Stamp) with the white tag I cut using Hero Arts Nested Tag Dies. I made the frame using Cascade cardstock from Spellbinders and an old Poppystamps die set called Scalloped Stitch Frames (again, this is retired so I've linked to a set of very similar double stitch frames by Pinkfresh Studio.) I used Dried Marigold Distress Ink to ink blend through the Sunburst Stencil by Waffle Flower. I cut this piece with the Pinkfresh Studios Nested Rectangles Postage Edge dies. Behind all this is a small scrap of black and white lined paper from an old MFT paper pad.
The sentiment is part of this sweet stamp set. I heat embossed it on black with Brutus Monroe Alabaster embossing powder.
The fun part is the Simon Says Stamp Festive Bunting die I used in the top left. I cut the triangle parts with 3 different colors (the blue is the Cascade I used earlier), and then the string part from black. The holes are large enough to easily snake the black string part through the holes.
I used a variety of foam and liquid glue to adhere everything to an A2 card base made with Neenah Classic Crest Solar White 110lb.
Affiliate links are used in this post at no cost to you. This means I may receive a small commission when you click through and shop using the links I provide. This helps support me in creating and posting my crafts. Items marked with an asterisk * at first mention were provided by a store or manufacturer. Otherwise, all items were purchased by me.
This card was inspired by one of my favorite card makers, Inge Groot. I used the wonderful Coffee with Friends* stamp set from the new Every Happiness release from Simon Says Stamp. I Copic colored the bear and the tree using E41, E43, E44, Y15, YR04, C0, B41, B45, G94, YG61, YG63, YR00. The remaining colors I used were Dick Blick Brush Markers and Spectrum Noir markers. I highlighted everything using a Gelly Roll white pen.
I used an old Sizzix Swiss Dot embossing folder (it's retired and I've linked to one by Simon Says Stamp) with the white tag I cut using Hero Arts Nested Tag Dies. I made the frame using Cascade cardstock from Spellbinders and an old Poppystamps die set called Scalloped Stitch Frames (again, this is retired so I've linked to a set of very similar double stitch frames by Pinkfresh Studio.) I used Dried Marigold Distress Ink to ink blend through the Sunburst Stencil by Waffle Flower. I cut this piece with the Pinkfresh Studios Nested Rectangles Postage Edge dies. Behind all this is a small scrap of black and white lined paper from an old MFT paper pad.
The sentiment is part of this sweet stamp set. I heat embossed it on black with Brutus Monroe Alabaster embossing powder.
The fun part is the Simon Says Stamp Festive Bunting die I used in the top left. I cut the triangle parts with 3 different colors (the blue is the Cascade I used earlier), and then the string part from black. The holes are large enough to easily snake the black string part through the holes.
I used a variety of foam and liquid glue to adhere everything to an A2 card base made with Neenah Classic Crest Solar White 110lb.
Affiliate links are used in this post at no cost to you. This means I may receive a small commission when you click through and shop using the links I provide. This helps support me in creating and posting my crafts. Items marked with an asterisk * at first mention were provided by a store or manufacturer. Otherwise, all items were purchased by me.

It was a hard choice to decide on a color scheme for the new Serenity Garden Primrose dies* by Susan Tierney Cockburn. Primrose grow in so many amazing colors. I finally decided on a yellow and green color scheme. I used Copic markers in Y17, Y19, and Y38 to color the center of the flowers. Since I have seen many primrose with thin striations on the petals, I added thin little stripes over the Copic markers using some super-fine felt markers I picked up off Amazon.
Since Susan uses some tools that are no longer available to shape her flowers, I had to get creative. I was able to cobble together some tools in order to copy her techniques pretty well and I have provided affiliate links to those below.

I used a bright green cardstock for the center of the flowers. The leaves were also colored with Copics YG93, YG95, YG97, and G99. I colored both tops and bottoms to make sure no white was showing.
After I had created all my primrose blooms and the leaves, I took a piece of A2-sized Neenah white cardstock and created an ink blended “glow” in the center with a 1” Pinkfresh Studio blending brush and Crushed Olive Distress Ink. I then used the Nested Postage Label and Tag die set to cut out a stitched rectangle. Finally, I used the Tufted 3D embossing folder to make the panel complete, spritzing the backside with water first. I adhered this to a white A2 card and adhered all my flowers and leaves on the 2 opposite corners. For my sentiment, I hot foiled a sentiment from the You Are Everything Hot Foil Plate and Die set. I used gold foil on white cardstock, then die cut, then adhered with foam tape.
Affiliate links are used in this post at no cost to you. This means I may receive a small commission when you click through and shop using the links I provide. This helps support me in creating and posting my crafts. Items marked with an asterisk * at first mention were provided by a store or manufacturer. Otherwise, all items were purchased by me.

It was a hard choice to decide on a color scheme for the new Serenity Garden Primrose dies* by Susan Tierney Cockburn. Primrose grow in so many amazing colors. I finally decided on a yellow and green color scheme. I used Copic markers in Y17, Y19, and Y38 to color the center of the flowers. Since I have seen many primrose with thin striations on the petals, I added thin little stripes over the Copic markers using some super-fine felt markers I picked up off Amazon.
Since Susan uses some tools that are no longer available to shape her flowers, I had to get creative. I was able to cobble together some tools in order to copy her techniques pretty well and I have provided affiliate links to those below.
I used a bright green cardstock for the center of the flowers. The leaves were also colored with Copics YG93, YG95, YG97, and G99. I colored both tops and bottoms to make sure no white was showing.
After I had created all my primrose blooms and the leaves, I took a piece of A2-sized Neenah white cardstock and created an ink blended “glow” in the center with a 1” Pinkfresh Studio blending brush and Crushed Olive Distress Ink. I then used the Nested Postage Label and Tag die set to cut out a stitched rectangle. Finally, I used the Tufted 3D embossing folder to make the panel complete, spritzing the backside with water first. I adhered this to a white A2 card and adhered all my flowers and leaves on the 2 opposite corners. For my sentiment, I hot foiled a sentiment from the You Are Everything Hot Foil Plate and Die set. I used gold foil on white cardstock, then die cut, then adhered with foam tape.
Affiliate links are used in this post at no cost to you. This means I may receive a small commission when you click through and shop using the links I provide. This helps support me in creating and posting my crafts. Items marked with an asterisk * at first mention were provided by a store or manufacturer. Otherwise, all items were purchased by me.
Heads up. This is going to be a long blog post because I am including over a dozen close up photos of my process in making the flowers.

First, a shoutout to Jennifer McGuire. I saw a card of hers from years ago and I mimicked the colors and style. I believe it used Altenew's African Daisy dies. I don’t have a date or link for that card.
I’ve never made a 3D flower before, especially not one with such detail. While a die set like the Spellbinders Serenity Garden Astrantia* set designed by Susan Tierney Cockburn takes time to build like Susan does it, the process is fun. I am including a LOT of photos of how I put these flowers together with some time saving tips. Susan has an excellent video on YouTube about how to build these flowers. I did a few things differently (some by accident) but I loved my results. I am trying to replicate the look of Astrantia Sparkling Stars Red breed. I couldn't find an unlicensed photo of this to use here, but you can Google the species.

The nice thing about the die set is that each die has a marking on it telling you how many times you should cut it out. I started by following Susan’s YouTube tutorial and her technique of cutting everything from white 80lb cardstock. Both 110 and 110 cardstock will be too heavy for making these flowers.

I took the two big petaled die cuts and colored the top AND bottoms of each with Copic markers V06, V09, and RV29 as shown. I laid down the darkest purple at the tips, then the red over everything, then the lighter purple over the darker purple.


These two flowers get shaped first by using my Sizzix reverse tweezers by grabbing the petal straight on with the tip pointing to the center, and gently wrapping each petal around the tweezer tips. Next, as Susan showed, I gently grabbed the tip of the petal in the tweezers and twisted to the right. You must do this VERY gently or you risk ripping the petal. And do NOT wet your flowers thinking that will make it easier. Wet paper is much more fragile and things will rip.

Then, on a sturdy foam pad like the one by Sizzix, with a medium-sized ball stylus, I “cupped” each flower by pressing and swirling the stylus in the center. These two flowers can now be glued together in the center only and offsetting the petals.
The little stems (stamen?) in the center is constructed of 5 (yes, 5) die cuts: 2 large, 2 medium, and 1 coil. I first Copic colored these all using YG61 on top and bottom. Then, still using my foam pad, I pushed a tiny ball stylus into each side of the tip of each stem (it looks like the end of a dog bone). Then I took a tiny ball stylus and ran it down each stem on each piece. I failed to cup the center of each of these, but it worked out okay. Pressing down in the center of each with a small to medium size ball stylus would have been helpful.

Now I come to making the itty bitty flowers (which I just love and included in a different project.) First, because I wanted to replicate the Sparkling Stars Red breed of these flowers, I wanted to leave a little white on those tiny interior flowers. I used my R29 copic marker and scribbled about a 3 x 4” rectangle on some white cardstock, not covering every millimeter. I did this top and bottom.


Next I took the little die plate that cuts out 70 tiny flowers and ran it through my machine. Then, I stopped and did NOT take it off my mat. With the die and paper still stuck on my mat, I used a fine-tip marker and poked it through each hole, giving me a center dot in each of my flowers.


Then - and you will have varying degrees of success with this (you might be able to do it if you put the sandwich upside down and lift off the mat) - if you can transfer both the die and the paper intact from the mat to the foam pad, you will set yourself up perfectly for the next step. Next, I poked the tiniest ball stylus into the same holes and pressed down. This technique both popped the flower out of the die and cupped it in the middle, making it fold up like the flowers appear in real life.
If the flowers are out of the die before this step, it only takes a few seconds to cup the flowers as they are sitting on the pad.


I carefully glued these flowers to the stem tips (2 on each) with the cupped side pointing out. Susan does this differently. This makes for using all 70 of those tiny flowers. Whew, the hard part is over.
Now you simply layer these spoked-looking things, large to small, in the center of the other flower you’ve constructed, offsetting each stem. After the glue is all dry, the flower should be sturdy enough that you can fluff or move the interior stems as much as you want. I had no issue with squeezing and pushing the stems around.

After all my flowers were built, I took two A2-sized pieces of Oceanside cardstock. With one, I first spritzed the back with water and then dry embossed it with Simon Hurley’s new Cascading Dots 3D Embossing Folder* and cut the lower portion off at a diagonal. With the second piece, I simply adhered a Hello sentiment from Simon Hurley’s new Big & Bold Sentiment die set that I cut from brushed gold cardstock. I adhered the top cut and embossed piece on top of the A2 flat piece with thin foam adhesive. Next, I added the flowers along the cut panel at the very edge with liquid glue. Then I cut 1 Hello from heavy white cardstock and glued that behind a satin gold Hello I cut from some gold cardstock. I added this sentiment as the final piece to my card front. I will glue all of it on to a white cardbase. This will definitely be a hand delivered card.
If you’ve read this far, as my dear dad used to say, I owe you a Coke. Here’s your soda.

Affiliate links are used in this post at no cost to you. This means I may receive a small commission when you click through and shop using the links I provide. This helps support me in creating and posting my crafts. Items marked with an asterisk * at first mention were provided by a store or manufacturer. Otherwise, all items were purchased by me.
Heads up. This is going to be a long blog post because I am including over a dozen close up photos of my process in making the flowers.
First, a shoutout to Jennifer McGuire. I saw a card of hers from years ago and I mimicked the colors and style. I believe it used Altenew's African Daisy dies. I don’t have a date or link for that card.
I’ve never made a 3D flower before, especially not one with such detail. While a die set like the Spellbinders Serenity Garden Astrantia* set designed by Susan Tierney Cockburn takes time to build like Susan does it, the process is fun. I am including a LOT of photos of how I put these flowers together with some time saving tips. Susan has an excellent video on YouTube about how to build these flowers. I did a few things differently (some by accident) but I loved my results. I am trying to replicate the look of Astrantia Sparkling Stars Red breed. I couldn't find an unlicensed photo of this to use here, but you can Google the species.
The nice thing about the die set is that each die has a marking on it telling you how many times you should cut it out. I started by following Susan’s YouTube tutorial and her technique of cutting everything from white 80lb cardstock. Both 110 and 110 cardstock will be too heavy for making these flowers.
I took the two big petaled die cuts and colored the top AND bottoms of each with Copic markers V06, V09, and RV29 as shown. I laid down the darkest purple at the tips, then the red over everything, then the lighter purple over the darker purple.
These two flowers get shaped first by using my Sizzix reverse tweezers by grabbing the petal straight on with the tip pointing to the center, and gently wrapping each petal around the tweezer tips. Next, as Susan showed, I gently grabbed the tip of the petal in the tweezers and twisted to the right. You must do this VERY gently or you risk ripping the petal. And do NOT wet your flowers thinking that will make it easier. Wet paper is much more fragile and things will rip.
Then, on a sturdy foam pad like the one by Sizzix, with a medium-sized ball stylus, I “cupped” each flower by pressing and swirling the stylus in the center. These two flowers can now be glued together in the center only and offsetting the petals.
The little stems (stamen?) in the center is constructed of 5 (yes, 5) die cuts: 2 large, 2 medium, and 1 coil. I first Copic colored these all using YG61 on top and bottom. Then, still using my foam pad, I pushed a tiny ball stylus into each side of the tip of each stem (it looks like the end of a dog bone). Then I took a tiny ball stylus and ran it down each stem on each piece. I failed to cup the center of each of these, but it worked out okay. Pressing down in the center of each with a small to medium size ball stylus would have been helpful.
Now I come to making the itty bitty flowers (which I just love and included in a different project.) First, because I wanted to replicate the Sparkling Stars Red breed of these flowers, I wanted to leave a little white on those tiny interior flowers. I used my R29 copic marker and scribbled about a 3 x 4” rectangle on some white cardstock, not covering every millimeter. I did this top and bottom.
Next I took the little die plate that cuts out 70 tiny flowers and ran it through my machine. Then, I stopped and did NOT take it off my mat. With the die and paper still stuck on my mat, I used a fine-tip marker and poked it through each hole, giving me a center dot in each of my flowers.
Then - and you will have varying degrees of success with this (you might be able to do it if you put the sandwich upside down and lift off the mat) - if you can transfer both the die and the paper intact from the mat to the foam pad, you will set yourself up perfectly for the next step. Next, I poked the tiniest ball stylus into the same holes and pressed down. This technique both popped the flower out of the die and cupped it in the middle, making it fold up like the flowers appear in real life.
If the flowers are out of the die before this step, it only takes a few seconds to cup the flowers as they are sitting on the pad.
I carefully glued these flowers to the stem tips (2 on each) with the cupped side pointing out. Susan does this differently. This makes for using all 70 of those tiny flowers. Whew, the hard part is over.
Now you simply layer these spoked-looking things, large to small, in the center of the other flower you’ve constructed, offsetting each stem. After the glue is all dry, the flower should be sturdy enough that you can fluff or move the interior stems as much as you want. I had no issue with squeezing and pushing the stems around.
After all my flowers were built, I took two A2-sized pieces of Oceanside cardstock. With one, I first spritzed the back with water and then dry embossed it with Simon Hurley’s new Cascading Dots 3D Embossing Folder* and cut the lower portion off at a diagonal. With the second piece, I simply adhered a Hello sentiment from Simon Hurley’s new Big & Bold Sentiment die set that I cut from brushed gold cardstock. I adhered the top cut and embossed piece on top of the A2 flat piece with thin foam adhesive. Next, I added the flowers along the cut panel at the very edge with liquid glue. Then I cut 1 Hello from heavy white cardstock and glued that behind a satin gold Hello I cut from some gold cardstock. I added this sentiment as the final piece to my card front. I will glue all of it on to a white cardbase. This will definitely be a hand delivered card.
If you’ve read this far, as my dear dad used to say, I owe you a Coke. Here’s your soda.
Affiliate links are used in this post at no cost to you. This means I may receive a small commission when you click through and shop using the links I provide. This helps support me in creating and posting my crafts. Items marked with an asterisk * at first mention were provided by a store or manufacturer. Otherwise, all items were purchased by me.
When you want to put a real twist on your die cuts, pull out something you already have (but if you’re like me, may have forgotten about). Washi tape!

To make this adorable card featuring Simon Hurley’s new Cascading Dots 3D embossing folder* and the new Whimsical Village Collection* from Vicky Papaioannou and Spellbinders, I took a coordinating set of American Crafts washi tape I picked up years ago at a craft store (craft stores and online retailers still sell A LOT of washi tape in coordinating patterns). I cut a piece of 110 white cardstock to about 4.5 x 7” and carefully laid down strips of washi tape, in alternating widths, from the bottom edge to near the top. It was easy to get the tape straight.

Then I used the 3 Whimsical Houses* outline dies and die cut them out. I made sure the bottom edge of the dies were parallel to the edges of the washi tape for a cohesive horizontal “striped” look. I die cut all the details from colored cardstock and adhered with glue.
I used the Whimsical Blooms* die set for the fun flowers, the Village Companions die set* for the clouds, and Whimsical Wishes* for the sentiment. I ran a piece of Seaside cardstock through my die cutting machine with one of the stitched rectangle dies in Spellbinders Nested Postage Labels and Tag. Then, I took that piece and used the Cascading Dots 3D embossing folder to create the background. This is part of his new Cascading Cornflowers release. The remainder of my cardstock came from Stampin' Up! include Soft Sable, Blushing Bride, Evening Evergreen, and Mint Macaron.
After I adhered everything with glue or foam adhesive, I adhered the panel to a piece of brown cardstock cut using the postage edge die from Spellbinders. I added a sentiment stamped in brown ink on Alabaster cardstock.
Affiliate links are used in this post at no cost to you. This means I may receive a small commission when you click through and shop using the links I provide. This helps support me in creating and posting my crafts. Items marked with an asterisk * at first mention were provided by a store or manufacturer. Otherwise, all items were purchased by me.

When you want to put a real twist on your die cuts, pull out something you already have (but if you’re like me, may have forgotten about). Washi tape!
To make this adorable card featuring Simon Hurley’s new Cascading Dots 3D embossing folder* and the new Whimsical Village Collection* from Vicky Papaioannou and Spellbinders, I took a coordinating set of American Crafts washi tape I picked up years ago at a craft store (craft stores and online retailers still sell A LOT of washi tape in coordinating patterns). I cut a piece of 110 white cardstock to about 4.5 x 7” and carefully laid down strips of washi tape, in alternating widths, from the bottom edge to near the top. It was easy to get the tape straight.
Then I used the 3 Whimsical Houses* outline dies and die cut them out. I made sure the bottom edge of the dies were parallel to the edges of the washi tape for a cohesive horizontal “striped” look. I die cut all the details from colored cardstock and adhered with glue.
I used the Whimsical Blooms* die set for the fun flowers, the Village Companions die set* for the clouds, and Whimsical Wishes* for the sentiment. I ran a piece of Seaside cardstock through my die cutting machine with one of the stitched rectangle dies in Spellbinders Nested Postage Labels and Tag. Then, I took that piece and used the Cascading Dots 3D embossing folder to create the background. This is part of his new Cascading Cornflowers release. The remainder of my cardstock came from Stampin' Up! include Soft Sable, Blushing Bride, Evening Evergreen, and Mint Macaron.
After I adhered everything with glue or foam adhesive, I adhered the panel to a piece of brown cardstock cut using the postage edge die from Spellbinders. I added a sentiment stamped in brown ink on Alabaster cardstock.
Affiliate links are used in this post at no cost to you. This means I may receive a small commission when you click through and shop using the links I provide. This helps support me in creating and posting my crafts. Items marked with an asterisk * at first mention were provided by a store or manufacturer. Otherwise, all items were purchased by me.

Introducing the Whimsical Village* by Vicky Papaioannou for Spellbinders. This adorable collection includes so many fantastic pieces and add-ons, along with a fun swirly embossing folder, and a cute typewriter-style sentiment set.
Here I used heavy white cardstock to do three things. 1. I dry embossed a white A6 panel with the Whimsical Skies* 3D embossing folder. 2. I die cut some adorable little embossed clouds with the Village Companions* die set. 3. I cut 3 cute houses from the Whimsical Houses* die set.

Next, I used 3 colors of polka-dotted paper to die cut the same three houses and glued these onto the white cut outs for support, since my dotted paper was thin. I used gray, light blue, orange, red and pink Spellbinders cardstock to cut the house details.
I used Brutus Monroe’s Alabaster embossing powder to heat emboss my sentiment from the Whimsical Wishes* Stamp set onto a label using the Sentiment Labels die set. The “string” is part of the die set and is just white cardstock. Love that detail.
I adhered everything with foam adhesive tape and liquid glue.
Affiliate links are used in this post at no cost to you. This means I may receive a small commission when you click through and shop using the links I provide. This helps support me in creating and posting my crafts. Items marked with an asterisk * at first mention were provided by a store or manufacturer. Otherwise, all items were purchased by me.
Introducing the Whimsical Village* by Vicky Papaioannou for Spellbinders. This adorable collection includes so many fantastic pieces and add-ons, along with a fun swirly embossing folder, and a cute typewriter-style sentiment set.
Here I used heavy white cardstock to do three things. 1. I dry embossed a white A6 panel with the Whimsical Skies* 3D embossing folder. 2. I die cut some adorable little embossed clouds with the Village Companions* die set. 3. I cut 3 cute houses from the Whimsical Houses* die set.
Next, I used 3 colors of polka-dotted paper to die cut the same three houses and glued these onto the white cut outs for support, since my dotted paper was thin. I used gray, light blue, orange, red and pink Spellbinders cardstock to cut the house details.
I used Brutus Monroe’s Alabaster embossing powder to heat emboss my sentiment from the Whimsical Wishes* Stamp set onto a label using the Sentiment Labels die set. The “string” is part of the die set and is just white cardstock. Love that detail.
I adhered everything with foam adhesive tape and liquid glue.
Affiliate links are used in this post at no cost to you. This means I may receive a small commission when you click through and shop using the links I provide. This helps support me in creating and posting my crafts. Items marked with an asterisk * at first mention were provided by a store or manufacturer. Otherwise, all items were purchased by me.

I am the guest designer on the super fun Cut It Up Challenge Blog today. I encourage you to join us for this challenge, #356. This round’s theme is flowers. I decided to go with a hot foil glimmer plate from Spellbinders called Glimmering Peonies. It is a giant image that exceeds the bounds of an A2 card. I used the Spellbinders Glimmer Hot Foil Roll in Polished Brass to foil this onto Secret Sea colored cardstock from Stampin’ Up! I initially die cut it with Spellbinders Essential Modern Ovals. As I played with it, I realized I wanted it to fit on an A2 card, so I cut off about an inch of the oval at the bottom, leaving me with an arch. Naturally, you could use an arch die to do this, such as the Essential Arches from Spellbinders.

Next, I used Ink On 3 Gold embossing powder along with the Mini Messages Stamp Set from Honey Bee Stamps to heat emboss the sentiment onto a strip of the Secret Sea cardstock. I used Spellbinders Sentiment Labels dies to cut a piece of brushed gold cardstock, the sentiment, and the “string” which is simply paper.
I took one more A2 sized piece of Secret Sea cardstock and dry embossed it with Simon Says Stamp Tiny Tufts 3D embossing folder. I just love the delicate botanical image this folder creates.
I adhered all the elements with either foam tape or my favorite glue.
So what florals can you use to join us in the Flowers challenge on the Cut It Up Challenge?
Affiliate links are used in this post at no cost to you. This means I may receive a small commission when you click through and shop using the links I provide. This helps support me in creating and posting my crafts. Items marked with an asterisk * at first mention were provided by a store or manufacturer. Otherwise, all items were purchased by me. I do not get paid to promote any products.

I am the guest designer on the super fun Cut It Up Challenge Blog today. I encourage you to join us for this challenge, #356. This round’s theme is flowers. I decided to go with a hot foil glimmer plate from Spellbinders called Glimmering Peonies. It is a giant image that exceeds the bounds of an A2 card. I used the Spellbinders Glimmer Hot Foil Roll in Polished Brass to foil this onto Secret Sea colored cardstock from Stampin’ Up! I initially die cut it with Spellbinders Essential Modern Ovals. As I played with it, I realized I wanted it to fit on an A2 card, so I cut off about an inch of the oval at the bottom, leaving me with an arch. Naturally, you could use an arch die to do this, such as the Essential Arches from Spellbinders.
Next, I used Ink On 3 Gold embossing powder along with the Mini Messages Stamp Set from Honey Bee Stamps to heat emboss the sentiment onto a strip of the Secret Sea cardstock. I used Spellbinders Sentiment Labels dies to cut a piece of brushed gold cardstock, the sentiment, and the “string” which is simply paper.
I took one more A2 sized piece of Secret Sea cardstock and dry embossed it with Simon Says Stamp Tiny Tufts 3D embossing folder. I just love the delicate botanical image this folder creates.
I adhered all the elements with either foam tape or my favorite glue.
So what florals can you use to join us in the Flowers challenge on the Cut It Up Challenge?
Affiliate links are used in this post at no cost to you. This means I may receive a small commission when you click through and shop using the links I provide. This helps support me in creating and posting my crafts. Items marked with an asterisk * at first mention were provided by a store or manufacturer. Otherwise, all items were purchased by me. I do not get paid to promote any products.
Spring and the color lavendar go together like the finest pairing of cheese and wine. They simply belong together. I made this card for my youngest daughter on the completion of her medical assistant certification. She loves lavendar. I used the Spellbinders Colorwheel Lavender cardstock along with Neenah Classic Crest 110lb cardstock. I dry embossed a 4” x 5.25” piece of lavender with the Simon Says Stamp Boho Flowers Embossing Folder. It’s an ideal floral pattern for almost any time of year.

Next, I matted that to a cardbase 4.25" x 5.5". I used the middle-size circle from the Pink Fresh Studios Elegant Circles die set and cut it (and kept the center) from the white cardstock. I used the Spellbinders Betterpress You Are Everything Letterpress inking plate and matching die along with their gold foil to create the sentiment on my Spellbinders Glimmer machine. The flowers are from Pinkfresh Studios Breezy Blossoms where I used their matching stamps, stencils and dies. The ink is Lavender Glaze from Taylored Expressions.
I assembled everything as shown and added Clear Iridescent sequins from This Calls for Confetti (such a cool business name.)

Affiliate links are used in this post at no cost to you. This means I may receive a small commission when you click through and shop using the links I provide. This helps support me in creating and posting my crafts. Items marked with an asterisk * at first mention were provided by a store or manufacturer. Otherwise, all items were purchased by me. I do not get paid to promote any products.
Spring and the color lavendar go together like the finest pairing of cheese and wine. They simply belong together. I made this card for my youngest daughter on the completion of her medical assistant certification. She loves lavendar. I used the Spellbinders Colorwheel Lavender cardstock along with Neenah Classic Crest 110lb cardstock. I dry embossed a 4” x 5.25” piece of lavender with the Simon Says Stamp Boho Flowers Embossing Folder. It’s an ideal floral pattern for almost any time of year.
Next, I matted that to a cardbase 4.25" x 5.5". I used the middle-size circle from the Pink Fresh Studios Elegant Circles die set and cut it (and kept the center) from the white cardstock. I used the Spellbinders Betterpress You Are Everything Letterpress inking plate and matching die along with their gold foil to create the sentiment on my Spellbinders Glimmer machine. The flowers are from Pinkfresh Studios Breezy Blossoms where I used their matching stamps, stencils and dies. The ink is Lavender Glaze from Taylored Expressions.
I assembled everything as shown and added Clear Iridescent sequins from This Calls for Confetti (such a cool business name.)
Affiliate links are used in this post at no cost to you. This means I may receive a small commission when you click through and shop using the links I provide. This helps support me in creating and posting my crafts. Items marked with an asterisk * at first mention were provided by a store or manufacturer. Otherwise, all items were purchased by me. I do not get paid to promote any products.
When I started this card I knew I wanted to combine this adorable Flourish Rabbit die from Simon Says Stamp with the Elegant Circles Die Set from Pinkfresh Studio. What I didn’t know is that I’d use one of the oldest embellishments I own and had never opened before (we’re talking 19 years, people).

I cut the bunny from Neenah Classic Crest 110lb coverstock. For the piece that makes the background of the ear, I gently ink blended a little Dried Marigold Distress Ink to give a hint of color. On that same piece, I colored the eye black so it would show through the top piece of the die. I used 2 alcohol ink markers to color the flower and leaves on the rabbit. I also used one of my lightest Copic markers (E40) to add in a hint of shading on a few edges of the rabbit.

I used the largest die in the Pinkfresh Studios Elegant Circles die set and cut it from a pale green cardstock, Soft Seafoam from Stampin’ Up!. I stacked this die cut with 3 more behind it to give it a lot of lift and sandwiched a circle of Heavyweight Vellum from Amazon amongst the stack. After I had glued the rabbit on this portion, I wanted to add tiny flowers and leaves on the bottom edge to give the rabbit something to sit on. I pulled out my basket of “paper flowers.” In this basket is both the kind of paper flowers I would buy from Prima decades ago and tiny little paper flowers from left over die cutting I had done recently. I unearthed an unopened package of tiny white paper flowers and silver brads from a long-ago company called Making Memories. I bought these in about 2007 when I was working for Archiver’s. I paired these cute little flowers with greenery from some large Poppystamps Pop Up Easel card die sets. I put tiny orange Poppystamps Fairy Jewels in the center of all the flowers and glued everything onto my circle frame.
I discovered an already paint splattered piece of Stampin’ Up! Crumb Cake in my stash, cut it into a 5 x 5” square and dry embossed it with the Tufted 3D Embossing Folder from Spellbinders. I backed this with a piece of pale orange cardstock 5.25 x 5.25” and another piece of Crumb Cake, 5.5 x 5.5”. Finally, I stamped a sentiment in dark green ink from the Simon Says Stamp Easter Greetings stamp set and used the Honeybee Stamps Mini Messages Banner die set to cut out the greeting. As usual, I attached this to a white cardbase.
I am entering this card in 3 challenges. First is the Simon Says Stamp Monday Challenge with the theme of Emboss It. Next is the Double Trouble Challenge using the 3-2-1 element (3 Copic markers, 2 new dies, 1 cotton tail) plus Thing 3 theme of Easter. Finally, I am entering the CreaLadies challenge with the theme of animal.
NOTE: Square cards in square envelopes, of any size, cost more to mail than a rectangular envelope. Please check with the USPS to make sure you have enough postage.
A very happy Easter to you!
Affiliate links are used in this post at no cost to you. This means I may receive a small commission when you click through and shop using the links I provide. This helps support me in creating and posting my crafts. Items marked with an asterisk * at first mention were provided by a store or manufacturer. Otherwise, all items were purchased by me. I do not get paid to promote any products.
When I started this card I knew I wanted to combine this adorable Flourish Rabbit die from Simon Says Stamp with the Elegant Circles Die Set from Pinkfresh Studio. What I didn’t know is that I’d use one of the oldest embellishments I own and had never opened before (we’re talking 19 years, people).
I cut the bunny from Neenah Classic Crest 110lb coverstock. For the piece that makes the background of the ear, I gently ink blended a little Dried Marigold Distress Ink to give a hint of color. On that same piece, I colored the eye black so it would show through the top piece of the die. I used 2 alcohol ink markers to color the flower and leaves on the rabbit. I also used one of my lightest Copic markers (E40) to add in a hint of shading on a few edges of the rabbit.
I used the largest die in the Pinkfresh Studios Elegant Circles die set and cut it from a pale green cardstock, Soft Seafoam from Stampin’ Up!. I stacked this die cut with 3 more behind it to give it a lot of lift and sandwiched a circle of Heavyweight Vellum from Amazon amongst the stack. After I had glued the rabbit on this portion, I wanted to add tiny flowers and leaves on the bottom edge to give the rabbit something to sit on. I pulled out my basket of “paper flowers.” In this basket is both the kind of paper flowers I would buy from Prima decades ago and tiny little paper flowers from left over die cutting I had done recently. I unearthed an unopened package of tiny white paper flowers and silver brads from a long-ago company called Making Memories. I bought these in about 2007 when I was working for Archiver’s. I paired these cute little flowers with greenery from some large Poppystamps Pop Up Easel card die sets. I put tiny orange Poppystamps Fairy Jewels in the center of all the flowers and glued everything onto my circle frame.
I discovered an already paint splattered piece of Stampin’ Up! Crumb Cake in my stash, cut it into a 5 x 5” square and dry embossed it with the Tufted 3D Embossing Folder from Spellbinders. I backed this with a piece of pale orange cardstock 5.25 x 5.25” and another piece of Crumb Cake, 5.5 x 5.5”. Finally, I stamped a sentiment in dark green ink from the Simon Says Stamp Easter Greetings stamp set and used the Honeybee Stamps Mini Messages Banner die set to cut out the greeting. As usual, I attached this to a white cardbase.
I am entering this card in 3 challenges. First is the Simon Says Stamp Monday Challenge with the theme of Emboss It. Next is the Double Trouble Challenge using the 3-2-1 element (3 Copic markers, 2 new dies, 1 cotton tail) plus Thing 3 theme of Easter. Finally, I am entering the CreaLadies challenge with the theme of animal.
NOTE: Square cards in square envelopes, of any size, cost more to mail than a rectangular envelope. Please check with the USPS to make sure you have enough postage.
A very happy Easter to you!
Affiliate links are used in this post at no cost to you. This means I may receive a small commission when you click through and shop using the links I provide. This helps support me in creating and posting my crafts. Items marked with an asterisk * at first mention were provided by a store or manufacturer. Otherwise, all items were purchased by me. I do not get paid to promote any products.

I made this graduation card for a dear family friend upon receiving her master's degree. The Yay You die and shadow die were designed by Cathy Zielske for Simon Says Stamp. The brick embossing folder is a retired Stampin' Up! product, but there are very similar, fantastic ones from Honey Bee Stamps here, and Altenew here.

I cut the graduation hat from my Silhouette as I did not have a die. The rainbow was hand drawn using a straight edge and a variety of Copic and other alcohol markers seen here, such as RV55 Hollyhock, RV17 Deep Magenta, R29 Lipstick Red, YR68 Orange, and V06 Lavender.

The sentiment strip was from my stash, along with the flat iridescent sequins. I am entering this at Addicted to CAS #304 and Simply Clean and Simple CAS Card Designs.
I made this graduation card for a dear family friend upon receiving her master's degree. The Yay You die and shadow die were designed by Cathy Zielske for Simon Says Stamp. The brick embossing folder is a retired Stampin' Up! product, but there are very similar, fantastic ones from Honey Bee Stamps here, and Altenew here.
I cut the graduation hat from my Silhouette as I did not have a die. The rainbow was hand drawn using a straight edge and a variety of Copic and other alcohol markers seen here, such as RV55 Hollyhock, RV17 Deep Magenta, R29 Lipstick Red, YR68 Orange, and V06 Lavender.
The sentiment strip was from my stash, along with the flat iridescent sequins. I am entering this at Addicted to CAS #304 and Simply Clean and Simple CAS Card Designs.


