

If you're reading this, first - thanks; second, I am part of today's Simon Says Stamp Instagram Hop. If you head to my tinypaperblossom account, you can comment on each maker's IG post and be entered into a drawing for a $25 SSS gift card. It's a sweet deal.

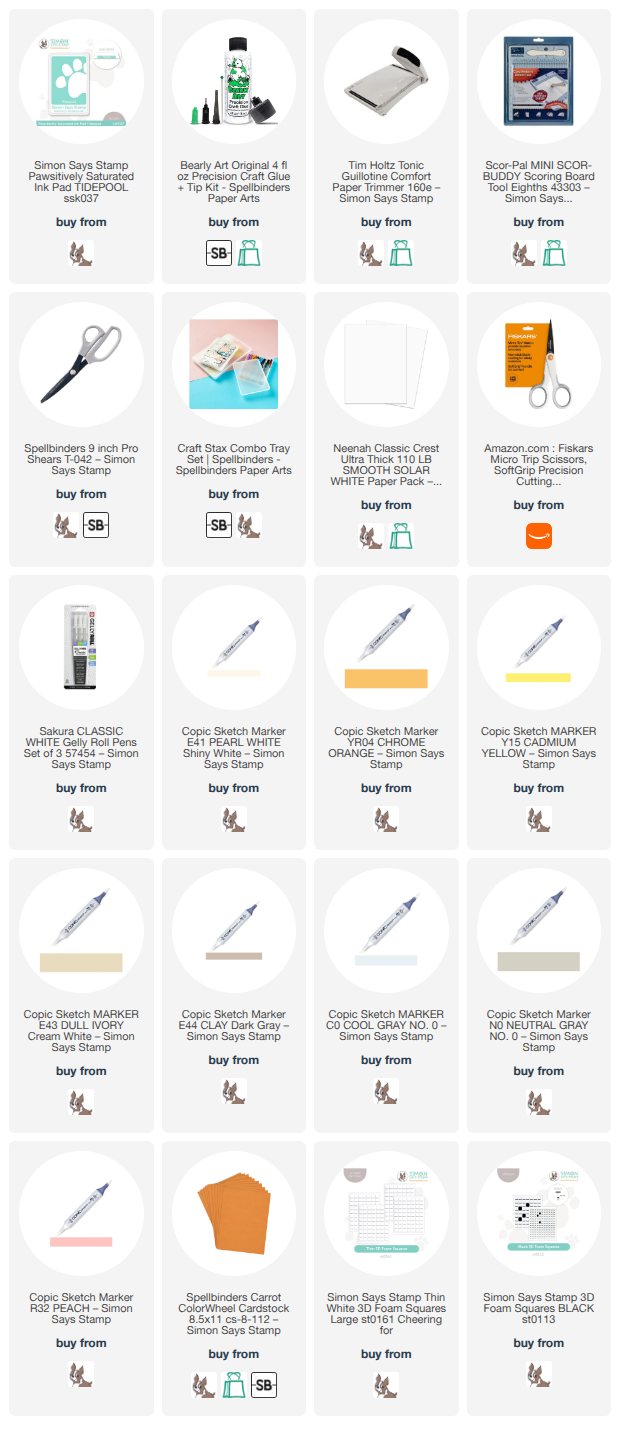
I used the Simon Says Stamp Tidepool ink and the large Pinkfresh Studio blending brushes to ink blend a glow in the center of the card. I masked off the bottom of my ink blend so that when I added the sentiment strip, the glow would not continue below it. I used Versa Clair Black ink to stamp with the 2-line sentiment onto Spellbinders Colorwheel Carrot cardstock. I used a square punch to cut the fishtail on each end of the sentiment strip. I adhered everything with a mix of foam adhesive in 2 different heights and liquid glue. Finally, I used some Poppystamp Fairy Jewels to add a bit of sparkle around the image.
Affiliate links are used in this post at no cost to you. This means I may receive a small commission when you click through and shop using the links I provide. This helps support me in creating and posting my crafts. Items marked with an asterisk * at first mention were provided by a store or manufacturer. Otherwise, all items were purchased by me.
If you're reading this, first - thanks; second, I am part of today's Simon Says Stamp Instagram Hop. If you head to my tinypaperblossom account, you can comment on each maker's IG post and be entered into a drawing for a $25 SSS gift card. It's a sweet deal.
I used the Simon Says Stamp Tidepool ink and the large Pinkfresh Studio blending brushes to ink blend a glow in the center of the card. I masked off the bottom of my ink blend so that when I added the sentiment strip, the glow would not continue below it. I used Versa Clair Black ink to stamp with the 2-line sentiment onto Spellbinders Colorwheel Carrot cardstock. I used a square punch to cut the fishtail on each end of the sentiment strip. I adhered everything with a mix of foam adhesive in 2 different heights and liquid glue. Finally, I used some Poppystamp Fairy Jewels to add a bit of sparkle around the image.
Affiliate links are used in this post at no cost to you. This means I may receive a small commission when you click through and shop using the links I provide. This helps support me in creating and posting my crafts. Items marked with an asterisk * at first mention were provided by a store or manufacturer. Otherwise, all items were purchased by me.

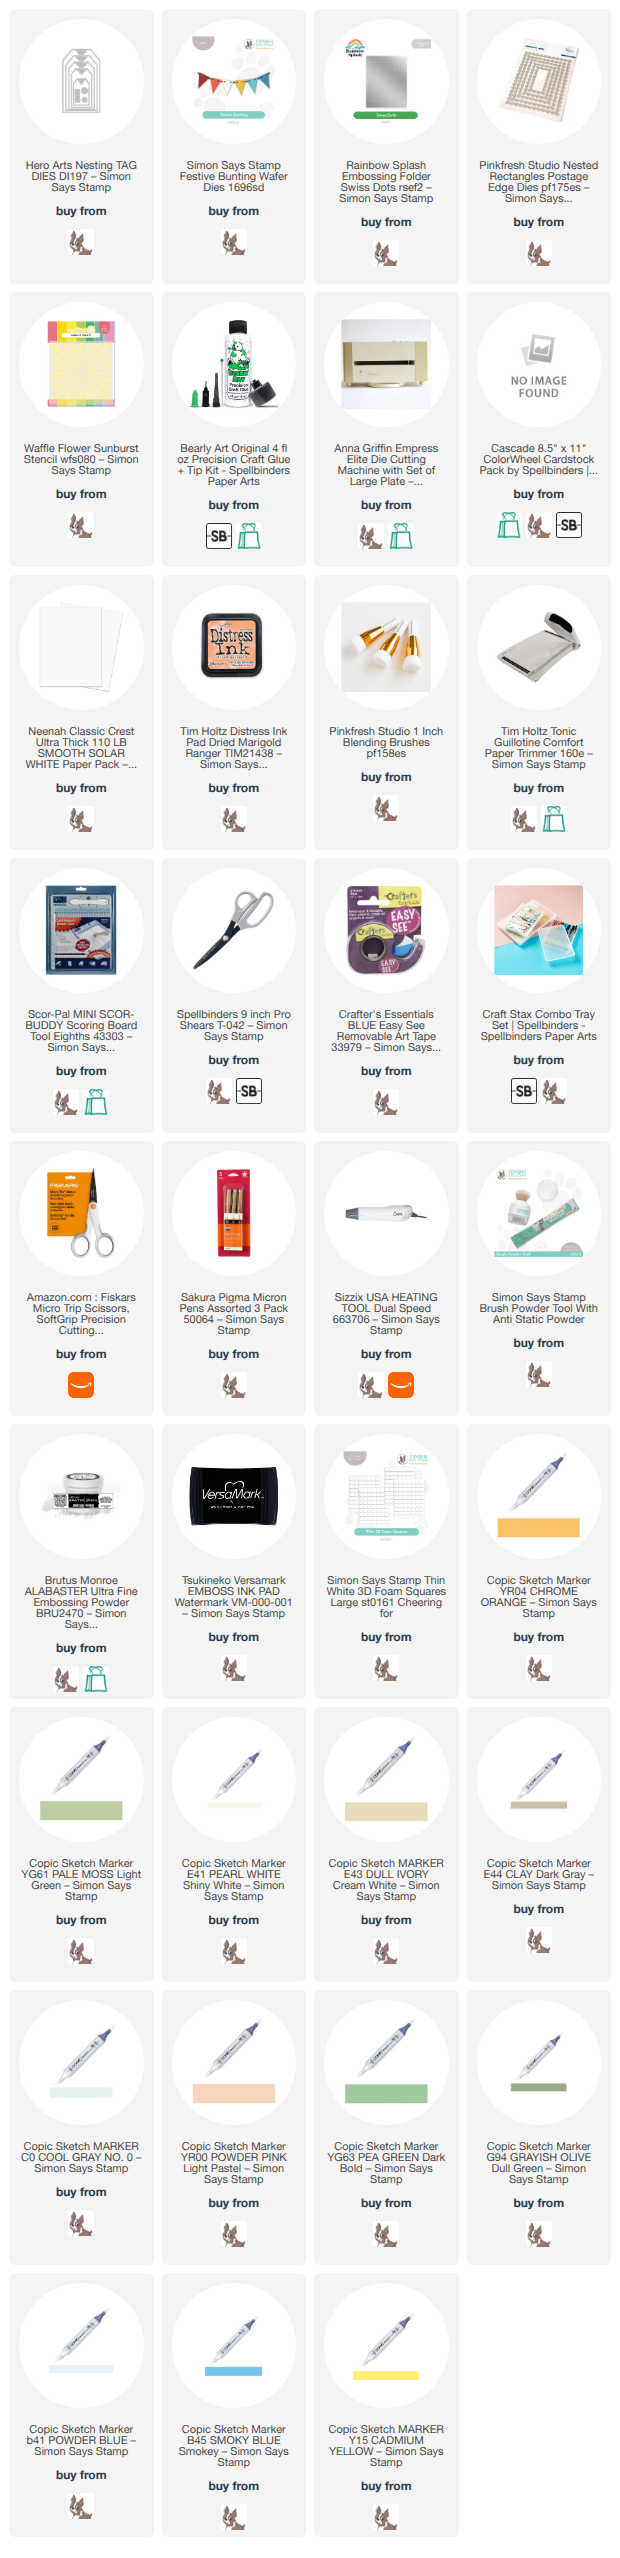
This card was inspired by one of my favorite card makers, Inge Groot. I used the wonderful Coffee with Friends* stamp set from the new Every Happiness release from Simon Says Stamp. I Copic colored the bear and the tree using E41, E43, E44, Y15, YR04, C0, B41, B45, G94, YG61, YG63, YR00. The remaining colors I used were Dick Blick Brush Markers and Spectrum Noir markers. I highlighted everything using a Gelly Roll white pen.

I used an old Sizzix Swiss Dot embossing folder (it's retired and I've linked to one by Simon Says Stamp) with the white tag I cut using Hero Arts Nested Tag Dies. I made the frame using Cascade cardstock from Spellbinders and an old Poppystamps die set called Scalloped Stitch Frames (again, this is retired so I've linked to a set of very similar double stitch frames by Pinkfresh Studio.) I used Dried Marigold Distress Ink to ink blend through the Sunburst Stencil by Waffle Flower. I cut this piece with the Pinkfresh Studios Nested Rectangles Postage Edge dies. Behind all this is a small scrap of black and white lined paper from an old MFT paper pad.
The sentiment is part of this sweet stamp set. I heat embossed it on black with Brutus Monroe Alabaster embossing powder.
The fun part is the Simon Says Stamp Festive Bunting die I used in the top left. I cut the triangle parts with 3 different colors (the blue is the Cascade I used earlier), and then the string part from black. The holes are large enough to easily snake the black string part through the holes.
I used a variety of foam and liquid glue to adhere everything to an A2 card base made with Neenah Classic Crest Solar White 110lb.
Affiliate links are used in this post at no cost to you. This means I may receive a small commission when you click through and shop using the links I provide. This helps support me in creating and posting my crafts. Items marked with an asterisk * at first mention were provided by a store or manufacturer. Otherwise, all items were purchased by me.
This card was inspired by one of my favorite card makers, Inge Groot. I used the wonderful Coffee with Friends* stamp set from the new Every Happiness release from Simon Says Stamp. I Copic colored the bear and the tree using E41, E43, E44, Y15, YR04, C0, B41, B45, G94, YG61, YG63, YR00. The remaining colors I used were Dick Blick Brush Markers and Spectrum Noir markers. I highlighted everything using a Gelly Roll white pen.
I used an old Sizzix Swiss Dot embossing folder (it's retired and I've linked to one by Simon Says Stamp) with the white tag I cut using Hero Arts Nested Tag Dies. I made the frame using Cascade cardstock from Spellbinders and an old Poppystamps die set called Scalloped Stitch Frames (again, this is retired so I've linked to a set of very similar double stitch frames by Pinkfresh Studio.) I used Dried Marigold Distress Ink to ink blend through the Sunburst Stencil by Waffle Flower. I cut this piece with the Pinkfresh Studios Nested Rectangles Postage Edge dies. Behind all this is a small scrap of black and white lined paper from an old MFT paper pad.
The sentiment is part of this sweet stamp set. I heat embossed it on black with Brutus Monroe Alabaster embossing powder.
The fun part is the Simon Says Stamp Festive Bunting die I used in the top left. I cut the triangle parts with 3 different colors (the blue is the Cascade I used earlier), and then the string part from black. The holes are large enough to easily snake the black string part through the holes.
I used a variety of foam and liquid glue to adhere everything to an A2 card base made with Neenah Classic Crest Solar White 110lb.
Affiliate links are used in this post at no cost to you. This means I may receive a small commission when you click through and shop using the links I provide. This helps support me in creating and posting my crafts. Items marked with an asterisk * at first mention were provided by a store or manufacturer. Otherwise, all items were purchased by me.

The delightful Coffee with Friends* from the new 2026 Simon Says Stamp Every Happiness release is full of adorable images to color, and great, easy-to-use sentiments (even if you’re a tea drinker).
I decided to create a pop up card using the excellent instructions from Jennifer McGuire’s YouTube video “Easy Pop-up Frame Cards” from September 2023. My base is a pale peachy-pink cardstock measuring 4.25” x 9.5”. I scored both short ends at .25”, 1”, and 2”. I used a pink ink and a Pinkfresh Studio large blending brush to stencil over the Lawn Fawn Brick stencil in the middle of the card base. My ‘floor’ is a kraft cardstock that is scored at every .5” to give the sense of a wood plank floor (I decided not to make this wood effect more prominent to not distract from the rest of the scene). I edged the floor pieces with Tim Holtz Distress Ink in Pumice Stone.

I folded the card base along the scorelines and then, using 2 Paper Rose nested rectangle dies (I don’t see these for sale anywhere, so I’ve linked to an almost identical Hero Arts set), I die cut 2 identical frames (gluing them together for strength) from Taylored Expressions Papaya cardstock. I adhered a small strip of the inked kraft ‘floor’ to the back of the frame. Next, following Jennifer’s instructions, I applied liquid glue to this frame and floor piece on the left and right edges only and adhered it to the .25” scored edge on the left and right of the cardbase.
On to the critters, and the sweet accessories like the chair, table, vase and counter/cupcake stand. They’re adorable. I stamped with my new favorite black ink, Gina K Amalgam black ink on Neenah Classic Crest cover stock 110lb. I colored them with Copic markers, some Dick Blick Studio Brush alcohol markers and some Spectrum Noir markers. Here is my list of Copics: E31, E33, E35, E40, E41, E43, E44, E47, E11, E13, E15, C0, N0, R00, R20, R32, B0000, BG70, BG72, BG75, YR00, YG61, YG63, G94, B41, B45, B21. Feel free to email me or message me via Instagram for more details or to learn which Dick Blick markers I used. I used a white Gelly Roll pen to highlight all the images I colored.
I fussy-cut all the animals (didn’t have the dies). The Elizabeth Craft Designs Fine Pointed Scissors are a game changer for detailed cutting. I don’t use them for big edges that are easy to cut with small scissors, but for areas like under an arm, between legs, around a stem. If you don’t have a set of these, put them on your wish list now. I carefully edged the cut images with a small or bullet-tipped black felt marker. The pen has to be held behind the cut piece so if you slip, you only mark on the backside. Jennifer McGuire gave this same tip in the video I referenced above.
I glued all the critters into place as shown, providing some depth using foam adhesive in places. I heat embossed my sentiment with Brutus Monroe Alabaster embossing powder on brown cardstock and glued it on.
This card will flatten to fit into an A2 envelope.
Affiliate links are used in this post at no cost to you. This means I may receive a small commission when you click through and shop using the links I provide. This helps support me in creating and posting my crafts. Items marked with an asterisk * at first mention were provided by a store or manufacturer. Otherwise, all items were purchased by me.

The delightful Coffee with Friends* from the new 2026 Simon Says Stamp Every Happiness release is full of adorable images to color, and great, easy-to-use sentiments (even if you’re a tea drinker).
I decided to create a pop up card using the excellent instructions from Jennifer McGuire’s YouTube video “Easy Pop-up Frame Cards” from September 2023. My base is a pale peachy-pink cardstock measuring 4.25” x 9.5”. I scored both short ends at .25”, 1”, and 2”. I used a pink ink and a Pinkfresh Studio large blending brush to stencil over the Lawn Fawn Brick stencil in the middle of the card base. My ‘floor’ is a kraft cardstock that is scored at every .5” to give the sense of a wood plank floor (I decided not to make this wood effect more prominent to not distract from the rest of the scene). I edged the floor pieces with Tim Holtz Distress Ink in Pumice Stone.
I folded the card base along the scorelines and then, using 2 Paper Rose nested rectangle dies (I don’t see these for sale anywhere, so I’ve linked to an almost identical Hero Arts set), I die cut 2 identical frames (gluing them together for strength) from Taylored Expressions Papaya cardstock. I adhered a small strip of the inked kraft ‘floor’ to the back of the frame. Next, following Jennifer’s instructions, I applied liquid glue to this frame and floor piece on the left and right edges only and adhered it to the .25” scored edge on the left and right of the cardbase.
On to the critters, and the sweet accessories like the chair, table, vase and counter/cupcake stand. They’re adorable. I stamped with my new favorite black ink, Gina K Amalgam black ink on Neenah Classic Crest cover stock 110lb. I colored them with Copic markers, some Dick Blick Studio Brush alcohol markers and some Spectrum Noir markers. Here is my list of Copics: E31, E33, E35, E40, E41, E43, E44, E47, E11, E13, E15, C0, N0, R00, R20, R32, B0000, BG70, BG72, BG75, YR00, YG61, YG63, G94, B41, B45, B21. Feel free to email me or message me via Instagram for more details or to learn which Dick Blick markers I used. I used a white Gelly Roll pen to highlight all the images I colored.
I fussy-cut all the animals (didn’t have the dies). The Elizabeth Craft Designs Fine Pointed Scissors are a game changer for detailed cutting. I don’t use them for big edges that are easy to cut with small scissors, but for areas like under an arm, between legs, around a stem. If you don’t have a set of these, put them on your wish list now. I carefully edged the cut images with a small or bullet-tipped black felt marker. The pen has to be held behind the cut piece so if you slip, you only mark on the backside. Jennifer McGuire gave this same tip in the video I referenced above.
I glued all the critters into place as shown, providing some depth using foam adhesive in places. I heat embossed my sentiment with Brutus Monroe Alabaster embossing powder on brown cardstock and glued it on.
This card will flatten to fit into an A2 envelope.
Affiliate links are used in this post at no cost to you. This means I may receive a small commission when you click through and shop using the links I provide. This helps support me in creating and posting my crafts. Items marked with an asterisk * at first mention were provided by a store or manufacturer. Otherwise, all items were purchased by me.

Back on the blog after a long while. Just got busy with life stuff over the summer. I know you know what I mean.
I am back with not one, but three cards all for Autumn and Halloween. In between working on birthday and Christmas cards, I’ve continued to play with my Stamps by Judith & Heather. I enjoy adding layers to even a flat design as I just love the dimension and "shadow" it adds to a card.


Here are all the supplies I used:
Cardstock: Neenah Classic Crest Solar White 110lb cover stock, Stampin’ Up! Basic Black, Soft Suede (retired), Hello Honey (r), Pumpkin Pie.
Ink: Memento Tuxedo Black
Stamps: Stamps by Judith & Heather - Scruffy Pup, Trick-or-Treat Pumpkin, all tiny “stubby” stamps; Sentiments - Happy Halloween from SU’s And Many More, Autumn Greetings from Autumn Wreath set by Pretty Pink Posh
Patterned Paper: All from My Favorite Things
Die: Mini Slimline Stitched Layers by Popsiclesticks (Etsy store)
Markers: Mostly Copic, a few are Spectrum Noir.
Embellishment: Tim Holtz Tiny Attacher, black gel pen to add movement lines
These were fun to make, except for the fussy cutting it took to make itty bitty leaf and candy corn masks.
I am entering all three cards in the Sept 11 Simon Says Stamp Wednesday Challenge featuring Four Legged Friends, and the Tic Tac Toe C256 Challenge. I am also entering the autumn themed card in the Sept 5 As You Like It Challenge.
Back on the blog after a long while. Just got busy with life stuff over the summer. I know you know what I mean.
I am back with not one, but three cards all for Autumn and Halloween. In between working on birthday and Christmas cards, I’ve continued to play with my Stamps by Judith & Heather. I enjoy adding layers to even a flat design as I just love the dimension and "shadow" it adds to a card.
Here are all the supplies I used:
Cardstock: Neenah Classic Crest Solar White 110lb cover stock, Stampin’ Up! Basic Black, Soft Suede (retired), Hello Honey (r), Pumpkin Pie.
Ink: Memento Tuxedo Black
Stamps: Stamps by Judith & Heather - Scruffy Pup, Trick-or-Treat Pumpkin, all tiny “stubby” stamps; Sentiments - Happy Halloween from SU’s And Many More, Autumn Greetings from Autumn Wreath set by Pretty Pink Posh
Patterned Paper: All from My Favorite Things
Die: Mini Slimline Stitched Layers by Popsiclesticks (Etsy store)
Markers: Mostly Copic, a few are Spectrum Noir.
Embellishment: Tim Holtz Tiny Attacher, black gel pen to add movement lines
These were fun to make, except for the fussy cutting it took to make itty bitty leaf and candy corn masks.
I am entering all three cards in the Sept 11 Simon Says Stamp Wednesday Challenge featuring Four Legged Friends, and the Tic Tac Toe C256 Challenge. I am also entering the autumn themed card in the Sept 5 As You Like It Challenge.
Whew, June has been a whirlwind. My family was in Denver on June 1 for my niece's lovely wedding. I've attended a scrapbooking convention in Denton, TX and had a fun four days with some dear friends from high school, most recently.
A little family-run stamp company (at least 35 years old) called Stamps by Judith & Heather is always at these conventions. They make hand-drawn stamps that are all meant for scene building. Many of their stamps are woodblock, especially the small ones that are mounted on the end of a wooden dowel - you know, peg stamps, also known as "stubbies." The fact that you can mix and match hundreds of different images (lots of florals, animals, cute containers, insects, scenery and more) is what makes their stamps so unique and fun.
You can find some of their videos on Facebook and some older ones on YouTube. The stamping goes FAST, which is fun. Heather does ALL her coloring on 22lb copy paper (later glued to cardstock) and then colors with Tombow water-based markers and a blender pen.


I used a scruffy dog, grass, a tin bucket, leaves, mushrooms, a small green plant, a pumpkin and a little heart to build my scene. I used Post-It masking with the bucket, dog, pumpkins and mushrooms to make them appear layered like I wanted. I colored with Copics, Spectrum Noir markers and Dick Blick alcohol ink markers. I added the dots line at the end and added a Simon Says Stamp sentiment strip along with a tiny strip of Stampin' Up's Poppy Parade CS, with a Tiny Attacher by Tim Holtz in the left top corner.

Cardstock was Neenah Solar White Classic Crest 110lb, plus Stampin' Up's Mossy Meadow. I die cut the card front panels with mini slimline dies by Popsicle Sticks from Etsy. Rest assured, I'll be using more and more of these stamps on my cards.

I am entering this card at Addicted to Stamps & More #471, The Outlawz Challenges, and Double Trouble.
Whew, June has been a whirlwind. My family was in Denver on June 1 for my niece's lovely wedding. I've attended a scrapbooking convention in Denton, TX and had a fun four days with some dear friends from high school, most recently.
A little family-run stamp company (at least 35 years old) called Stamps by Judith & Heather is always at these conventions. They make hand-drawn stamps that are all meant for scene building. Many of their stamps are woodblock, especially the small ones that are mounted on the end of a wooden dowel - you know, peg stamps, also known as "stubbies." The fact that you can mix and match hundreds of different images (lots of florals, animals, cute containers, insects, scenery and more) is what makes their stamps so unique and fun.
You can find some of their videos on Facebook and some older ones on YouTube. The stamping goes FAST, which is fun. Heather does ALL her coloring on 22lb copy paper (later glued to cardstock) and then colors with Tombow water-based markers and a blender pen.
I used a scruffy dog, grass, a tin bucket, leaves, mushrooms, a small green plant, a pumpkin and a little heart to build my scene. I used Post-It masking with the bucket, dog, pumpkins and mushrooms to make them appear layered like I wanted. I colored with Copics, Spectrum Noir markers and Dick Blick alcohol ink markers. I added the dots line at the end and added a Simon Says Stamp sentiment strip along with a tiny strip of Stampin' Up's Poppy Parade CS, with a Tiny Attacher by Tim Holtz in the left top corner.
Cardstock was Neenah Solar White Classic Crest 110lb, plus Stampin' Up's Mossy Meadow. I die cut the card front panels with mini slimline dies by Popsicle Sticks from Etsy. Rest assured, I'll be using more and more of these stamps on my cards.
I am entering this card at Addicted to Stamps & More #471, The Outlawz Challenges, and Double Trouble.

There is nothing quite as sweet as the images by Anita Jeram for Colorado Craft Company. I pulled out these Tea Time sweeties to enter the Color Throwdown Challenge #743. Lime, Pink and White are the colors required with neutrals (gray here) allowed. I am also entering the Art Impressions Challenge. I made a video of putting together this card including all my coloring and I plan to edit it to use as an Instagram reel in the coming days. My files are larger than normal because I just left my phone recording the entire time I was coloring all the images. Gonna be a bugger to edit. (Edit: Video is finished and on my reels on IG @tinypaperblossom.)

I colored all the images with alcohol markers by Copic, Dick Blick, and Spectrum Noir. I cut them out with the matching dies. Next, I used Sweetly Stitched Shapes dies from Stampin' Up! to cut out all the stitched circles from old Stampin' Up! and Jillibean Soup paper. I used a die from the Mama Elephant Window Dressings die set to cut the white panel. I used plenty of foam adhesive to build the dimension on this card. Finally, I used a sentiment from My Favorite Things Birdie Brown's Greetings Galore attached with the Tim Holtz Tiny Attacher. I made the fishtail with a small square punch.
I have many more images from Colorado Craft Company and Anita Jeram colored; I just need to make them into cards.
Have a great day!
There is nothing quite as sweet as the images by Anita Jeram for Colorado Craft Company. I pulled out these Tea Time sweeties to enter the Color Throwdown Challenge #743. Lime, Pink and White are the colors required with neutrals (gray here) allowed. I am also entering the Art Impressions Challenge. I made a video of putting together this card including all my coloring and I plan to edit it to use as an Instagram reel in the coming days. My files are larger than normal because I just left my phone recording the entire time I was coloring all the images. Gonna be a bugger to edit. (Edit: Video is finished and on my reels on IG @tinypaperblossom.)
I colored all the images with alcohol markers by Copic, Dick Blick, and Spectrum Noir. I cut them out with the matching dies. Next, I used Sweetly Stitched Shapes dies from Stampin' Up! to cut out all the stitched circles from old Stampin' Up! and Jillibean Soup paper. I used a die from the Mama Elephant Window Dressings die set to cut the white panel. I used plenty of foam adhesive to build the dimension on this card. Finally, I used a sentiment from My Favorite Things Birdie Brown's Greetings Galore attached with the Tim Holtz Tiny Attacher. I made the fishtail with a small square punch.
I have many more images from Colorado Craft Company and Anita Jeram colored; I just need to make them into cards.
Have a great day!
When I received all the new floral dies from Poppystamps, I was super inspired by a post I had seen on Pinterest. I decided to CASE the amazing Zsoka Marko and her December 2022 card that you can see here on her blog A Pocket Full of Scrap.


When I received all the new floral dies from Poppystamps, I was super inspired by a post I had seen on Pinterest. I decided to CASE the amazing Zsoka Marko and her December 2022 card that you can see here on her blog A Pocket Full of Scrap.


I am also entering the As You Like It Challenge. I chose this design because I love squares and tiny, little details surrounded by clean space. I love miniatures (how I never owned a doll house growing up, I'll never know) and so coloring and layering *tiny paper blossoms* (ahem) on top of a stitched square frame was right up my alley.

I am also entering the As You Like It Challenge. I chose this design because I love squares and tiny, little details surrounded by clean space. I love miniatures (how I never owned a doll house growing up, I'll never know) and so coloring and layering *tiny paper blossoms* (ahem) on top of a stitched square frame was right up my alley.


A clean and simple feline card came together for several challenges. The challenges called for using green, making it vibrant, using a pet, using a cat, and using a curve. I love trying to hit so many requirements with one card. It's like solving a puzzle. The cat rubber stamp I've had for several years. I purchased it at The Paper Crown in Waco, Texas. It's called Meow Mix but I'm going to need to research the manufacturer. I stamped it on Gina K Pure Luxury Heavyweight white cardstock with Memento Tuxedo Black ink. I colored in tiny portions with gray and pink Copic and Spectrum Noir markers. I fussy cut it. I used a circle cutter to cut a large circle from the corner of a piece of white cardstock. Underneath that I put the green and white polka dot paper from Jillibean Soup (Soup Staples in Olive Sugar). I punched three hearts from SU's Melon Mambo cardstock with a retired triple heart punch from Stampin' Up!. I adhered the cat with foam adhesive and then the hearts, and then added the sentiment strip from Paper Rose.
A clean and simple feline card came together for several challenges. The challenges called for using green, making it vibrant, using a pet, using a cat, and using a curve. I love trying to hit so many requirements with one card. It's like solving a puzzle. The cat rubber stamp I've had for several years. I purchased it at The Paper Crown in Waco, Texas. It's called Meow Mix but I'm going to need to research the manufacturer. I stamped it on Gina K Pure Luxury Heavyweight white cardstock with Memento Tuxedo Black ink. I colored in tiny portions with gray and pink Copic and Spectrum Noir markers. I fussy cut it. I used a circle cutter to cut a large circle from the corner of a piece of white cardstock. Underneath that I put the green and white polka dot paper from Jillibean Soup (Soup Staples in Olive Sugar). I punched three hearts from SU's Melon Mambo cardstock with a retired triple heart punch from Stampin' Up!. I adhered the cat with foam adhesive and then the hearts, and then added the sentiment strip from Paper Rose.

I'm over on the Poppystamps blog today with this sweet slimline card featuring their Whittle Rainbow Unicorn die kit. It comes with two unicorns, clouds, a rainbow, stars, a moon and a heart. Basically, if Lucky Charms was a die kit, this would be it. It also includes a small set of sentiment stamps.

I love slimline cards and made this into one with three circular windows. I chose 3 pieces of blue cardstock for the sky backgrounds and punched out one 2.5" circle from each of them. Next I used almost all the dies in the kit to cut a variety of shapes. I also cut out 1 rainbow in toned-down rainbow shades of cardstock. The rainbow die simply cuts 6 rainbow shaped stripes, so there is still a need to glue the stripes down side by side to either your main card, or to another piece of small cardstock. I chose to glue them on to a scrap piece. Then I promptly cut it in half to use in two of the three windows.
I used the panel with the three circle windows to guide me in what I put where. I glued the background "scenes" directly onto the blue circles. Next, I glued the foreground pieces, onto the front of the white panel. I used glitter paper for my unicorn wings and horns. The manes I colored with a pale purple Spectrum Noir marker. Finally, I used foam adhesive to pop up the front panel onto the decorated card. My last move was to heat emboss the sentiment onto black cardstock with white embossing powder and glue it to the card front.
I want to give a special shout out to #VistaCreate. I was able to create my watermark using a font I uploaded, and get a transparent background, all without having to pay any subscription fee.
Ingredients:
CS: Neenah Classic Crest Solar White 110lb, Black cardstock, Recollections 65lb, Memory Box 6x6" paper pads for all other colored cardstock and glitter cardstock
Dies & Stamps: All from Poppystamps Whittle Rainbow Unicorn Kit
Marker: Spectrum Noir TriBlend Hydrangea - lightest shade
Ink: Ranger Embossing Ink
Embossing powder: Taylored Expressions Detail White Embossing Powder
I'm over on the Poppystamps blog today with this sweet slimline card featuring their Whittle Rainbow Unicorn die kit. It comes with two unicorns, clouds, a rainbow, stars, a moon and a heart. Basically, if Lucky Charms was a die kit, this would be it. It also includes a small set of sentiment stamps.
I love slimline cards and made this into one with three circular windows. I chose 3 pieces of blue cardstock for the sky backgrounds and punched out one 2.5" circle from each of them. Next I used almost all the dies in the kit to cut a variety of shapes. I also cut out 1 rainbow in toned-down rainbow shades of cardstock. The rainbow die simply cuts 6 rainbow shaped stripes, so there is still a need to glue the stripes down side by side to either your main card, or to another piece of small cardstock. I chose to glue them on to a scrap piece. Then I promptly cut it in half to use in two of the three windows.
I used the panel with the three circle windows to guide me in what I put where. I glued the background "scenes" directly onto the blue circles. Next, I glued the foreground pieces, onto the front of the white panel. I used glitter paper for my unicorn wings and horns. The manes I colored with a pale purple Spectrum Noir marker. Finally, I used foam adhesive to pop up the front panel onto the decorated card. My last move was to heat emboss the sentiment onto black cardstock with white embossing powder and glue it to the card front.
I want to give a special shout out to #VistaCreate. I was able to create my watermark using a font I uploaded, and get a transparent background, all without having to pay any subscription fee.
Ingredients:
CS: Neenah Classic Crest Solar White 110lb, Black cardstock, Recollections 65lb, Memory Box 6x6" paper pads for all other colored cardstock and glitter cardstock
Dies & Stamps: All from Poppystamps Whittle Rainbow Unicorn Kit
Marker: Spectrum Noir TriBlend Hydrangea - lightest shade
Ink: Ranger Embossing Ink
Embossing powder: Taylored Expressions Detail White Embossing Powder

I just love a good card challenge (or two, or three). I decided to make a card to enter both a MFT Stamps challenge and the Color Throwdown Challenge this week. The MFT Challenge called for a mini slimline with the measurements of 3 x 6". I've only made two of these before, so I was up for the challenge again. Color Throwdown asked for using bright pink, bright turquoise blue, bright lime green and black. This adorable van and surfboard from MFT's Sunny Vibes stamp set was going to be perfect (and a world away from all the Christmas stuff I've been making).

I am a giant fan of Inge Groot, one of the members of the MFT Design Team and an amazing card maker. Check out her excellent work here. I wanted to use her style of a white background and then plenty of colorful layers. I colored the van and surfboard with alcohol ink markers and simply skipped the items that would not have been one of the 4 colors in the challenge, hence why the tree trunks are white and not brown (an Inge Groot trick). I noticed that if I put the van down onto a white square it was really going to be white on white. So, I lightly inked the white square with Tumbled Glass Distress Ink to create some definition while still keeping to my color scheme. I glued down two die cut trees and then popped up the van/surfboard image on a die cut stitched square.
To create more color I added two more die cut squares (the blue is a little larger) sticking with my color scheme. To work the black in, I added a fishtail banner straight down the center of the card with a black and white polka dot paper. Then I used a sentiment strip popped up off a striped black and white scrap for more definition.
I was very pleased with how I worked all my colors together. I could get very used to this little format.
Challenges I'm entering: MFT Slimline Challenge, Color Throwdown Challenge ctd#672
Ingredients:
CS: Neenah Classic Crest Solar White 110lb
Stamps: Sunny Vibes by My Favorite Things
Dies: Sunny Vibes by My Favorite Things, Stampin' Up! Stitched Shapes, Art Impressions Nested Stitched Squares
Patterned Paper: Black & white polka dot by The Paper Studio, Poppin' Polka Dots by MFT Stamps, blue stripe is Stampin' Up! designer series paper (retired), black and white stripe is from the My Bright Life 6x6 paper pad by Jen Hadfield Home Made by American Crafts
Embellishments: Clear Wink of Stella on headlamp, Sentiment Strip by Paper Roses Black & White Sentiment Sheets
Markers: Copic, Spectrum Noir & Dick Blick
I just love a good card challenge (or two, or three). I decided to make a card to enter both a MFT Stamps challenge and the Color Throwdown Challenge this week. The MFT Challenge called for a mini slimline with the measurements of 3 x 6". I've only made two of these before, so I was up for the challenge again. Color Throwdown asked for using bright pink, bright turquoise blue, bright lime green and black. This adorable van and surfboard from MFT's Sunny Vibes stamp set was going to be perfect (and a world away from all the Christmas stuff I've been making).
I am a giant fan of Inge Groot, one of the members of the MFT Design Team and an amazing card maker. Check out her excellent work here. I wanted to use her style of a white background and then plenty of colorful layers. I colored the van and surfboard with alcohol ink markers and simply skipped the items that would not have been one of the 4 colors in the challenge, hence why the tree trunks are white and not brown (an Inge Groot trick). I noticed that if I put the van down onto a white square it was really going to be white on white. So, I lightly inked the white square with Tumbled Glass Distress Ink to create some definition while still keeping to my color scheme. I glued down two die cut trees and then popped up the van/surfboard image on a die cut stitched square.
To create more color I added two more die cut squares (the blue is a little larger) sticking with my color scheme. To work the black in, I added a fishtail banner straight down the center of the card with a black and white polka dot paper. Then I used a sentiment strip popped up off a striped black and white scrap for more definition.
I was very pleased with how I worked all my colors together. I could get very used to this little format.
Challenges I'm entering: MFT Slimline Challenge, Color Throwdown Challenge ctd#672
Ingredients:
CS: Neenah Classic Crest Solar White 110lb
Stamps: Sunny Vibes by My Favorite Things
Dies: Sunny Vibes by My Favorite Things, Stampin' Up! Stitched Shapes, Art Impressions Nested Stitched Squares
Patterned Paper: Black & white polka dot by The Paper Studio, Poppin' Polka Dots by MFT Stamps, blue stripe is Stampin' Up! designer series paper (retired), black and white stripe is from the My Bright Life 6x6 paper pad by Jen Hadfield Home Made by American Crafts
Embellishments: Clear Wink of Stella on headlamp, Sentiment Strip by Paper Roses Black & White Sentiment Sheets
Markers: Copic, Spectrum Noir & Dick Blick


Except for the sweet MFT figures, I custom created every die cut myself on my Silhouette Cameo 2. The background is using Distress Oxide inks blended together. All the coloring was done using alcohol markers. I printed the sentiments from my PC using a font called Libel Suit. The shaker elements are a mix of several things.
I am entering this into the MFT Sketch Challenge.
Ingredients:
CS: Neenah Classic Crest Solar White 110lb, lightweight CS for computer printing, light blue and glitter paper from my stash; acetate sheets
Stamps: MFT Stamps Warm Hugs & Frosty Kisses
Dies: MFT Stamps Warm Hugs & Frosty Kisses, all other shapes were custom created on Silhouette - no downloaded files
Ink: Memento Tuxedo Black, Distress Ink Tumbled Glass, Distress Oxide Faded Jeans and Shaded Lilac
Markers: Copic, Dick Blick, Spectrum Noir Tri-blend Dull Green Blend,
Embellishments: Shaker - a combination of Recollections Specialty Christmas Glitter Snowflakes, Dress My Craft White Sunshine Sequins and Czech Seed Beads in Canadian White by John Bead; Uniball White Signo Gel Pen, mini jingle bells from craft store, ribbon, baker's twine, foam tape
Except for the sweet MFT figures, I custom created every die cut myself on my Silhouette Cameo 2. The background is using Distress Oxide inks blended together. All the coloring was done using alcohol markers. I printed the sentiments from my PC using a font called Libel Suit. The shaker elements are a mix of several things.
I am entering this into the MFT Sketch Challenge.
Ingredients:
CS: Neenah Classic Crest Solar White 110lb, lightweight CS for computer printing, light blue and glitter paper from my stash; acetate sheets
Stamps: MFT Stamps Warm Hugs & Frosty Kisses
Dies: MFT Stamps Warm Hugs & Frosty Kisses, all other shapes were custom created on Silhouette - no downloaded files
Ink: Memento Tuxedo Black, Distress Ink Tumbled Glass, Distress Oxide Faded Jeans and Shaded Lilac
Markers: Copic, Dick Blick, Spectrum Noir Tri-blend Dull Green Blend,
Embellishments: Shaker - a combination of Recollections Specialty Christmas Glitter Snowflakes, Dress My Craft White Sunshine Sequins and Czech Seed Beads in Canadian White by John Bead; Uniball White Signo Gel Pen, mini jingle bells from craft store, ribbon, baker's twine, foam tape


Thanksgiving is right around the corner and I wasn't going to miss a chance to play with my sweet My Favorite Things Harvest Mouse stamp and die set. A friend of mine gave me a set of neutral colored mini slimline notecards (they open at the top, not the side) and envelopes and I immediately thought I could do something small and simple with them.
I colored all the images with alcohol markers, die cut them and glued them above a sentiment I stamped directly on the card. I wanted to leave a lot of open space above the images to make it a true clean and simple design. Now, how easy was that?
Ingredients:
CS: Pre-made Stampin' Up! Sahara Sand mini-slimline notecards, Neenah Solar White Classic Crest 110lb
Ink: Memento Tuxedo Black
Markers: From Copic, Dick Blick, Spectrum Noir
Stamps: MFT Harvest Mouse with matching dies, sentiment from Stampin' Up! Lighthearted Leaves
Thanksgiving is right around the corner and I wasn't going to miss a chance to play with my sweet My Favorite Things Harvest Mouse stamp and die set. A friend of mine gave me a set of neutral colored mini slimline notecards (they open at the top, not the side) and envelopes and I immediately thought I could do something small and simple with them.
I colored all the images with alcohol markers, die cut them and glued them above a sentiment I stamped directly on the card. I wanted to leave a lot of open space above the images to make it a true clean and simple design. Now, how easy was that?
Ingredients:
CS: Pre-made Stampin' Up! Sahara Sand mini-slimline notecards, Neenah Solar White Classic Crest 110lb
Ink: Memento Tuxedo Black
Markers: From Copic, Dick Blick, Spectrum Noir
Stamps: MFT Harvest Mouse with matching dies, sentiment from Stampin' Up! Lighthearted Leaves
I was so excited to get MFT's Warm Hugs & Frosty Kisses in the mail. I have ideas coming out my ears. I wanted to enter the MFT Slimline Challenge to make an autumn-themed slimline. I started by using a blend of 4 Distress Oxide inks on my Gina K cardstock. Then I used my alcohol ink markers to color in these sweet, tiny penguins (all the while dreaming of sweater weather). I die cut them, and cut the hills and trees on my Silhouette Cameo. The hardest part of this card was cutting small enough pieces of my foam adhesive to fit the back of the trees.


I was so excited to get MFT's Warm Hugs & Frosty Kisses in the mail. I have ideas coming out my ears. I wanted to enter the MFT Slimline Challenge to make an autumn-themed slimline. I started by using a blend of 4 Distress Oxide inks on my Gina K cardstock. Then I used my alcohol ink markers to color in these sweet, tiny penguins (all the while dreaming of sweater weather). I die cut them, and cut the hills and trees on my Silhouette Cameo. The hardest part of this card was cutting small enough pieces of my foam adhesive to fit the back of the trees.
Love this floral frame and using just three colors to color it. It came together with vellum, and several other things I dug out of my stash. I used Gina K Connect Glue to glue the gold frame, cut from my Silhouette, to the floral frame, then to the vellum, then to the cardstock. The Connect Glue gives you a little play time and doesn't bond instantly. I love my Art Glitter Glue, but it bonds pretty darn quick. I used Wink of Stella to add a glimmer to the dark green leaves. Keep scrolling for the list of ingredients.


Love this floral frame and using just three colors to color it. It came together with vellum, and several other things I dug out of my stash. I used Gina K Connect Glue to glue the gold frame, cut from my Silhouette, to the floral frame, then to the vellum, then to the cardstock. The Connect Glue gives you a little play time and doesn't bond instantly. I love my Art Glitter Glue, but it bonds pretty darn quick. I used Wink of Stella to add a glimmer to the dark green leaves. Keep scrolling for the list of ingredients.


Stamp Set: Tweet Friends by MFT
Markers: Spectrum Noir, Dick Blick and Copic
Stencil: homemade starburst
Ink: Memento Black, Daffodil Delight
Sentiment is die cut by Silhouette machine using Bebas Neue font, computer printed using the font KG What Does the Fox Say
Stamp Set: Tweet Friends by MFT
Markers: Spectrum Noir, Dick Blick and Copic
Stencil: homemade starburst
Ink: Memento Black, Daffodil Delight
Sentiment is die cut by Silhouette machine using Bebas Neue font, computer printed using the font KG What Does the Fox Say


