

[Stay tuned for a little die cutting trick I did below.] The Still Here stamp set* from Simon Says Stamp’s October Sending Cheer release is a very unique size. The hand measures 1 7/8” x 4 1/8”. In order to make a card where 3 hands could fit on the card, I really needed to make an A6 card, measuring 4.5 x 6.25”. I wanted to do a pastel treatment on the hands with a relatively simple background.
I cut 3 pieces of white cardstock to 4.5” x 6.25”. I took my first panel and dry embossed it with the Simon Says Stamp Dotty Diamonds Embossing Folder. I then cut it down to 3.5” x 5.25” and distressed the edge of this. I cut my second panel to 4” x 5.75”. I left my third panel as is.
I stamped the peace-sign hand three times. First, using Concord & 9th’s Harbor ink, then using Taylored Expressions Lavender Glaze ink, and finally using a retired Stampin’ Up! colored called Soft Seafoam. An ideal substitute for the Stampin’ Up! color is Altenew’s Pistachio Fresh Dye Ink. I fussy cut all three hands and adhered them to the front of the embossed panel as shown, with the blue one on top.

Now for the die cutting trick. I stamped the sentiment “You don’t have to carry it all alone” with black VersaFine Clair Nocturne ink on a piece of white cardstock. I used the smallest tag die from Simon Says Stamps Rounded Tags die set, and by making sure the bottom edge of the tag was always hanging off my cutting mat (thereby not getting cut), I was able to cut the label in the shape you see, after it was stamped. I first put the die to the left of the sentiment and cut the top and sides, then switched it to the right side of the sentiment, cutting the top and sides of the tag shape. It was a little tricky, but it worked perfectly. And using the tag holes, I threaded some Simon Says Stamp Metallic Silver Cord through the holes and around the back of the embossed decorated panel.
I layered all three of these panels on top of one another, using thin foam adhesive under the embossed panel.
I finished by adding some clear, iridescent sequins in 2 sizes.
If you shop from the highlighted product links above, I may receive a small commission at no cost to you. It is much appreciated and helps fund my crafting. Also, any item first marked with an asterisk * was provided by an online store. Otherwise, I bought my supplies.
[Stay tuned for a little die cutting trick I did below.] The Still Here stamp set* from Simon Says Stamp’s October Sending Cheer release is a very unique size. The hand measures 1 7/8” x 4 1/8”. In order to make a card where 3 hands could fit on the card, I really needed to make an A6 card, measuring 4.5 x 6.25”. I wanted to do a pastel treatment on the hands with a relatively simple background.
I cut 3 pieces of white cardstock to 4.5” x 6.25”. I took my first panel and dry embossed it with the Simon Says Stamp Dotty Diamonds Embossing Folder. I then cut it down to 3.5” x 5.25” and distressed the edge of this. I cut my second panel to 4” x 5.75”. I left my third panel as is.
I stamped the peace-sign hand three times. First, using Concord & 9th’s Harbor ink, then using Taylored Expressions Lavender Glaze ink, and finally using a retired Stampin’ Up! colored called Soft Seafoam. An ideal substitute for the Stampin’ Up! color is Altenew’s Pistachio Fresh Dye Ink. I fussy cut all three hands and adhered them to the front of the embossed panel as shown, with the blue one on top.
Now for the die cutting trick. I stamped the sentiment “You don’t have to carry it all alone” with black VersaFine Clair Nocturne ink on a piece of white cardstock. I used the smallest tag die from Simon Says Stamps Rounded Tags die set, and by making sure the bottom edge of the tag was always hanging off my cutting mat (thereby not getting cut), I was able to cut the label in the shape you see, after it was stamped. I first put the die to the left of the sentiment and cut the top and sides, then switched it to the right side of the sentiment, cutting the top and sides of the tag shape. It was a little tricky, but it worked perfectly. And using the tag holes, I threaded some Simon Says Stamp Metallic Silver Cord through the holes and around the back of the embossed decorated panel.
I layered all three of these panels on top of one another, using thin foam adhesive under the embossed panel.
I finished by adding some clear, iridescent sequins in 2 sizes.
If you shop from the highlighted product links above, I may receive a small commission at no cost to you. It is much appreciated and helps fund my crafting. Also, any item first marked with an asterisk * was provided by an online store. Otherwise, I bought my supplies.
Spring and the color lavendar go together like the finest pairing of cheese and wine. They simply belong together. I made this card for my youngest daughter on the completion of her medical assistant certification. She loves lavendar. I used the Spellbinders Colorwheel Lavender cardstock along with Neenah Classic Crest 110lb cardstock. I dry embossed a 4” x 5.25” piece of lavender with the Simon Says Stamp Boho Flowers Embossing Folder. It’s an ideal floral pattern for almost any time of year.

Next, I matted that to a cardbase 4.25" x 5.5". I used the middle-size circle from the Pink Fresh Studios Elegant Circles die set and cut it (and kept the center) from the white cardstock. I used the Spellbinders Betterpress You Are Everything Letterpress inking plate and matching die along with their gold foil to create the sentiment on my Spellbinders Glimmer machine. The flowers are from Pinkfresh Studios Breezy Blossoms where I used their matching stamps, stencils and dies. The ink is Lavender Glaze from Taylored Expressions.
I assembled everything as shown and added Clear Iridescent sequins from This Calls for Confetti (such a cool business name.)

Affiliate links are used in this post at no cost to you. This means I may receive a small commission when you click through and shop using the links I provide. This helps support me in creating and posting my crafts. Items marked with an asterisk * at first mention were provided by a store or manufacturer. Otherwise, all items were purchased by me. I do not get paid to promote any products.
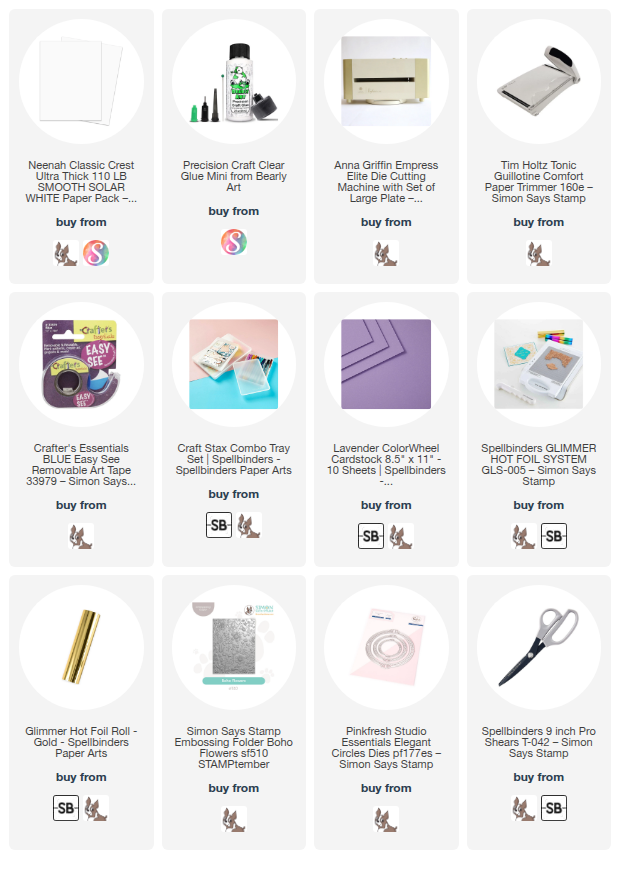
Spring and the color lavendar go together like the finest pairing of cheese and wine. They simply belong together. I made this card for my youngest daughter on the completion of her medical assistant certification. She loves lavendar. I used the Spellbinders Colorwheel Lavender cardstock along with Neenah Classic Crest 110lb cardstock. I dry embossed a 4” x 5.25” piece of lavender with the Simon Says Stamp Boho Flowers Embossing Folder. It’s an ideal floral pattern for almost any time of year.
Next, I matted that to a cardbase 4.25" x 5.5". I used the middle-size circle from the Pink Fresh Studios Elegant Circles die set and cut it (and kept the center) from the white cardstock. I used the Spellbinders Betterpress You Are Everything Letterpress inking plate and matching die along with their gold foil to create the sentiment on my Spellbinders Glimmer machine. The flowers are from Pinkfresh Studios Breezy Blossoms where I used their matching stamps, stencils and dies. The ink is Lavender Glaze from Taylored Expressions.
I assembled everything as shown and added Clear Iridescent sequins from This Calls for Confetti (such a cool business name.)
Affiliate links are used in this post at no cost to you. This means I may receive a small commission when you click through and shop using the links I provide. This helps support me in creating and posting my crafts. Items marked with an asterisk * at first mention were provided by a store or manufacturer. Otherwise, all items were purchased by me. I do not get paid to promote any products.

My favorite Christmas make this season. I used the 2021 Die-cember die from Simon Says Stamp and Tim Holtz called Dash Away All. I die cut it from from heavyweight black cardstock. I liberally blended two Distress Oxide inks in Uncharted Mariner and Tumbled Glass on Neenah 110lb Classic Crest Solar White. I spritzed a very small amount of water on the inked panel to make it look like stars. Next, I flicked silver watercolor paint onto the panel from my Kuretake Gansai Tambi Starry watercolor set.

I used the other dies in the same set to cut out the moon and the stars from the background. Then I made a cardbase from the same Neenah cardstock and adhered a piece of Stampin' Up!'s So Saffron yellow cardstock to it in a size smaller than my inked panel. I popped up the black Santa and sleigh with foam adhesive and adhered it in place, then used the same adhesive to pop up the entire panel over the So Saffron cardstock on the front of the card.
Finally, I heat embossed Merry Christmas from Taylored Expressions Modern Holiday Greetings with white embossing powder on black cardstock (always tricky for me). I trimmed the sentiment and adhered it with foam adhesive.
I hope you have a fantastic holiday season and a wonderful and relaxing New Year.
My favorite Christmas make this season. I used the 2021 Die-cember die from Simon Says Stamp and Tim Holtz called Dash Away All. I die cut it from from heavyweight black cardstock. I liberally blended two Distress Oxide inks in Uncharted Mariner and Tumbled Glass on Neenah 110lb Classic Crest Solar White. I spritzed a very small amount of water on the inked panel to make it look like stars. Next, I flicked silver watercolor paint onto the panel from my Kuretake Gansai Tambi Starry watercolor set.
I used the other dies in the same set to cut out the moon and the stars from the background. Then I made a cardbase from the same Neenah cardstock and adhered a piece of Stampin' Up!'s So Saffron yellow cardstock to it in a size smaller than my inked panel. I popped up the black Santa and sleigh with foam adhesive and adhered it in place, then used the same adhesive to pop up the entire panel over the So Saffron cardstock on the front of the card.
Finally, I heat embossed Merry Christmas from Taylored Expressions Modern Holiday Greetings with white embossing powder on black cardstock (always tricky for me). I trimmed the sentiment and adhered it with foam adhesive.
I hope you have a fantastic holiday season and a wonderful and relaxing New Year.

T'is the Season. Christmas is typically a very busy time in most households that celebrate the holiday. But this year, mine is extra busy. I am planning my daughter's January wedding and I'm swamped with a To Do list longer than Santa's Naughty list. Fortunately, very early this year I began making some Christmas cards. I chose 5 designs and made 7 of each. I saw this design somewhere - perhaps Instagram, using the now-retired Tim Holtz Snowflake Impresslit. If you're not familiar with them, at one time Sizzix produced these small embossing folders that both cut and embossed an image at the same time. They are all retired now, so I am holding on to the ones I have. The oak leaves one is my favorite.

I used Neenah's Classic Crest Solar White 110lb cardstock (spritzed with water) to make the snowflake. Next, I used a Bazzill Kraft stock (maybe Peanut Cluster color) and embossed it with the Sizzix embossing folder called Nordic Pattern by Olivia Rose. I just adore the imagery. I very lightly swiped Picket Fence Distress Ink over the raised areas using a domed foam blender.
Finally, I embossed Merry Christmas using Taylored Expressions Modern Holiday Greetings stamp set. It's a fantastic set with lots of "clean" Christmas sentiments. By clean, I mean there are no flourishes and everything is sans serif. Lots to choose from.
I put it all together on a cardbase using the same Neenah cardstock. Just dropped this card, along with about 40 others at the post office.
Happy Holidays, y'all!
T'is the Season. Christmas is typically a very busy time in most households that celebrate the holiday. But this year, mine is extra busy. I am planning my daughter's January wedding and I'm swamped with a To Do list longer than Santa's Naughty list. Fortunately, very early this year I began making some Christmas cards. I chose 5 designs and made 7 of each. I saw this design somewhere - perhaps Instagram, using the now-retired Tim Holtz Snowflake Impresslit. If you're not familiar with them, at one time Sizzix produced these small embossing folders that both cut and embossed an image at the same time. They are all retired now, so I am holding on to the ones I have. The oak leaves one is my favorite.
I used Neenah's Classic Crest Solar White 110lb cardstock (spritzed with water) to make the snowflake. Next, I used a Bazzill Kraft stock (maybe Peanut Cluster color) and embossed it with the Sizzix embossing folder called Nordic Pattern by Olivia Rose. I just adore the imagery. I very lightly swiped Picket Fence Distress Ink over the raised areas using a domed foam blender.
Finally, I embossed Merry Christmas using Taylored Expressions Modern Holiday Greetings stamp set. It's a fantastic set with lots of "clean" Christmas sentiments. By clean, I mean there are no flourishes and everything is sans serif. Lots to choose from.
I put it all together on a cardbase using the same Neenah cardstock. Just dropped this card, along with about 40 others at the post office.
Happy Holidays, y'all!

You might be the same as me on this. Sometimes I see a card so beautiful and perfect I just have to copy it. Last October, Barbara Schiassi @barbarayaya, one of Tim Holtz's amazing makers, created a poinsettia card using his Tree Rings 3D Embossing Folder by Sizzix and Holiday Brushstrokes #3. I just adored it. Since I had just gotten his Tree Rings 3D folder and I had his Festive Bouquet die set, I decided I wanted to make some Christmas cards using both, sort of mimicking her design.


You might be the same as me on this. Sometimes I see a card so beautiful and perfect I just have to copy it. Last October, Barbara Schiassi @barbarayaya, one of Tim Holtz's amazing makers, created a poinsettia card using his Tree Rings 3D Embossing Folder by Sizzix and Holiday Brushstrokes #3. I just adored it. Since I had just gotten his Tree Rings 3D folder and I had his Festive Bouquet die set, I decided I wanted to make some Christmas cards using both, sort of mimicking her design.

I'm over on the Poppystamps blog today with this sweet slimline card featuring their Whittle Rainbow Unicorn die kit. It comes with two unicorns, clouds, a rainbow, stars, a moon and a heart. Basically, if Lucky Charms was a die kit, this would be it. It also includes a small set of sentiment stamps.

I love slimline cards and made this into one with three circular windows. I chose 3 pieces of blue cardstock for the sky backgrounds and punched out one 2.5" circle from each of them. Next I used almost all the dies in the kit to cut a variety of shapes. I also cut out 1 rainbow in toned-down rainbow shades of cardstock. The rainbow die simply cuts 6 rainbow shaped stripes, so there is still a need to glue the stripes down side by side to either your main card, or to another piece of small cardstock. I chose to glue them on to a scrap piece. Then I promptly cut it in half to use in two of the three windows.
I used the panel with the three circle windows to guide me in what I put where. I glued the background "scenes" directly onto the blue circles. Next, I glued the foreground pieces, onto the front of the white panel. I used glitter paper for my unicorn wings and horns. The manes I colored with a pale purple Spectrum Noir marker. Finally, I used foam adhesive to pop up the front panel onto the decorated card. My last move was to heat emboss the sentiment onto black cardstock with white embossing powder and glue it to the card front.
I want to give a special shout out to #VistaCreate. I was able to create my watermark using a font I uploaded, and get a transparent background, all without having to pay any subscription fee.
Ingredients:
CS: Neenah Classic Crest Solar White 110lb, Black cardstock, Recollections 65lb, Memory Box 6x6" paper pads for all other colored cardstock and glitter cardstock
Dies & Stamps: All from Poppystamps Whittle Rainbow Unicorn Kit
Marker: Spectrum Noir TriBlend Hydrangea - lightest shade
Ink: Ranger Embossing Ink
Embossing powder: Taylored Expressions Detail White Embossing Powder
I'm over on the Poppystamps blog today with this sweet slimline card featuring their Whittle Rainbow Unicorn die kit. It comes with two unicorns, clouds, a rainbow, stars, a moon and a heart. Basically, if Lucky Charms was a die kit, this would be it. It also includes a small set of sentiment stamps.
I love slimline cards and made this into one with three circular windows. I chose 3 pieces of blue cardstock for the sky backgrounds and punched out one 2.5" circle from each of them. Next I used almost all the dies in the kit to cut a variety of shapes. I also cut out 1 rainbow in toned-down rainbow shades of cardstock. The rainbow die simply cuts 6 rainbow shaped stripes, so there is still a need to glue the stripes down side by side to either your main card, or to another piece of small cardstock. I chose to glue them on to a scrap piece. Then I promptly cut it in half to use in two of the three windows.
I used the panel with the three circle windows to guide me in what I put where. I glued the background "scenes" directly onto the blue circles. Next, I glued the foreground pieces, onto the front of the white panel. I used glitter paper for my unicorn wings and horns. The manes I colored with a pale purple Spectrum Noir marker. Finally, I used foam adhesive to pop up the front panel onto the decorated card. My last move was to heat emboss the sentiment onto black cardstock with white embossing powder and glue it to the card front.
I want to give a special shout out to #VistaCreate. I was able to create my watermark using a font I uploaded, and get a transparent background, all without having to pay any subscription fee.
Ingredients:
CS: Neenah Classic Crest Solar White 110lb, Black cardstock, Recollections 65lb, Memory Box 6x6" paper pads for all other colored cardstock and glitter cardstock
Dies & Stamps: All from Poppystamps Whittle Rainbow Unicorn Kit
Marker: Spectrum Noir TriBlend Hydrangea - lightest shade
Ink: Ranger Embossing Ink
Embossing powder: Taylored Expressions Detail White Embossing Powder
I was thrilled to have my card chosen by the Color Hues Color Challenge as the winner of their 24th challenge with my Coral & Turquoise card. As a result, they have graciously asked me to be the guest designer for challenge #26. Pink and purple are the challenge colors, and they are not just for unicorns and Disney princesses anymore. When I think of these two colors, I think of flowers. My husband loves to grow flowers in our backyard and lilies in our koi pond and they are most often pink and purple. I recently purchased a gorgeous 6x6" background stamp from My Favorite Things called Roses All Over Background. It is stunning, and a big departure from the adorable animal stamps I know them for. It is not new in their catalog; I've simply never seen it until recently. I stamped this on watercolor paper with Versamark (I got the best results from putting the paper down onto the stamp and pressing) and then heat embossing in white. I used only 2 of my Zig Clean Color Real Brush markers to put the color down. Then I used a water brush to spread it onto the rose pattern, even blending a little here and there.
To let the beauty of the stamp and the colors shine through (and to not stray from pink and purple), I kept the sentiment short, sweet, and black and white. It needed more than a stamped phrase, but not much more. I don't yet own any script dies (soon, I promise), so I used my Silhouette. I used the Silhouette's offset feature to get the black background. I pop dotted everything off a white background and I was done. The card will fit into a 5.5" square envelope.


CS: Gina K Pure Luxury Heavy Weight 110lb, Canson XL cold press watercolor paper, Bazzill Licorice Twist
Ink: Versamark
Die: Silhouette used with font Bigfat Script from Fontspace.com
Embossing Powder: Taylored Expressions Fine Detail White Embossing Powder
Watercolor: Zig Clean Color Real Brush Markers in Lilac 080 and Pink 025; Pentel waterbrush with largest tip
I was thrilled to have my card chosen by the Color Hues Color Challenge as the winner of their 24th challenge with my Coral & Turquoise card. As a result, they have graciously asked me to be the guest designer for challenge #26. Pink and purple are the challenge colors, and they are not just for unicorns and Disney princesses anymore. When I think of these two colors, I think of flowers. My husband loves to grow flowers in our backyard and lilies in our koi pond and they are most often pink and purple. I recently purchased a gorgeous 6x6" background stamp from My Favorite Things called Roses All Over Background. It is stunning, and a big departure from the adorable animal stamps I know them for. It is not new in their catalog; I've simply never seen it until recently. I stamped this on watercolor paper with Versamark (I got the best results from putting the paper down onto the stamp and pressing) and then heat embossing in white. I used only 2 of my Zig Clean Color Real Brush markers to put the color down. Then I used a water brush to spread it onto the rose pattern, even blending a little here and there.
To let the beauty of the stamp and the colors shine through (and to not stray from pink and purple), I kept the sentiment short, sweet, and black and white. It needed more than a stamped phrase, but not much more. I don't yet own any script dies (soon, I promise), so I used my Silhouette. I used the Silhouette's offset feature to get the black background. I pop dotted everything off a white background and I was done. The card will fit into a 5.5" square envelope.
CS: Gina K Pure Luxury Heavy Weight 110lb, Canson XL cold press watercolor paper, Bazzill Licorice Twist
Ink: Versamark
Die: Silhouette used with font Bigfat Script from Fontspace.com
Embossing Powder: Taylored Expressions Fine Detail White Embossing Powder
Watercolor: Zig Clean Color Real Brush Markers in Lilac 080 and Pink 025; Pentel waterbrush with largest tip

