

A peace-hand sign always makes me think of the 60s with the decade’s bell bottom jeans, long hair and tie dye clothing. I decided to attempt a tie dye background for the Simon Says Stamp Still Here stamp set*, part of October’s Sending Cheer release.
I experimented with several techniques to get a tie dye look. Using just the edges of a rainbow of Distress Ink cubes, I made concentric rectangles on a 4.5 x 6.25” (that’s A6 size) piece of Tim Holtz Distress Watercolor paper. I added water to the very center and hoped it would give a tie dye look as the water spread. It almost worked, but left a distinctly rectangle shape of ink swipes on the paper. I abandoned that one and then just tried to use my Distress Ink Sprays on wet watercolor paper. I used Spun Sugar, Picked Raspberry, Abandoned Coral, Spiced Marmalade, Mustard Seed, and a very small amount of Shabby Shutters (barely visible). That worked better, but I still lacked the concentric circles I was looking for. I took this panel and simply added big concentric circles with a paintbrush dipped in clean water. That got closer to what I wanted, and I stopped there to dry the panel and flatten it under some books for a little while.
Next, I stamped the peace-hand sign in black VersaFine Clair Nocturne ink in the middle of the panel. I did the same with the 2 sentiments. I die cut this with one die from the Spellbinders Essential Modern Ovals die set. I cut a larger oval from Taylored Expressions Lollipop Cardstock.


I really wanted a sunburst in the background of my oval, but I ran into a problem (and found a workaround). I had a great 6x6” Sunburst Stencil from Waffle Flower but it didn’t cover an A6 panel. I ink blended with Altenew’s Maple Yellow ink from the center outwards with a large blending brush. On the left and right, I could go to the edge of the paper before I ran into the edge of the stencil. However, on the top and bottom, I had to make sure I didn’t touch the frame edge of the stencil with my blending brush. I removed the stencil and then extended the sunburst ray edges with Post It tape and kept blending to the edge of my paper. It worked great. (See photos for details)


I trimmed about 1/8” from each side of my yellow sunburst panel and used foam adhesive to mat it on an A6 piece of black cardstock. Next I glued on my oval. I added just a couple gems in the center of the largest flowers for a bit of sparkle.
If you shop from the highlighted product links above, I may receive a small commission at no cost to you. It is much appreciated and helps fund my crafting. Also, any item first marked with an asterisk * was provided by an online store. Otherwise, I bought my supplies.
A peace-hand sign always makes me think of the 60s with the decade’s bell bottom jeans, long hair and tie dye clothing. I decided to attempt a tie dye background for the Simon Says Stamp Still Here stamp set*, part of October’s Sending Cheer release.
I experimented with several techniques to get a tie dye look. Using just the edges of a rainbow of Distress Ink cubes, I made concentric rectangles on a 4.5 x 6.25” (that’s A6 size) piece of Tim Holtz Distress Watercolor paper. I added water to the very center and hoped it would give a tie dye look as the water spread. It almost worked, but left a distinctly rectangle shape of ink swipes on the paper. I abandoned that one and then just tried to use my Distress Ink Sprays on wet watercolor paper. I used Spun Sugar, Picked Raspberry, Abandoned Coral, Spiced Marmalade, Mustard Seed, and a very small amount of Shabby Shutters (barely visible). That worked better, but I still lacked the concentric circles I was looking for. I took this panel and simply added big concentric circles with a paintbrush dipped in clean water. That got closer to what I wanted, and I stopped there to dry the panel and flatten it under some books for a little while.
Next, I stamped the peace-hand sign in black VersaFine Clair Nocturne ink in the middle of the panel. I did the same with the 2 sentiments. I die cut this with one die from the Spellbinders Essential Modern Ovals die set. I cut a larger oval from Taylored Expressions Lollipop Cardstock.
I really wanted a sunburst in the background of my oval, but I ran into a problem (and found a workaround). I had a great 6x6” Sunburst Stencil from Waffle Flower but it didn’t cover an A6 panel. I ink blended with Altenew’s Maple Yellow ink from the center outwards with a large blending brush. On the left and right, I could go to the edge of the paper before I ran into the edge of the stencil. However, on the top and bottom, I had to make sure I didn’t touch the frame edge of the stencil with my blending brush. I removed the stencil and then extended the sunburst ray edges with Post It tape and kept blending to the edge of my paper. It worked great. (See photos for details)
I trimmed about 1/8” from each side of my yellow sunburst panel and used foam adhesive to mat it on an A6 piece of black cardstock. Next I glued on my oval. I added just a couple gems in the center of the largest flowers for a bit of sparkle.
If you shop from the highlighted product links above, I may receive a small commission at no cost to you. It is much appreciated and helps fund my crafting. Also, any item first marked with an asterisk * was provided by an online store. Otherwise, I bought my supplies.

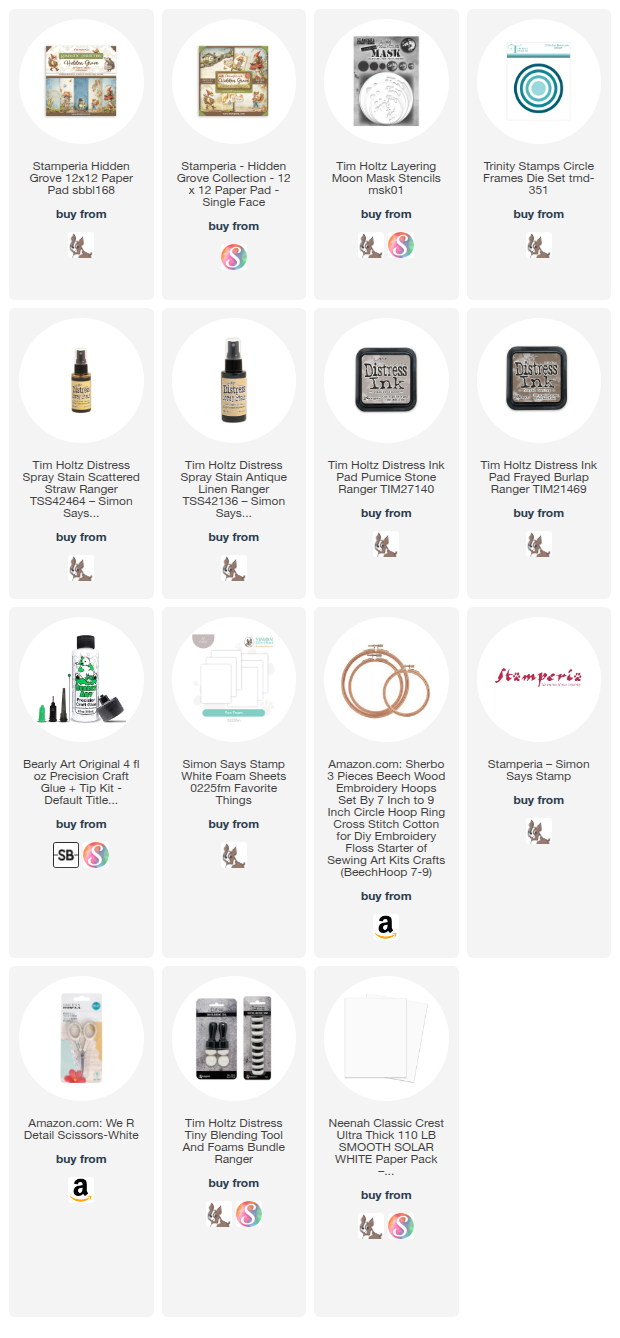
About a year ago, I discovered this utterly adorable artwork by the one and only Stamperia at Simple Pleasures in Colorado Springs (y’all, this IS the mothership of papercrafting and they ship). I bought the chipboard pieces, several 12 x 12 pieces of the darling paper, and had no idea what I’d do with them. About a month later we learned we’d be grandparents for the first time. I had an idea. I bought more of the Hidden Grove paper line from Simon Says Stamp. The grandbaby showed up early so I put the pedal to the metal in late January and made these three mixed media hoops.

Except for the moon on the largest hoop (which was made with Tim Holtz Antique Linen Distress Spray, Scattered Straw Distress Spray and Pumice Stone Distress Ink together with his Moon Mask), everything you see is part of the Hidden Grove line from Stamperia. If you’re not familiar with this company, all their artwork is divine. Be prepared to fall in love.

Each hoop has a few pieces of chipboard embellishments on it, especially on the edge of the hoop. And there are a few pieces of the Hidden Grove chipboard in the backgrounds. However, the majority of the images were fussy cut using my favorite detail scissors from We R Memory Keepers. I used similar or identical paper to the background, and once it was cut, I inked all the edges just a tiny bit with Frayed Burlap Distress Ink. Next, I backed each of the pieces with a chipboard harvested from old mailers, notepads, etc. I simply traced around my fussy cut pieces and then cut the cardboard out inside the trace line by about 4mm, to ensure it was smaller than my artwork and wouldn’t show. It wasn’t pretty looking but it made the pieces sturdy. Then, I raised the cut pieces up from the Hidden Grove paper background with a LOT of craft foam. I ended up using a combination of 2mm fun foam and 4mm fun foam from the hobby store. I used Bearly Arts glue for everything on this project. It’s my favorite liquid glue.

The hoops themselves came from Goodwill (the largest one) and Amazon (the 2 smaller ones). I bought a $0.69 bottle of walnut colored stain from the same hobby store along with some cheap foam brushes. It took no time at all to stain the hoops (separated inside from outside hoop) and have them dry.
The very back of the hoops is more chipboard, which I covered with solid cardstock to make it look better from behind. The ribbon I got from the Etsy seller named Delainenoe.
This was a labor of love and now hangs in the little guy’s nursery using Command Adhesive Velcro Strips.
Affiliate links are used in this post at no cost to you. This means I may receive a small commission when you click through and shop using the links I provide. This helps support me in creating and posting my crafts. Items marked with an asterisk * at first mention were provided by a store or manufacturer. Otherwise, all items were purchased by me. I do not get paid to promote any products.
SUPPLY LIST
About a year ago, I discovered this utterly adorable artwork by the one and only Stamperia at Simple Pleasures in Colorado Springs (y’all, this IS the mothership of papercrafting and they ship). I bought the chipboard pieces, several 12 x 12 pieces of the darling paper, and had no idea what I’d do with them. About a month later we learned we’d be grandparents for the first time. I had an idea. I bought more of the Hidden Grove paper line from Simon Says Stamp. The grandbaby showed up early so I put the pedal to the metal in late January and made these three mixed media hoops.
Except for the moon on the largest hoop (which was made with Tim Holtz Antique Linen Distress Spray, Scattered Straw Distress Spray and Pumice Stone Distress Ink together with his Moon Mask), everything you see is part of the Hidden Grove line from Stamperia. If you’re not familiar with this company, all their artwork is divine. Be prepared to fall in love.
Each hoop has a few pieces of chipboard embellishments on it, especially on the edge of the hoop. And there are a few pieces of the Hidden Grove chipboard in the backgrounds. However, the majority of the images were fussy cut using my favorite detail scissors from We R Memory Keepers. I used similar or identical paper to the background, and once it was cut, I inked all the edges just a tiny bit with Frayed Burlap Distress Ink. Next, I backed each of the pieces with a chipboard harvested from old mailers, notepads, etc. I simply traced around my fussy cut pieces and then cut the cardboard out inside the trace line by about 4mm, to ensure it was smaller than my artwork and wouldn’t show. It wasn’t pretty looking but it made the pieces sturdy. Then, I raised the cut pieces up from the Hidden Grove paper background with a LOT of craft foam. I ended up using a combination of 2mm fun foam and 4mm fun foam from the hobby store. I used Bearly Arts glue for everything on this project. It’s my favorite liquid glue.
The hoops themselves came from Goodwill (the largest one) and Amazon (the 2 smaller ones). I bought a $0.69 bottle of walnut colored stain from the same hobby store along with some cheap foam brushes. It took no time at all to stain the hoops (separated inside from outside hoop) and have them dry.
The very back of the hoops is more chipboard, which I covered with solid cardstock to make it look better from behind. The ribbon I got from the Etsy seller named Delainenoe.
This was a labor of love and now hangs in the little guy’s nursery using Command Adhesive Velcro Strips.
Affiliate links are used in this post at no cost to you. This means I may receive a small commission when you click through and shop using the links I provide. This helps support me in creating and posting my crafts. Items marked with an asterisk * at first mention were provided by a store or manufacturer. Otherwise, all items were purchased by me. I do not get paid to promote any products.
SUPPLY LIST

I recently got several packages of Tim Holtz’s Palette Paper Collection. It is absolutely dreamy. I’m so glad I got the Orange Tim Holtz 8x8 Palette Paper Collection, because it made the most ideal carrots. I used the Tim Holtz Abstract Elements die set to cut out 3 different sizes of carrots and then I edged them with Rusty Hinge Distress Ink to really make the orange pop. I used one die from Trinity Stamps Wildflower Clippings die set to create the carrot tops, cut from watercolor paper sprayed with Peeled Paint Distress Spray Stain.
I created Mr. McGregor’s Garden by taking Canson XL watercolor paper and dipping and drying it in a series of inks and sprays: Vintage Photo and Ground Espresso inkpads along with Frayed Burlap and Walnut Stain Spray Stains. I made dirt! I die cut this one large piece using the Lawn Fawn Puffy Clouds Border dies and a die from the retired Mama Elephant Slim Window Dressings Die Set. It was a bit of a trick getting the carrots glued just where I wanted them and then gluing the levels of dirt all together. I’m sure I did it the hard way.

I computer printed the “Mr. McGregor’s Garden” text onto Stampin’ Up! Crumb Cake paper and then cut it out (along with some green cardstock) using the sign dies out of the Tim Holtz Road Trip die set.
I made a tiny sentiment from the old Colorado Craft Company Bunnies and Robin stamp set.
I used a homemade cloud stencil along with Tumbled Glass Distress Ink to inkblend clouds in the sky.
I adhered the entire garden scene with foam tape on top of the cloud background. I was happy with how my garden grew. ;-) I am entering this in the Pick Three Challenge using text, slimline, and die cuts.
Affiliate links are used in this post at no cost to you. This means I may receive a small commission when you click through and shop using the links I provide. This helps support me in creating and posting my crafts. Items marked with an asterisk * at first mention were provided by a store or manufacturer. Otherwise, all items were purchased by me. I do not get paid to promote any products.
I recently got several packages of Tim Holtz’s Palette Paper Collection. It is absolutely dreamy. I’m so glad I got the Orange Tim Holtz 8x8 Palette Paper Collection, because it made the most ideal carrots. I used the Tim Holtz Abstract Elements die set to cut out 3 different sizes of carrots and then I edged them with Rusty Hinge Distress Ink to really make the orange pop. I used one die from Trinity Stamps Wildflower Clippings die set to create the carrot tops, cut from watercolor paper sprayed with Peeled Paint Distress Spray Stain.
I created Mr. McGregor’s Garden by taking Canson XL watercolor paper and dipping and drying it in a series of inks and sprays: Vintage Photo and Ground Espresso inkpads along with Frayed Burlap and Walnut Stain Spray Stains. I made dirt! I die cut this one large piece using the Lawn Fawn Puffy Clouds Border dies and a die from the retired Mama Elephant Slim Window Dressings Die Set. It was a bit of a trick getting the carrots glued just where I wanted them and then gluing the levels of dirt all together. I’m sure I did it the hard way.
I computer printed the “Mr. McGregor’s Garden” text onto Stampin’ Up! Crumb Cake paper and then cut it out (along with some green cardstock) using the sign dies out of the Tim Holtz Road Trip die set.
I made a tiny sentiment from the old Colorado Craft Company Bunnies and Robin stamp set.
I used a homemade cloud stencil along with Tumbled Glass Distress Ink to inkblend clouds in the sky.
I adhered the entire garden scene with foam tape on top of the cloud background. I was happy with how my garden grew. ;-) I am entering this in the Pick Three Challenge using text, slimline, and die cuts.
Affiliate links are used in this post at no cost to you. This means I may receive a small commission when you click through and shop using the links I provide. This helps support me in creating and posting my crafts. Items marked with an asterisk * at first mention were provided by a store or manufacturer. Otherwise, all items were purchased by me. I do not get paid to promote any products.

Mixed Media is a marathon. A card idea can come together and get produced relatively fast most of the time, but a big mixed media project takes time. The Simon Says Stamp Wednesday Challenge to use a bit of green sent me off in every direction. This giant tag is 6 1/4" x 9 1/4". I started with Tim Holtz Backdrops Vol 5 and chose an "Old Paper" piece. I cut it to a tab shape and matted it on black cardstock. Instead of using actual stitching around the edge, I used a very old 49 & Market stamp set called Gabi's Line Stitching and stamped my stitching around the edge. Using Tim Holtz Blossom Stencil and his Opaque Crackle Paste I stenciled onto the paper. To knock down some of the brightness of the crackle paste, I dabbed on Old Paper Distress Ink.

I rarely use my alcohol inks because I am usually not happy with my results, but this time I just wanted green. I used Ranger Alcohol Ink in Moss along with a little bit of Chronicle on a piece of Duralar paper to just get a mass of green. I die cut this with Tim Holtz Nested Hexagons dies and made a lot of hexagons and hexagon frames. I glued those down, some with foam adhesive. I splattered the tag with Distress Paint in Picket Fence. I took Tattered Rose Distress Spray Stain and Antique Linen Spray Stain and made a mass of an orange-y coral color on Canson XL watercolor paper. I cut 2 of the Tim Holtz Scribbly Butterflies from this and glued them together at the center.

Next, I fussy cut these 2 amazing flowers from another sheet from the backdrops. That took time. Since the big flower was so fragile, I glued it to a piece of heavyweight vellum that I had already heat embossed with Peeled Paint Distress Embossing Glaze and Tim Holtz Floral Outlines stamp set (my favorite TH stamp set). I glued the small flower directly onto 2 hexagons. Since I wanted to lighten up the area behind my big flower, I put some thread along with a strip of Tim Holtz Mummy Cloth beneath it. I adhered the flower and vellum with carefully hidden foam adhesive.
Finally, I inked and matted 2 phrases from Tim Holtz Idea-ology Clippings Sticker Book onto black cardstock and adhered them with foam adhesive. I tied some beautiful green Vivant ribbon around the hole I punched at the top.
I am entering this into the Simon Says Stamp Monday Challenge and the Make My Monday Challenge and the Inspiration Station Challenge.
Affiliate links are used in this post at no cost to you. This means I may receive a small commission when you click through and shop using the links I provide. This helps support me in creating and posting my crafts. Items marked with an asterisk (*) at first mention, were provided by a store or manufacturer. Otherwise, all items were purchased by me. I do not get paid to promote any products.
Mixed Media is a marathon. A card idea can come together and get produced relatively fast most of the time, but a big mixed media project takes time. The Simon Says Stamp Wednesday Challenge to use a bit of green sent me off in every direction. This giant tag is 6 1/4" x 9 1/4". I started with Tim Holtz Backdrops Vol 5 and chose an "Old Paper" piece. I cut it to a tab shape and matted it on black cardstock. Instead of using actual stitching around the edge, I used a very old 49 & Market stamp set called Gabi's Line Stitching and stamped my stitching around the edge. Using Tim Holtz Blossom Stencil and his Opaque Crackle Paste I stenciled onto the paper. To knock down some of the brightness of the crackle paste, I dabbed on Old Paper Distress Ink.
I rarely use my alcohol inks because I am usually not happy with my results, but this time I just wanted green. I used Ranger Alcohol Ink in Moss along with a little bit of Chronicle on a piece of Duralar paper to just get a mass of green. I die cut this with Tim Holtz Nested Hexagons dies and made a lot of hexagons and hexagon frames. I glued those down, some with foam adhesive. I splattered the tag with Distress Paint in Picket Fence. I took Tattered Rose Distress Spray Stain and Antique Linen Spray Stain and made a mass of an orange-y coral color on Canson XL watercolor paper. I cut 2 of the Tim Holtz Scribbly Butterflies from this and glued them together at the center.
Next, I fussy cut these 2 amazing flowers from another sheet from the backdrops. That took time. Since the big flower was so fragile, I glued it to a piece of heavyweight vellum that I had already heat embossed with Peeled Paint Distress Embossing Glaze and Tim Holtz Floral Outlines stamp set (my favorite TH stamp set). I glued the small flower directly onto 2 hexagons. Since I wanted to lighten up the area behind my big flower, I put some thread along with a strip of Tim Holtz Mummy Cloth beneath it. I adhered the flower and vellum with carefully hidden foam adhesive.
Finally, I inked and matted 2 phrases from Tim Holtz Idea-ology Clippings Sticker Book onto black cardstock and adhered them with foam adhesive. I tied some beautiful green Vivant ribbon around the hole I punched at the top.
I am entering this into the Simon Says Stamp Monday Challenge and the Make My Monday Challenge and the Inspiration Station Challenge.
Affiliate links are used in this post at no cost to you. This means I may receive a small commission when you click through and shop using the links I provide. This helps support me in creating and posting my crafts. Items marked with an asterisk (*) at first mention, were provided by a store or manufacturer. Otherwise, all items were purchased by me. I do not get paid to promote any products.

Here with another slimline card. This one has all sorts of ingredients in it. I'll go front to back. First up is a leaf created with the Tim Holtz Leaf Fragments die set (awesome set). I cut it from watercolor paper and used first some Uncharted Mariner Distress Spray Stain, then added Winter Frost Distress Mica Spray on top. The three-layer piece beneath the leaf is tied up with some linen thread from Stampin' Up! The layers consist of a piece of orange Core'dinations cardstock that has been dry embossed with a Fun Stampers Journey embossing folder called Wind and Water. Underneath that is a scrap of Stamperia paper from the Cosmos paper pad. Beneath that is a piece of Tim Holtz's Black Kraft Heavystock that was embossed with the Fun Stampers Journey embossing folder called Diamond Netting. I sanded this one a little to bring the kraft part out.

And speaking of kraft. These pieces all sit on top of a piece of Stampin' Up! Crumb Cake stamped with my favorite Tim Holtz Stamp set called Floral Outlines in black ink. The card base is (I think) Stampin' Up! Dapper Denim. I used some Tim Holtz Distress Black Soot paint to splatter on the card. I enjoyed using this many layers. Thanks for looking. Happy 20th anniversary to Distress inks! #sss20yearsofdistress
Here with another slimline card. This one has all sorts of ingredients in it. I'll go front to back. First up is a leaf created with the Tim Holtz Leaf Fragments die set (awesome set). I cut it from watercolor paper and used first some Uncharted Mariner Distress Spray Stain, then added Winter Frost Distress Mica Spray on top. The three-layer piece beneath the leaf is tied up with some linen thread from Stampin' Up! The layers consist of a piece of orange Core'dinations cardstock that has been dry embossed with a Fun Stampers Journey embossing folder called Wind and Water. Underneath that is a scrap of Stamperia paper from the Cosmos paper pad. Beneath that is a piece of Tim Holtz's Black Kraft Heavystock that was embossed with the Fun Stampers Journey embossing folder called Diamond Netting. I sanded this one a little to bring the kraft part out.
And speaking of kraft. These pieces all sit on top of a piece of Stampin' Up! Crumb Cake stamped with my favorite Tim Holtz Stamp set called Floral Outlines in black ink. The card base is (I think) Stampin' Up! Dapper Denim. I used some Tim Holtz Distress Black Soot paint to splatter on the card. I enjoyed using this many layers. Thanks for looking. Happy 20th anniversary to Distress inks! #sss20yearsofdistress

Whew! January was a wild ride. Briefly, my daughter got married January 26 and I was the wedding planner. It wasn't an easy job, but everything went off without a hitch.
On to Valentine's Day! I love making Valentine cards because I love the color schemes that include plenty of pinks, reds and purples with lots of white thrown in.

I've made 15 different cards with Simon Says Stamp's Outline Love wafer die set and the Heart to Heart Background cling stamp. This combo is so much fun. I love all the different combinations of die cut inlay you can do with the die. I also put my Sizzix Sticky Grid paper to the test by cutting out the word LOVE and one of the dies from the Paper Rose Stitched Rectangles set all at the same time.


First I heat embossed the background stamp with Brutus Monroe's excellent Alabaster embossing powder. Then, I used the dip and dry technique with a combination of Tim Holtz's Spray Stains and his Mica Sprays for most of my backgrounds. I used SO many and had a blast. That Mica Spray really gives a pop of glimmer where you need it.

The You die is also from Simon Says Stamp. My embellishments are from my stash. And the cute Valentine cookie cutters are from my friend, Kristen.
Whew! January was a wild ride. Briefly, my daughter got married January 26 and I was the wedding planner. It wasn't an easy job, but everything went off without a hitch.
On to Valentine's Day! I love making Valentine cards because I love the color schemes that include plenty of pinks, reds and purples with lots of white thrown in.
I've made 15 different cards with Simon Says Stamp's Outline Love wafer die set and the Heart to Heart Background cling stamp. This combo is so much fun. I love all the different combinations of die cut inlay you can do with the die. I also put my Sizzix Sticky Grid paper to the test by cutting out the word LOVE and one of the dies from the Paper Rose Stitched Rectangles set all at the same time.
First I heat embossed the background stamp with Brutus Monroe's excellent Alabaster embossing powder. Then, I used the dip and dry technique with a combination of Tim Holtz's Spray Stains and his Mica Sprays for most of my backgrounds. I used SO many and had a blast. That Mica Spray really gives a pop of glimmer where you need it.
The You die is also from Simon Says Stamp. My embellishments are from my stash. And the cute Valentine cookie cutters are from my friend, Kristen.


When does a Tim Holtz Moon Mask not make a moon? When you use it to make the Earth!
This one was a doozy of a make. I had an idea and I ran with it -- but it was a marathon. I'll describe all the layers from bottom up, okay? The bottom layer is a piece of Bazzill cardstock in a taupe brown. With the exception of a little foam tape, I used my trusty Bearly Arts glue on every layer and flower. The next layer was a scrap from the Tim Holtz Paper Stash Wallflowers 12x12 paper pad.

Ideaology no longer makes these but you can still find them online. I cut the piece into a tag shape by simply snipping the corners of a long rectangular piece. I inked the edges with Frayed Burlap Distress Ink, splattered some Frayed Burlap Distress Spray Stain on, then stitched with a dark brown thread around the edge. I made some tiny rips on the edges to add to the aged look. Next, I stamped the Don't Forget and the April 22 with a Point Planners roller stamp by American Crafts. Finally, I went back to stitch on the Ideaology tag.

The Earth was created with watercolor paper and the large and medium Tim Holtz Moon Masks by Stamper's Anonymous. I dusted my paper with anti-static powder, then smashed a Versamark embossing ink pad through the largest moon mask onto the watercolor paper. I applied Peeled Paint Distress Embossing Glaze and heat set it. Next, I masked off a portion of the medium moon mask so that I wouldn't catch any edges, just the blobs. I positioned it where I wanted it and did the same technique with the Versamark and the embossing glaze. I used my dear old Coluzzle cutting tool to cut a circle around the green blobs.


When does a Tim Holtz Moon Mask not make a moon? When you use it to make the Earth!
This one was a doozy of a make. I had an idea and I ran with it -- but it was a marathon. I'll describe all the layers from bottom up, okay? The bottom layer is a piece of Bazzill cardstock in a taupe brown. With the exception of a little foam tape, I used my trusty Bearly Arts glue on every layer and flower. The next layer was a scrap from the Tim Holtz Paper Stash Wallflowers 12x12 paper pad.
Ideaology no longer makes these but you can still find them online. I cut the piece into a tag shape by simply snipping the corners of a long rectangular piece. I inked the edges with Frayed Burlap Distress Ink, splattered some Frayed Burlap Distress Spray Stain on, then stitched with a dark brown thread around the edge. I made some tiny rips on the edges to add to the aged look. Next, I stamped the Don't Forget and the April 22 with a Point Planners roller stamp by American Crafts. Finally, I went back to stitch on the Ideaology tag.
The Earth was created with watercolor paper and the large and medium Tim Holtz Moon Masks by Stamper's Anonymous. I dusted my paper with anti-static powder, then smashed a Versamark embossing ink pad through the largest moon mask onto the watercolor paper. I applied Peeled Paint Distress Embossing Glaze and heat set it. Next, I masked off a portion of the medium moon mask so that I wouldn't catch any edges, just the blobs. I positioned it where I wanted it and did the same technique with the Versamark and the embossing glaze. I used my dear old Coluzzle cutting tool to cut a circle around the green blobs.

I'm loving both Tim Holtz's new Ideaology Backdrops Volume 5 TH94309 and the Alphanumeric Bulletin dies #666281.

I'm loving both Tim Holtz's new Ideaology Backdrops Volume 5 TH94309 and the Alphanumeric Bulletin dies #666281.

Like many, I am a huge Tim Holtz fan. I wanted to make a TH themed St. Patrick's Day card using just his products, with the four-leaf clover from the Sizzix Lucky Love Impresslit. I am not a natural at mixed media. I have to experiment, think, study Pinterest, and more, to come up with a mixed media piece I really like. I found a wonderful card by a Finnish artist named Riikka Kovasin here that I loved. Her layout and her use of some of the embellishments inspired me most.


Like many, I am a huge Tim Holtz fan. I wanted to make a TH themed St. Patrick's Day card using just his products, with the four-leaf clover from the Sizzix Lucky Love Impresslit. I am not a natural at mixed media. I have to experiment, think, study Pinterest, and more, to come up with a mixed media piece I really like. I found a wonderful card by a Finnish artist named Riikka Kovasin here that I loved. Her layout and her use of some of the embellishments inspired me most.


Today's your lucky day! Even though it's Friday, the 13th, I'm serving up this colorful, glittery Valentine's card. I started with Poppystamps' new Vintage Scalloped Heart die set. I love that this comes with 2 dies: the heart with the 'sunburst' slits in it, and the bigger scalloped heart background.

I cut the heart from fine, red glitter paper by Core 'dinations, and contrasted that with a brushed gold cardstock for the scalloped shadow.

I wanted something different for the background so I turned to my trusty Distress Spray Stains and created a background on watercolor paper with Speckled Egg, Salvaged Patina, and Frayed Burlap. For a final touch, and to tie in the brushed gold look, I spritzed my paper with Tarnished Brass Distress Mica Spray. I cut that piece down just a bit and matted it on the piece of brushed gold cardstock I used to cut the scalloped heart from - yay for no waste. I glued this onto a Stampin' Up! Very Vanilla card base.

Today's your lucky day! Even though it's Friday, the 13th, I'm serving up this colorful, glittery Valentine's card. I started with Poppystamps' new Vintage Scalloped Heart die set. I love that this comes with 2 dies: the heart with the 'sunburst' slits in it, and the bigger scalloped heart background.
I cut the heart from fine, red glitter paper by Core 'dinations, and contrasted that with a brushed gold cardstock for the scalloped shadow.
I wanted something different for the background so I turned to my trusty Distress Spray Stains and created a background on watercolor paper with Speckled Egg, Salvaged Patina, and Frayed Burlap. For a final touch, and to tie in the brushed gold look, I spritzed my paper with Tarnished Brass Distress Mica Spray. I cut that piece down just a bit and matted it on the piece of brushed gold cardstock I used to cut the scalloped heart from - yay for no waste. I glued this onto a Stampin' Up! Very Vanilla card base.


We're throwing our daughter and her fiance an engagement party between Christmas and New Year's Eve. I'm also throwing a bridal shower for a friend this summer. Both brides love the woodland theme for their wedding. I decided to hand make a banner featuring lots of Tim Holtz goodies.


It's almost Christmas and my crafting is finished. Now I cook (I wish I was half as comfortable with that as I am with papercrafting.) Happy Holidays!
We're throwing our daughter and her fiance an engagement party between Christmas and New Year's Eve. I'm also throwing a bridal shower for a friend this summer. Both brides love the woodland theme for their wedding. I decided to hand make a banner featuring lots of Tim Holtz goodies.
It's almost Christmas and my crafting is finished. Now I cook (I wish I was half as comfortable with that as I am with papercrafting.) Happy Holidays!



