

Christmas time can be joyous and wonderful, and also exhausting, especially for moms. Moms often end up being the chief planner, cook, maid, gift buyer, decorator, hostess, and peace maker during the holiday season. Spellbinders new Merry Mayhem collection reflects this kind of exhaustion that many of us feel, sometimes before December has even begun.

I used the Snow Done die set along with the Joy-ish stamp set to make a simple shaker card. All my cardstock is from Spellbinders ColorWheel cardstock pack of 48.
I doubled the foam tape I used behind my front panel, die cut using Essential Arches die set, to make room for the thickness of my penguin and iceberg die cuts as well as my sequin mix.
Christmas time can be joyous and wonderful, and also exhausting, especially for moms. Moms often end up being the chief planner, cook, maid, gift buyer, decorator, hostess, and peace maker during the holiday season. Spellbinders new Merry Mayhem collection reflects this kind of exhaustion that many of us feel, sometimes before December has even begun.
I used the Snow Done die set along with the Joy-ish stamp set to make a simple shaker card. All my cardstock is from Spellbinders ColorWheel cardstock pack of 48.
I doubled the foam tape I used behind my front panel, die cut using Essential Arches die set, to make room for the thickness of my penguin and iceberg die cuts as well as my sequin mix.

A peace-hand sign always makes me think of the 60s with the decade’s bell bottom jeans, long hair and tie dye clothing. I decided to attempt a tie dye background for the Simon Says Stamp Still Here stamp set*, part of October’s Sending Cheer release.
I experimented with several techniques to get a tie dye look. Using just the edges of a rainbow of Distress Ink cubes, I made concentric rectangles on a 4.5 x 6.25” (that’s A6 size) piece of Tim Holtz Distress Watercolor paper. I added water to the very center and hoped it would give a tie dye look as the water spread. It almost worked, but left a distinctly rectangle shape of ink swipes on the paper. I abandoned that one and then just tried to use my Distress Ink Sprays on wet watercolor paper. I used Spun Sugar, Picked Raspberry, Abandoned Coral, Spiced Marmalade, Mustard Seed, and a very small amount of Shabby Shutters (barely visible). That worked better, but I still lacked the concentric circles I was looking for. I took this panel and simply added big concentric circles with a paintbrush dipped in clean water. That got closer to what I wanted, and I stopped there to dry the panel and flatten it under some books for a little while.
Next, I stamped the peace-hand sign in black VersaFine Clair Nocturne ink in the middle of the panel. I did the same with the 2 sentiments. I die cut this with one die from the Spellbinders Essential Modern Ovals die set. I cut a larger oval from Taylored Expressions Lollipop Cardstock.

I really wanted a sunburst in the background of my oval, but I ran into a problem (and found a workaround). I had a great 6x6” Sunburst Stencil from Waffle Flower but it didn’t cover an A6 panel. I ink blended with Altenew’s Maple Yellow ink from the center outwards with a large blending brush. On the left and right, I could go to the edge of the paper before I ran into the edge of the stencil. However, on the top and bottom, I had to make sure I didn’t touch the frame edge of the stencil with my blending brush. I removed the stencil and then extended the sunburst ray edges with Post It tape and kept blending to the edge of my paper. It worked great. (See photos for details)


I trimmed about 1/8” from each side of my yellow sunburst panel and used foam adhesive to mat it on an A6 piece of black cardstock. Next I glued on my oval. I added just a couple gems in the center of the largest flowers for a bit of sparkle.

If you shop from the highlighted product links above, I may receive a small commission at no cost to you. It is much appreciated and helps fund my crafting. Also, any item first marked with an asterisk * was provided by an online store. Otherwise, I bought my supplies.
A peace-hand sign always makes me think of the 60s with the decade’s bell bottom jeans, long hair and tie dye clothing. I decided to attempt a tie dye background for the Simon Says Stamp Still Here stamp set*, part of October’s Sending Cheer release.
I experimented with several techniques to get a tie dye look. Using just the edges of a rainbow of Distress Ink cubes, I made concentric rectangles on a 4.5 x 6.25” (that’s A6 size) piece of Tim Holtz Distress Watercolor paper. I added water to the very center and hoped it would give a tie dye look as the water spread. It almost worked, but left a distinctly rectangle shape of ink swipes on the paper. I abandoned that one and then just tried to use my Distress Ink Sprays on wet watercolor paper. I used Spun Sugar, Picked Raspberry, Abandoned Coral, Spiced Marmalade, Mustard Seed, and a very small amount of Shabby Shutters (barely visible). That worked better, but I still lacked the concentric circles I was looking for. I took this panel and simply added big concentric circles with a paintbrush dipped in clean water. That got closer to what I wanted, and I stopped there to dry the panel and flatten it under some books for a little while.
Next, I stamped the peace-hand sign in black VersaFine Clair Nocturne ink in the middle of the panel. I did the same with the 2 sentiments. I die cut this with one die from the Spellbinders Essential Modern Ovals die set. I cut a larger oval from Taylored Expressions Lollipop Cardstock.
I really wanted a sunburst in the background of my oval, but I ran into a problem (and found a workaround). I had a great 6x6” Sunburst Stencil from Waffle Flower but it didn’t cover an A6 panel. I ink blended with Altenew’s Maple Yellow ink from the center outwards with a large blending brush. On the left and right, I could go to the edge of the paper before I ran into the edge of the stencil. However, on the top and bottom, I had to make sure I didn’t touch the frame edge of the stencil with my blending brush. I removed the stencil and then extended the sunburst ray edges with Post It tape and kept blending to the edge of my paper. It worked great. (See photos for details)
I trimmed about 1/8” from each side of my yellow sunburst panel and used foam adhesive to mat it on an A6 piece of black cardstock. Next I glued on my oval. I added just a couple gems in the center of the largest flowers for a bit of sparkle.
If you shop from the highlighted product links above, I may receive a small commission at no cost to you. It is much appreciated and helps fund my crafting. Also, any item first marked with an asterisk * was provided by an online store. Otherwise, I bought my supplies.

[Stay tuned for a little die cutting trick I did below.] The Still Here stamp set* from Simon Says Stamp’s October Sending Cheer release is a very unique size. The hand measures 1 7/8” x 4 1/8”. In order to make a card where 3 hands could fit on the card, I really needed to make an A6 card, measuring 4.5 x 6.25”. I wanted to do a pastel treatment on the hands with a relatively simple background.
I cut 3 pieces of white cardstock to 4.5” x 6.25”. I took my first panel and dry embossed it with the Simon Says Stamp Dotty Diamonds Embossing Folder. I then cut it down to 3.5” x 5.25” and distressed the edge of this. I cut my second panel to 4” x 5.75”. I left my third panel as is.
I stamped the peace-sign hand three times. First, using Concord & 9th’s Harbor ink, then using Taylored Expressions Lavender Glaze ink, and finally using a retired Stampin’ Up! colored called Soft Seafoam. An ideal substitute for the Stampin’ Up! color is Altenew’s Pistachio Fresh Dye Ink. I fussy cut all three hands and adhered them to the front of the embossed panel as shown, with the blue one on top.

Now for the die cutting trick. I stamped the sentiment “You don’t have to carry it all alone” with black VersaFine Clair Nocturne ink on a piece of white cardstock. I used the smallest tag die from Simon Says Stamps Rounded Tags die set, and by making sure the bottom edge of the tag was always hanging off my cutting mat (thereby not getting cut), I was able to cut the label in the shape you see, after it was stamped. I first put the die to the left of the sentiment and cut the top and sides, then switched it to the right side of the sentiment, cutting the top and sides of the tag shape. It was a little tricky, but it worked perfectly. And using the tag holes, I threaded some Simon Says Stamp Metallic Silver Cord through the holes and around the back of the embossed decorated panel.
I layered all three of these panels on top of one another, using thin foam adhesive under the embossed panel.
I finished by adding some clear, iridescent sequins in 2 sizes.
If you shop from the highlighted product links above, I may receive a small commission at no cost to you. It is much appreciated and helps fund my crafting. Also, any item first marked with an asterisk * was provided by an online store. Otherwise, I bought my supplies.
[Stay tuned for a little die cutting trick I did below.] The Still Here stamp set* from Simon Says Stamp’s October Sending Cheer release is a very unique size. The hand measures 1 7/8” x 4 1/8”. In order to make a card where 3 hands could fit on the card, I really needed to make an A6 card, measuring 4.5 x 6.25”. I wanted to do a pastel treatment on the hands with a relatively simple background.
I cut 3 pieces of white cardstock to 4.5” x 6.25”. I took my first panel and dry embossed it with the Simon Says Stamp Dotty Diamonds Embossing Folder. I then cut it down to 3.5” x 5.25” and distressed the edge of this. I cut my second panel to 4” x 5.75”. I left my third panel as is.
I stamped the peace-sign hand three times. First, using Concord & 9th’s Harbor ink, then using Taylored Expressions Lavender Glaze ink, and finally using a retired Stampin’ Up! colored called Soft Seafoam. An ideal substitute for the Stampin’ Up! color is Altenew’s Pistachio Fresh Dye Ink. I fussy cut all three hands and adhered them to the front of the embossed panel as shown, with the blue one on top.
Now for the die cutting trick. I stamped the sentiment “You don’t have to carry it all alone” with black VersaFine Clair Nocturne ink on a piece of white cardstock. I used the smallest tag die from Simon Says Stamps Rounded Tags die set, and by making sure the bottom edge of the tag was always hanging off my cutting mat (thereby not getting cut), I was able to cut the label in the shape you see, after it was stamped. I first put the die to the left of the sentiment and cut the top and sides, then switched it to the right side of the sentiment, cutting the top and sides of the tag shape. It was a little tricky, but it worked perfectly. And using the tag holes, I threaded some Simon Says Stamp Metallic Silver Cord through the holes and around the back of the embossed decorated panel.
I layered all three of these panels on top of one another, using thin foam adhesive under the embossed panel.
I finished by adding some clear, iridescent sequins in 2 sizes.
If you shop from the highlighted product links above, I may receive a small commission at no cost to you. It is much appreciated and helps fund my crafting. Also, any item first marked with an asterisk * was provided by an online store. Otherwise, I bought my supplies.

Day 2 of the Simon Says Stamp October Sending Cheer release. The beautiful floral inlay inside the peace-sign hand in the Still Here stamp set* offers a lot of design opportunities. I really wanted to color it in, and I had a notion to make the project a two-tone piece using blue and brown.
I decided on a tag. I used the largest tag die in the Simon Says Stamp Rounded Tags die set. I cut 2 tags, one from dark brown cardstock and 1 from a sheet of 8 x 8” Neutral Tim Holtz Palette Paper. I so love working with all the Palette Paper sets. I inked the edges of the tag with Frayed Burlap Distress Ink.
I stamped the hand using Gina K Designs Chocolate Truffle Amalgam Ink onto Lawn Fawn’s Vanilla Malt cardstock and fussy cut it leaving a thin border. Next, I took my Copic markers in B21, B41, B45 and B97 and colored in the floral design.

I took a piece of heavyweight vellum, tore one side, and stamped the “take care” sentiment from the Still Here stamp set on the right hand side using VersaFine Clair ink in Pinecone, an ink color that’s a little more red than the Gina K. Next, I heat embossed that with Brutus Monroe Icicle clear embossing powder.
I used the Hero Arts Nesting Tags die set to make both a small tag from a sheet of Tim Holtz Backdrops Vol 4 paper, as well as a hole reinforcer from Tim Holtz 8 x 8” Palette Paper in Blue. I inked the edge of the smaller tag with Frayed Burlap Distress Ink. Using the same blue Palette Paper, I die cut 2 sizes of butterflies using the Simon Says Stamp Artful Palette dies. I assembled everything and added a thread nest with beige thread between the smaller tag and the piece of vellum.
I took Tim Holtz Mummy Cloth to make the tie that goes through the hole.
If you shop from the highlighted product links above, I may receive a small commission at no cost to you. It is much appreciated and helps fund my crafting. Also, any item first marked with an asterisk * was provided by an online store. Otherwise, I bought my supplies.
Day 2 of the Simon Says Stamp October Sending Cheer release. The beautiful floral inlay inside the peace-sign hand in the Still Here stamp set* offers a lot of design opportunities. I really wanted to color it in, and I had a notion to make the project a two-tone piece using blue and brown.
I decided on a tag. I used the largest tag die in the Simon Says Stamp Rounded Tags die set. I cut 2 tags, one from dark brown cardstock and 1 from a sheet of 8 x 8” Neutral Tim Holtz Palette Paper. I so love working with all the Palette Paper sets. I inked the edges of the tag with Frayed Burlap Distress Ink.
I stamped the hand using Gina K Designs Chocolate Truffle Amalgam Ink onto Lawn Fawn’s Vanilla Malt cardstock and fussy cut it leaving a thin border. Next, I took my Copic markers in B21, B41, B45 and B97 and colored in the floral design.
I took a piece of heavyweight vellum, tore one side, and stamped the “take care” sentiment from the Still Here stamp set on the right hand side using VersaFine Clair ink in Pinecone, an ink color that’s a little more red than the Gina K. Next, I heat embossed that with Brutus Monroe Icicle clear embossing powder.
I used the Hero Arts Nesting Tags die set to make both a small tag from a sheet of Tim Holtz Backdrops Vol 4 paper, as well as a hole reinforcer from Tim Holtz 8 x 8” Palette Paper in Blue. I inked the edge of the smaller tag with Frayed Burlap Distress Ink. Using the same blue Palette Paper, I die cut 2 sizes of butterflies using the Simon Says Stamp Artful Palette dies. I assembled everything and added a thread nest with beige thread between the smaller tag and the piece of vellum.
I took Tim Holtz Mummy Cloth to make the tie that goes through the hole.
If you shop from the highlighted product links above, I may receive a small commission at no cost to you. It is much appreciated and helps fund my crafting. Also, any item first marked with an asterisk * was provided by an online store. Otherwise, I bought my supplies.

The new Still Here clear stamp* set is part of Simon Says Stamp’s October Sending Cheer release. This stamp set, with the peace hand sign, truly evokes the feeling of the 1960s. It makes me think of tie dye, bell bottoms, and the Beatles.
I decided to use a rainbow effect on the hand, and Distress Oxides were the perfect medium. I used a different Tim Holtz Tiny Ink Blender for each color, and diffused the ink before I stamped each time. So, it went like this: I inked the top of the hand, using a tiny blender, with Abandoned Coral Distress Oxide. Then I diffused that color at the bottom edge with the same ink blender. Then I stamped. Then I took a different ink blender and added Carved Pumpkin right below where the Abandoned Coral ink had been (never cleaning the stamp as I went) and diffused it at the top and bottom. I continued this process moving down the hand and using Mustard Seed, Twisted Citron, Peacock Feather, and Wilted Violet. I went back a couple times to add more ink in some spots, being careful to feather it out on the edges. I was very happy with my results.

I used VersaFine Clair black ink to stamp the Sending Peace sentiment, part of the Still Here stamp set, on the right side of the index finger.
For the white background of the card, I decided to use a favorite background stamp of mine. It is the Simon Hurley Typewriter stamp from Ranger. I stamped with black VersaFine Clair ink to get a crisp image.
I trimmed my rainbow-stamped white panel and torn the bottom edge. I used Spellbinders Colorwheel cardstock in Peridot, Teal Topaz and Lilac and tore pieces of these, in the same width as my white cardstock, to layer underneath. I glued all these pieces together and then matted them onto a black piece of cardstock. I centered all this onto my white typewriter stamped background. I glued all this onto a white A2 cardbase.
I finished the card with some color coordinated epoxy dots I had in my stash.
The highlighted links above are affiliate links. If you click through and shop from these I may receive a small commission at no cost to you. It is much appreciated and helps fund my crafting. Also, any item first marked with an asterisk* was provided at no cost by a retailer. Otherwise, I bought my supplies.
The new Still Here clear stamp* set is part of Simon Says Stamp’s October Sending Cheer release. This stamp set, with the peace hand sign, truly evokes the feeling of the 1960s. It makes me think of tie dye, bell bottoms, and the Beatles.
I decided to use a rainbow effect on the hand, and Distress Oxides were the perfect medium. I used a different Tim Holtz Tiny Ink Blender for each color, and diffused the ink before I stamped each time. So, it went like this: I inked the top of the hand, using a tiny blender, with Abandoned Coral Distress Oxide. Then I diffused that color at the bottom edge with the same ink blender. Then I stamped. Then I took a different ink blender and added Carved Pumpkin right below where the Abandoned Coral ink had been (never cleaning the stamp as I went) and diffused it at the top and bottom. I continued this process moving down the hand and using Mustard Seed, Twisted Citron, Peacock Feather, and Wilted Violet. I went back a couple times to add more ink in some spots, being careful to feather it out on the edges. I was very happy with my results.
I used VersaFine Clair black ink to stamp the Sending Peace sentiment, part of the Still Here stamp set, on the right side of the index finger.
For the white background of the card, I decided to use a favorite background stamp of mine. It is the Simon Hurley Typewriter stamp from Ranger. I stamped with black VersaFine Clair ink to get a crisp image.
I trimmed my rainbow-stamped white panel and torn the bottom edge. I used Spellbinders Colorwheel cardstock in Peridot, Teal Topaz and Lilac and tore pieces of these, in the same width as my white cardstock, to layer underneath. I glued all these pieces together and then matted them onto a black piece of cardstock. I centered all this onto my white typewriter stamped background. I glued all this onto a white A2 cardbase.
I finished the card with some color coordinated epoxy dots I had in my stash.
The highlighted links above are affiliate links. If you click through and shop from these I may receive a small commission at no cost to you. It is much appreciated and helps fund my crafting. Also, any item first marked with an asterisk* was provided at no cost by a retailer. Otherwise, I bought my supplies.

Inspired by the September 14, 2026 Simon Says Stamp Monday Challenge with the theme of Transport It, I am posting this card with the ever-popular Tim Holtz Road Trip die. I cut it from a variety of miscellaneous textured blue cardstock along with some grey and black. I got the blue cardstock from a friend and have no idea who manufactured it.

The trees shown here are from the Poppystamps Evergreen Trio die set. The clouds are from a Honey Bee Stamps die set called Whispy Clouds that is now retired.
I used a sentiment strip for the Happy Birthday sentiment. I don't know who made it. The background paper is from Joann's (#RIP), I believe. Designed by Maggie Holmes as part of her Forever Fields collection.
If you shop from the product links above, I may receive a small commission at no cost to you. It is much appreciated and helps fund my crafting. Also, any item first marked with an asterisk * was provided by an online store. Otherwise, I bought my supplies.
Inspired by the September 14, 2026 Simon Says Stamp Monday Challenge with the theme of Transport It, I am posting this card with the ever-popular Tim Holtz Road Trip die. I cut it from a variety of miscellaneous textured blue cardstock along with some grey and black. I got the blue cardstock from a friend and have no idea who manufactured it.
The trees shown here are from the Poppystamps Evergreen Trio die set. The clouds are from a Honey Bee Stamps die set called Whispy Clouds that is now retired.
I used a sentiment strip for the Happy Birthday sentiment. I don't know who made it. The background paper is from Joann's (#RIP), I believe. Designed by Maggie Holmes as part of her Forever Fields collection.
If you shop from the product links above, I may receive a small commission at no cost to you. It is much appreciated and helps fund my crafting. Also, any item first marked with an asterisk * was provided by an online store. Otherwise, I bought my supplies.

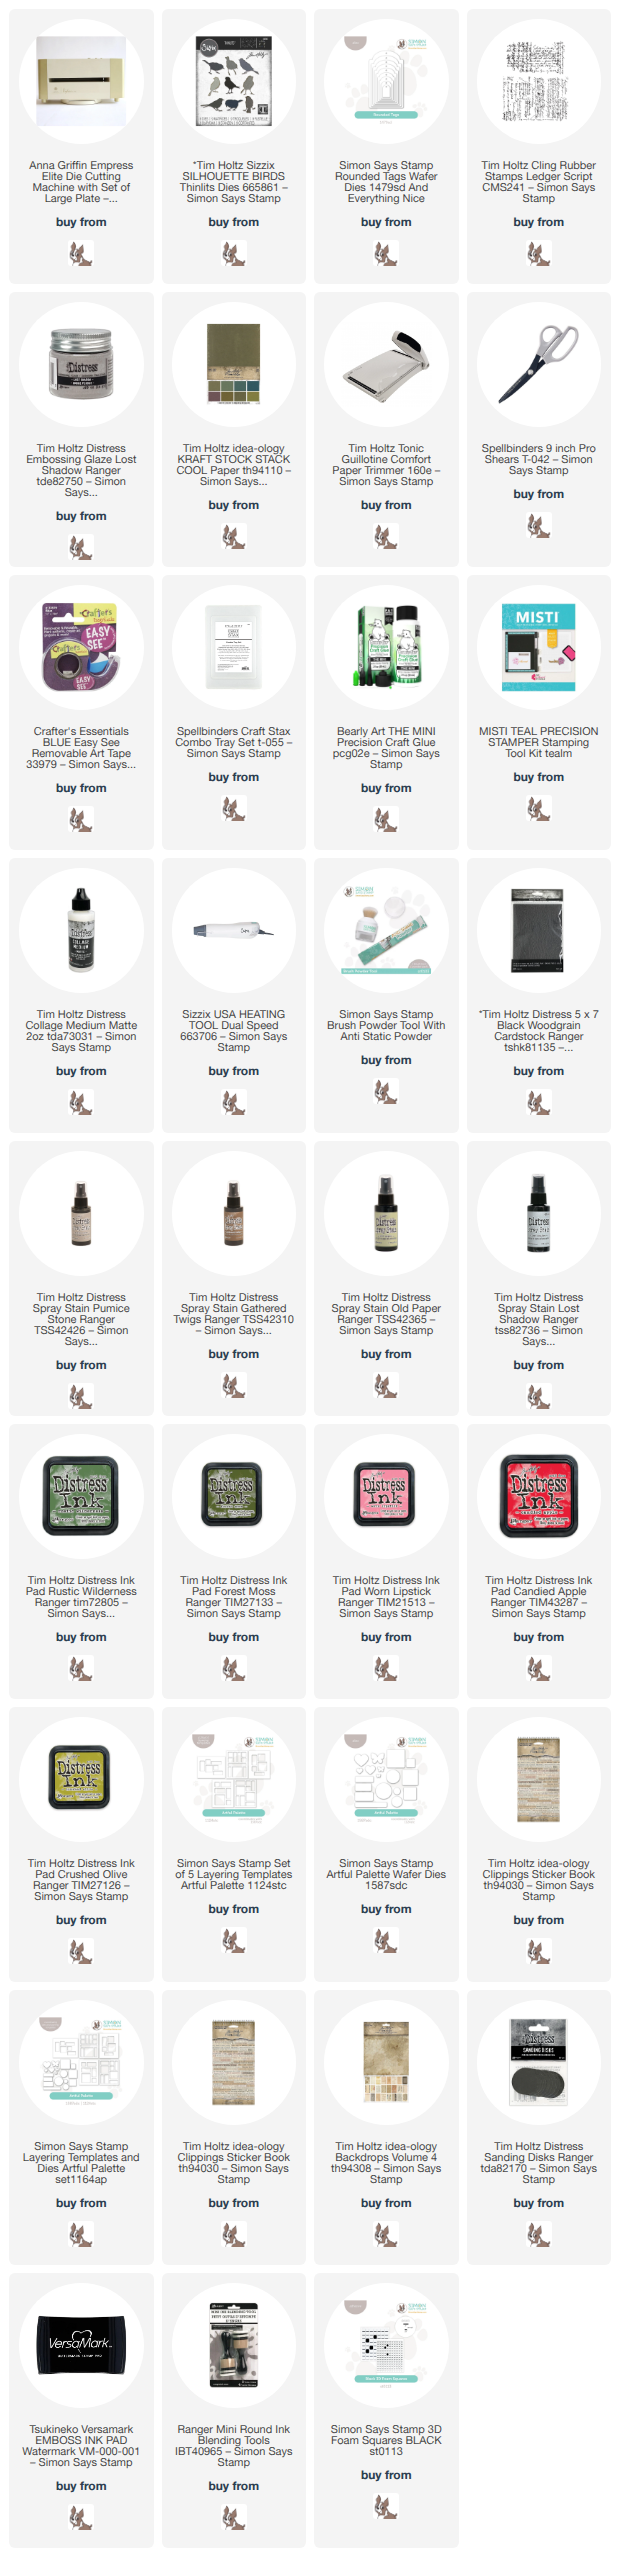
I was inspired by today’s Simon Says Stamp Wednesday Challenge to use texture and Tim Holtz products. Problem: there are too many choices! From pastes and stencils and Idea-ology to dies and so much else, how do you choose the products you’ll use. I’ve always loved his Silhouette Birds dies and don’t use them as often as I would like, so I started there. I adore his Picture Show die set too and decided to incorporate that.

Strangely, I worked from the middle out. I took a piece of his Distress Watercolor Paper and stamped with his Ledger Script stamp set with Versamark. I heat embossed using the Lost Shadow Embossing Glaze (excellent when you don’t want the harsh white of using clear powder). Then I dipped and dried the paper using Lost Shadow, Pumice Stone (mostly), and Old Paper Distress Spray Stain. I die cut the “Viewmaster” round slide reel die from this paper. Next, I took some of his Collage Paper - I don’t know what print it is, but it is old and was just a sheet given to me by a friend. I fan-folded it and then trimmed the ends (using no precision at all) and used collage medium to make it stay in a rosette form. Before I glued this to the center of the round slide reel, I dipped piece into a very small amount Forest Moss and Rustic Wilderness Distress ink smushed on a mat and mixed with a lot of water. I knew I was moving toward using some green and I wanted a cohesive color look.
I die cut the largest tag from the Simon Says Stamp rounded tags die set out of one of his Backdrops. I dipped the edges in some watered down Pumice Stone Distress Spray Stain and then inked the edges in the same color ink. I also glued this tag to an identical one cut from dark brown paper only for stability.
Next, I took a dark green piece of Tim’s Kraft Stock Stack Cool Paper and dry embossed it with a very old and retired 2D TH embossing folder called Blueprint. I sanded the top of this to reveal the kraft paper. Next, I used the Simon Says Stamp Artful Palette Dies to cut out rounded squares and rectangles. I lightly inked the edges with Pumice Stone ink and adhered them with foam adhesive to the tag, using one of the coordinating templates.
I glued the round slide reel with the collage paper rosette to the middle of the tag, on top of the kraft pieces. I added a thread nest in dark brown. I glued on 2 previously made die cuts from the retired Holiday Greens die set. I think these are inked with Rustic Wilderness and Crushed Olive Distress ink. I cut a Silhouette Bird from previously inked watercolor paper (this could be Worn Lipstick mixed with a little Candied Apple and flicked with some Gathered Twigs) and lightly inked the edges with Pumice Stone. I glued this on to the greenery pieces.
Finally, I adhered one of his Idea-ology Clippings to a small piece of his black woodgrain cardstock and glued it to the top of the tag.
I completed the tag with a piece of wrinkled seam binding I had in my stash.
I am also entering this into the Little Red Wagon Challenge to use a stamp.
If you shop from the links below. I may receive a small commission at no cost to you. It is much appreciated and helps fund my crafting. Also, any item first marked with an asterisk * was provided by an online store. Otherwise, I bought my supplies.
I was inspired by today’s Simon Says Stamp Wednesday Challenge to use texture and Tim Holtz products. Problem: there are too many choices! From pastes and stencils and Idea-ology to dies and so much else, how do you choose the products you’ll use. I’ve always loved his Silhouette Birds dies and don’t use them as often as I would like, so I started there. I adore his Picture Show die set too and decided to incorporate that.
Strangely, I worked from the middle out. I took a piece of his Distress Watercolor Paper and stamped with his Ledger Script stamp set with Versamark. I heat embossed using the Lost Shadow Embossing Glaze (excellent when you don’t want the harsh white of using clear powder). Then I dipped and dried the paper using Lost Shadow, Pumice Stone (mostly), and Old Paper Distress Spray Stain. I die cut the “Viewmaster” round slide reel die from this paper. Next, I took some of his Collage Paper - I don’t know what print it is, but it is old and was just a sheet given to me by a friend. I fan-folded it and then trimmed the ends (using no precision at all) and used collage medium to make it stay in a rosette form. Before I glued this to the center of the round slide reel, I dipped piece into a very small amount Forest Moss and Rustic Wilderness Distress ink smushed on a mat and mixed with a lot of water. I knew I was moving toward using some green and I wanted a cohesive color look.
I die cut the largest tag from the Simon Says Stamp rounded tags die set out of one of his Backdrops. I dipped the edges in some watered down Pumice Stone Distress Spray Stain and then inked the edges in the same color ink. I also glued this tag to an identical one cut from dark brown paper only for stability.
Next, I took a dark green piece of Tim’s Kraft Stock Stack Cool Paper and dry embossed it with a very old and retired 2D TH embossing folder called Blueprint. I sanded the top of this to reveal the kraft paper. Next, I used the Simon Says Stamp Artful Palette Dies to cut out rounded squares and rectangles. I lightly inked the edges with Pumice Stone ink and adhered them with foam adhesive to the tag, using one of the coordinating templates.
I glued the round slide reel with the collage paper rosette to the middle of the tag, on top of the kraft pieces. I added a thread nest in dark brown. I glued on 2 previously made die cuts from the retired Holiday Greens die set. I think these are inked with Rustic Wilderness and Crushed Olive Distress ink. I cut a Silhouette Bird from previously inked watercolor paper (this could be Worn Lipstick mixed with a little Candied Apple and flicked with some Gathered Twigs) and lightly inked the edges with Pumice Stone. I glued this on to the greenery pieces.
Finally, I adhered one of his Idea-ology Clippings to a small piece of his black woodgrain cardstock and glued it to the top of the tag.
I completed the tag with a piece of wrinkled seam binding I had in my stash.
I am also entering this into the Little Red Wagon Challenge to use a stamp.
If you shop from the links below. I may receive a small commission at no cost to you. It is much appreciated and helps fund my crafting. Also, any item first marked with an asterisk * was provided by an online store. Otherwise, I bought my supplies.

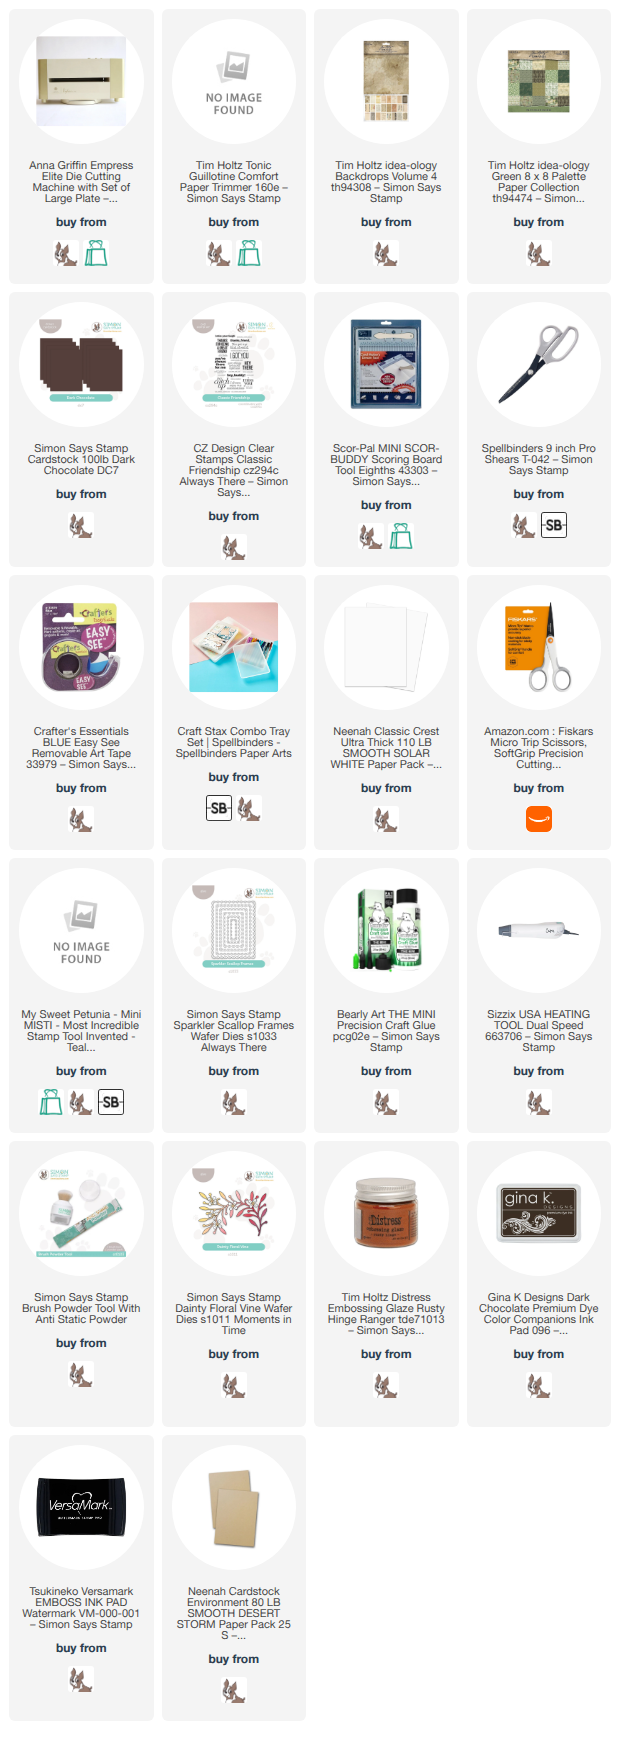
Happy Stamptember! I hope you are enjoying all the goodness of this fun, stamping season over at Simon Says Stamp. It promises to be an exciting month.
I love the phrase “Hey There, Pumpkin,” as I call my daughters by this affectionate name (or more commonly, Pumpkin Head). I decided to take the Harvest Blessings stamp set* and the Classic Friendship stamp set* and create a tag. The tag shape is all my own making — no die involved.

I first stamped the largest pumpkin (which has interchangeable phrases that go in the middle: Blessings, Pumpkin, and Thanks) with Versamark on Neenah Desert Storm Cardstock. Next, I heat embossed with Tim Holtz Distress Embossing Glaze in Rusty Hinge. Instead of stamping the word Pumpkin between the top and bottom of the pumpkin, I stamped it separately and heat embossed it with Lindy’s Gang Twilight Bronze embossing powder. If you don’t have that, any metallic embossing powder would work great. I cut out the word and glued it in the center of my fussy-cut pumpkin. The stem was stamped with a dark brown ink - no heat embossing.
Just behind my pumpkin, I wanted to create some very subtle foliage. I used 2 different die sets for this. First, I used the Simon Says Stamp Dainty Floral Vine and added leaves from Tim Holtz Funky Foliage die set from Sizzix to cut from the same Desert Storm cardstock.

I used Poppystamps Scalloped Stitch Frames die set to make the frame from green paper from the Tim Holtz idea-ology Green 8 x8 Paper Pallette Collection. This is retired so I have linked to a frame set from Simon Says Stamp. Combined with a rectangular die, this would make a frame. The light background of the frame and the dark background paper on the tag are both from Tim Holtz idea-ology Backdrops Vol 4. I stamped Hey There from the Simon Says Stamp Classic Friendship stamp set with Versamark and heat embossed with the same Lindy’s Gang Twilight Bronze embossing powder. The frame is popped up with foam tape.
I used both leaf stamps in the Harvest Blessings stamp set to stamp with Hero Arts Wet Cement ink onto the dark Backdrops paper background. A lot of light brown inks would work for this, or even Versamark, as I was only trying to get a watermark effect.
I assembled everything as shown adding a dark brown cardstock background, a hole reinforcer, crinkled seam binding and a little tan and white baker’s twine.
Hope you are all enjoying Stamptember.
If you shop from the links below. I may receive a small commission at no cost to you. It is much appreciated and helps fund my crafting. Also, any item first marked with an asterisk * was provided by an online store. Otherwise, I bought my supplies.
Happy Stamptember! I hope you are enjoying all the goodness of this fun, stamping season over at Simon Says Stamp. It promises to be an exciting month.
I love the phrase “Hey There, Pumpkin,” as I call my daughters by this affectionate name (or more commonly, Pumpkin Head). I decided to take the Harvest Blessings stamp set* and the Classic Friendship stamp set* and create a tag. The tag shape is all my own making — no die involved.
I first stamped the largest pumpkin (which has interchangeable phrases that go in the middle: Blessings, Pumpkin, and Thanks) with Versamark on Neenah Desert Storm Cardstock. Next, I heat embossed with Tim Holtz Distress Embossing Glaze in Rusty Hinge. Instead of stamping the word Pumpkin between the top and bottom of the pumpkin, I stamped it separately and heat embossed it with Lindy’s Gang Twilight Bronze embossing powder. If you don’t have that, any metallic embossing powder would work great. I cut out the word and glued it in the center of my fussy-cut pumpkin. The stem was stamped with a dark brown ink - no heat embossing.
Just behind my pumpkin, I wanted to create some very subtle foliage. I used 2 different die sets for this. First, I used the Simon Says Stamp Dainty Floral Vine and added leaves from Tim Holtz Funky Foliage die set from Sizzix to cut from the same Desert Storm cardstock.
I used Poppystamps Scalloped Stitch Frames die set to make the frame from green paper from the Tim Holtz idea-ology Green 8 x8 Paper Pallette Collection. This is retired so I have linked to a frame set from Simon Says Stamp. Combined with a rectangular die, this would make a frame. The light background of the frame and the dark background paper on the tag are both from Tim Holtz idea-ology Backdrops Vol 4. I stamped Hey There from the Simon Says Stamp Classic Friendship stamp set with Versamark and heat embossed with the same Lindy’s Gang Twilight Bronze embossing powder. The frame is popped up with foam tape.
I used both leaf stamps in the Harvest Blessings stamp set to stamp with Hero Arts Wet Cement ink onto the dark Backdrops paper background. A lot of light brown inks would work for this, or even Versamark, as I was only trying to get a watermark effect.
I assembled everything as shown adding a dark brown cardstock background, a hole reinforcer, crinkled seam binding and a little tan and white baker’s twine.
Hope you are all enjoying Stamptember.
If you shop from the links below. I may receive a small commission at no cost to you. It is much appreciated and helps fund my crafting. Also, any item first marked with an asterisk * was provided by an online store. Otherwise, I bought my supplies.

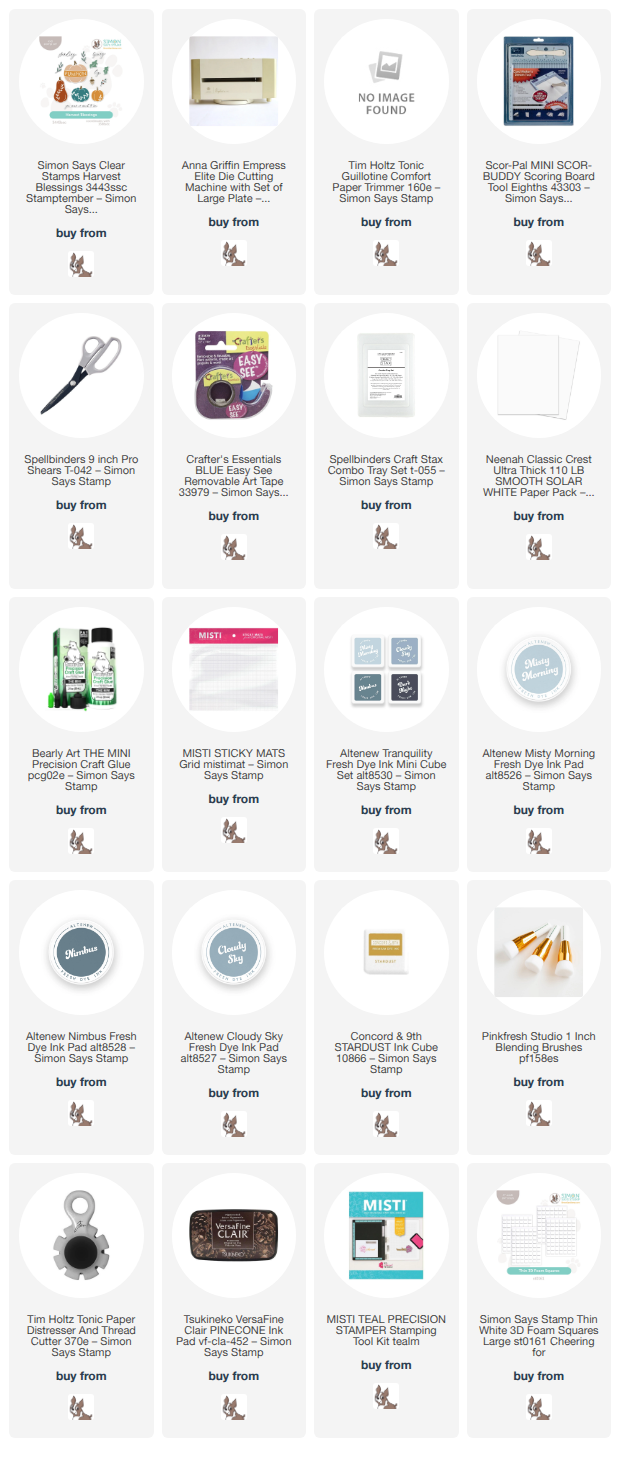
Happy Stamptember once again!! I hope you are enjoying all that Simon Says Stamp has to offer during this very special month. I will have Stamptember-related posts on my blog for Sept 1-4.
With so many cute, solid images in the Harvest Blessings stamp set*, I just had to use these to make a background. I used Stampin’ Up! ink including Pumpkin Pie, Old Olive, Rich Razzleberry, Crumb Cake and Early Espresso. I have linked to similar colors of ink and cardstock available from Simon Says Stamp below. I stamped the yellow leaves with Gina K Designs’ Sweet Corn yellow ink. I stamped randomly all over a piece of vanilla cardstock. I also stamped the word ‘sending’ in dark brown ink and then the itty-bitty heart stamp with the Rich Razzleberry ink. A great alternative to this cardstock and ink color is Gina K's Plum Punch. I cut it into a tag shape - no die used.

I die cut this stamped panel, as well as a Rich Razzleberry panel, using the Paper Rose Stitched Rectangles set of dies. These may be hard to find, but Simon Says Stamp makes an almost identical set which I have linked below.
For my focal point, I stamped the large pumpkin and stem in Pumpkin Pie and Early Espresso ink. Then I carefully stamped the word Blessings in the middle with Versamark. I also stamped the 2 leaves on a scrap piece. I heat embossed all three with Ink on 3’s Gold Rush embossing powder. I fussy cut the pumpkin and the leaves and popped them up with foam tape. The background is made of a cork sheet I’ve had in my stash forever. I die cut that with Spellbinders Labels 18 nested die set. It is retired but 2 great alternatives from Simon Says Stamp are their Grandstand Labels and the Petal Tipped Labels.

I assembled everything as shown and attached the tag with some linen thread to the fold in my card. I decided to adhere the tag to the card using a bit of foam adhesive, but you could easily leave it loose.
Happy Stamptember, y’all!
If you shop from the links below. I may receive a small commission at no cost to you. It is much appreciated and helps fund my crafting. Also, any item first marked with an asterisk * was provided by an online store. Otherwise, I bought my supplies.
Happy Stamptember once again!! I hope you are enjoying all that Simon Says Stamp has to offer during this very special month. I will have Stamptember-related posts on my blog for Sept 1-4.
With so many cute, solid images in the Harvest Blessings stamp set*, I just had to use these to make a background. I used Stampin’ Up! ink including Pumpkin Pie, Old Olive, Rich Razzleberry, Crumb Cake and Early Espresso. I have linked to similar colors of ink and cardstock available from Simon Says Stamp below. I stamped the yellow leaves with Gina K Designs’ Sweet Corn yellow ink. I stamped randomly all over a piece of vanilla cardstock. I also stamped the word ‘sending’ in dark brown ink and then the itty-bitty heart stamp with the Rich Razzleberry ink. A great alternative to this cardstock and ink color is Gina K's Plum Punch. I cut it into a tag shape - no die used.
I die cut this stamped panel, as well as a Rich Razzleberry panel, using the Paper Rose Stitched Rectangles set of dies. These may be hard to find, but Simon Says Stamp makes an almost identical set which I have linked below.
For my focal point, I stamped the large pumpkin and stem in Pumpkin Pie and Early Espresso ink. Then I carefully stamped the word Blessings in the middle with Versamark. I also stamped the 2 leaves on a scrap piece. I heat embossed all three with Ink on 3’s Gold Rush embossing powder. I fussy cut the pumpkin and the leaves and popped them up with foam tape. The background is made of a cork sheet I’ve had in my stash forever. I die cut that with Spellbinders Labels 18 nested die set. It is retired but 2 great alternatives from Simon Says Stamp are their Grandstand Labels and the Petal Tipped Labels.
I assembled everything as shown and attached the tag with some linen thread to the fold in my card. I decided to adhere the tag to the card using a bit of foam adhesive, but you could easily leave it loose.
Happy Stamptember, y’all!
If you shop from the links below. I may receive a small commission at no cost to you. It is much appreciated and helps fund my crafting. Also, any item first marked with an asterisk * was provided by an online store. Otherwise, I bought my supplies.


Welcome! This was a fun card to make. Even though I am “the Crazy Pumpkin Lady” and decorate my home with countless pumpkins in autumn, I don’t have any blue pumpkins (I do have a teal one, however). The ideal range of colors come from Altenew’s Tranquility line of inks, a gorgeous set of blue-gray colors that include Cloudy Sky, Nimbus, and Misty Morning. I used Altenew’s Misty Morning for the lightest blue and smallest pumpkin. Since I need to reink my Altenew pads, I chose 2 other blues very similar to Altenew's for the darker pumpkins. I first stamped the largest pumpkin in 2 steps: first the blue pumpkin and then the Thanks phrase in the middle using Hero Arts Wet Cement.

I used Hero Arts Wet Cement inkpad for the stems. I used Concord & 9th’s Stardust for the leaves and acorn bottom. I fussy cut all the images and glued the gourds together with the yellow leaves. I lightly ink blended a white cardstock panel with one of my blue inks (can’t remember which one but probably Misty Morning). I stamped the ‘you mean so much to me’ sentiment in Versa Fine Clair ink in Pinecone to get a super crisp, dark brown image. The white leaves in the background all come from Trinity Stamps’ Wildflower Clippings die set. I used a tan thread nest behind this.
The textured background comes from a very old Tim Holtz embossing folder called Gridlock (retired, but eBay has several at good prices). I edged the 2 white background pieces with my Tim Holtz Tonic Paper Distresser. I assembled everything as shown, using both foam tape and glue, attaching the tiny acorn to sit just over my sentiment.
If you shop from the links below. I may receive a small commission at no cost to you. It is much appreciated and helps fund my crafting. Also, any item first marked with an asterisk * was provided by an online store. Otherwise, I bought my supplies.
Welcome! This was a fun card to make. Even though I am “the Crazy Pumpkin Lady” and decorate my home with countless pumpkins in autumn, I don’t have any blue pumpkins (I do have a teal one, however). The ideal range of colors come from Altenew’s Tranquility line of inks, a gorgeous set of blue-gray colors that include Cloudy Sky, Nimbus, and Misty Morning. I used Altenew’s Misty Morning for the lightest blue and smallest pumpkin. Since I need to reink my Altenew pads, I chose 2 other blues very similar to Altenew's for the darker pumpkins. I first stamped the largest pumpkin in 2 steps: first the blue pumpkin and then the Thanks phrase in the middle using Hero Arts Wet Cement.
I used Hero Arts Wet Cement inkpad for the stems. I used Concord & 9th’s Stardust for the leaves and acorn bottom. I fussy cut all the images and glued the gourds together with the yellow leaves. I lightly ink blended a white cardstock panel with one of my blue inks (can’t remember which one but probably Misty Morning). I stamped the ‘you mean so much to me’ sentiment in Versa Fine Clair ink in Pinecone to get a super crisp, dark brown image. The white leaves in the background all come from Trinity Stamps’ Wildflower Clippings die set. I used a tan thread nest behind this.
The textured background comes from a very old Tim Holtz embossing folder called Gridlock (retired, but eBay has several at good prices). I edged the 2 white background pieces with my Tim Holtz Tonic Paper Distresser. I assembled everything as shown, using both foam tape and glue, attaching the tiny acorn to sit just over my sentiment.
If you shop from the links below. I may receive a small commission at no cost to you. It is much appreciated and helps fund my crafting. Also, any item first marked with an asterisk * was provided by an online store. Otherwise, I bought my supplies.

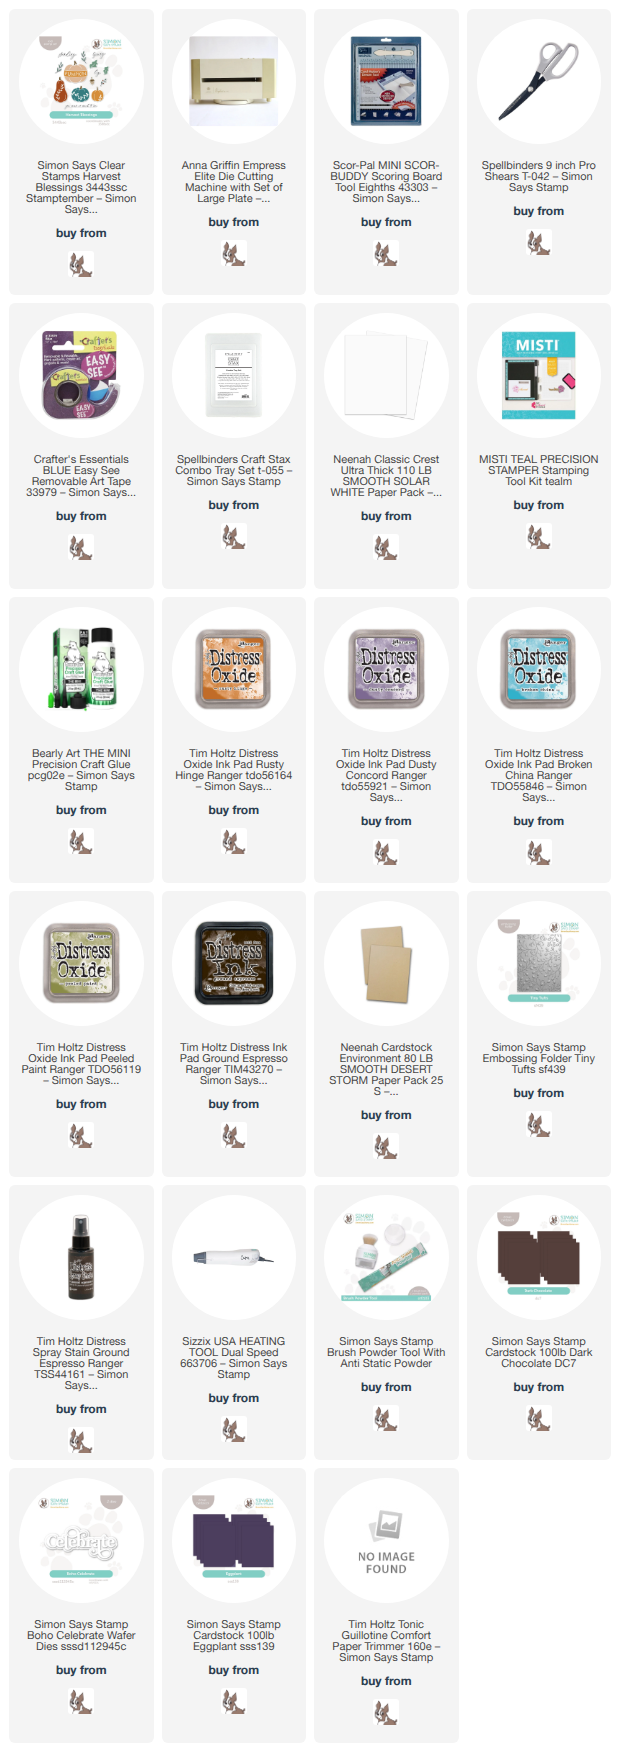
Happy STAMPtember from me to you! It’s a thrill to be participating as a member of the Simon Says Stamp Designer Family in my first STAMPtember. All my projects will use the elegant and easy-to-use Harvest Blessings stamp set*. When I opened my up my package from Simon Says Stamp and I saw all the pumpkins and gourds on the stamp set, I thought “they know me!” You see, I LOVE pumpkins. I decorate my home for fall in almost every room. I have pumpkins made of ceramic, glass, wicker, wood, plastic, and sweater material. I have a giant ivory-colored pumpkin platter (from Crate & Barrel eons ago) that sits on a shelf in my kitchen almost year round, except for December. I have a coffee mug that says “Crazy Pumpkin Lady” that I bought from Joann’s (#RIP).

Anyway, it was easy to come up with ideas for this set. For this first card, I decided to treat the solid-image stamps to my Distress Oxide inks. So that I could overlap the images, I used masks made from Post-It Notes to cover the images I stamped and didn’t want to stamp on top of. I used Rusty Hinge, Dusty Concord, Broken China, and Peeled Paint, along with Ground Espresso Distress Ink for the stems. After doing this stamping in a vertical line on a piece of Neenah Desert Storm cardstock, I splattered it with my Dr. Ph. Martin Bombay India Ink in Sepia. However, an equally good choice for this dark brown splatter is Tim Holtz’s Distress Spray in Ground Espresso. Just flick it from the little straw inside the bottle, instead of spraying it.
When my ink and my splatter were dry, I fussy cut the right edge of the stacked gourds as shown. I laid this edge down on some dark brown cardstock and traced it with a pencil. Next, I fussy cut the edge of the brown paper so I could make the shadow behind the gourds. I glued this thin piece behind the gourd piece.
Next came the leaves. I stamped the 2 leaf shapes in the stamp set onto the same Desert Storm cardstock with Versamark and heat embossed them with Lindy’s Gang Twilight Bronze embossing powder. If you have trouble finding this one, any dark, metallic embossing powder would work great. Gold would work perfectly too. I glued the leaves as shown onto my stamped piece.
I took a piece of purple cardstock (my best match for the Dusty Concord Distress Ink, I’ve linked to the Simon Says Stamp Eggplant cardstock below as I think it would be ideal) and dry embossed a piece of 4.5 x 6” cardstock with a favorite: Simon Says Stamp’s Tiny Tufts embossing folder. I purposedly used a larger than A2 piece for this as the dry embossing sort of “shrinks” the size of the paper because of the impressions it makes. Next, I cut it to an A2 size of 4.25” x 5.5”.
I built this card in an odd way - I took the purple piece and glued it to a cardbase made of Neenah Classic Crest 110lb cover stock in white. Then, I took the stamped piece (with the brown glued on the back) and scored it and folded it over the left side of the card. It made it kinda chunky and I might do this differently next time.
I then die cut Simon Says Stamp’s Boho Celebrate die three times from dark brown cardstock. I stacked two of them and glued them together, and then smooshed my Versamark inkpad onto the top one and again heat embossed with the same Twilight Bronze embossing powder. I cut the third die cut in half and glued only the right half onto the back of the word. I did this because the word was going to be glued down on the higher left side, and then hang over the lower embossed purple panel (I really hope that made sense [said no AI ever]). I was happy with how it all worked out.
Enjoy this Stamptember month at Simons Says Stamp and tune it every day for some fun surprises. By the way, the Harvest Blessings stamp set WILL be available past Stamptember.
Thanks!
Happy STAMPtember from me to you! It’s a thrill to be participating as a member of the Simon Says Stamp Designer Family in my first STAMPtember. All my projects will use the elegant and easy-to-use Harvest Blessings stamp set*. When I opened my up my package from Simon Says Stamp and I saw all the pumpkins and gourds on the stamp set, I thought “they know me!” You see, I LOVE pumpkins. I decorate my home for fall in almost every room. I have pumpkins made of ceramic, glass, wicker, wood, plastic, and sweater material. I have a giant ivory-colored pumpkin platter (from Crate & Barrel eons ago) that sits on a shelf in my kitchen almost year round, except for December. I have a coffee mug that says “Crazy Pumpkin Lady” that I bought from Joann’s (#RIP).
Anyway, it was easy to come up with ideas for this set. For this first card, I decided to treat the solid-image stamps to my Distress Oxide inks. So that I could overlap the images, I used masks made from Post-It Notes to cover the images I stamped and didn’t want to stamp on top of. I used Rusty Hinge, Dusty Concord, Broken China, and Peeled Paint, along with Ground Espresso Distress Ink for the stems. After doing this stamping in a vertical line on a piece of Neenah Desert Storm cardstock, I splattered it with my Dr. Ph. Martin Bombay India Ink in Sepia. However, an equally good choice for this dark brown splatter is Tim Holtz’s Distress Spray in Ground Espresso. Just flick it from the little straw inside the bottle, instead of spraying it.
When my ink and my splatter were dry, I fussy cut the right edge of the stacked gourds as shown. I laid this edge down on some dark brown cardstock and traced it with a pencil. Next, I fussy cut the edge of the brown paper so I could make the shadow behind the gourds. I glued this thin piece behind the gourd piece.
Next came the leaves. I stamped the 2 leaf shapes in the stamp set onto the same Desert Storm cardstock with Versamark and heat embossed them with Lindy’s Gang Twilight Bronze embossing powder. If you have trouble finding this one, any dark, metallic embossing powder would work great. Gold would work perfectly too. I glued the leaves as shown onto my stamped piece.
I took a piece of purple cardstock (my best match for the Dusty Concord Distress Ink, I’ve linked to the Simon Says Stamp Eggplant cardstock below as I think it would be ideal) and dry embossed a piece of 4.5 x 6” cardstock with a favorite: Simon Says Stamp’s Tiny Tufts embossing folder. I purposedly used a larger than A2 piece for this as the dry embossing sort of “shrinks” the size of the paper because of the impressions it makes. Next, I cut it to an A2 size of 4.25” x 5.5”.
I built this card in an odd way - I took the purple piece and glued it to a cardbase made of Neenah Classic Crest 110lb cover stock in white. Then, I took the stamped piece (with the brown glued on the back) and scored it and folded it over the left side of the card. It made it kinda chunky and I might do this differently next time.
I then die cut Simon Says Stamp’s Boho Celebrate die three times from dark brown cardstock. I stacked two of them and glued them together, and then smooshed my Versamark inkpad onto the top one and again heat embossed with the same Twilight Bronze embossing powder. I cut the third die cut in half and glued only the right half onto the back of the word. I did this because the word was going to be glued down on the higher left side, and then hang over the lower embossed purple panel (I really hope that made sense [said no AI ever]). I was happy with how it all worked out.
Enjoy this Stamptember month at Simons Says Stamp and tune it every day for some fun surprises. By the way, the Harvest Blessings stamp set WILL be available past Stamptember.
Thanks!

I took a little break from Stamptember creating for Simon Says Stamp to enter their Wednesday challenge. The theme is summertime blues featuring Pinkfresh Studio. I’ve come to thoroughly adore the time I spend stamping, stenciling, and die cutting with their products.
This card features plenty of Pinkfresh Studio’s products. I used the largest of the Elegant Circles dies. I stacked 2 and then added foam tape to the back. I also used the stamp, stencil and die bundle from All Kinds of Wonderful to create the 4 flowers that make up the bouquet. I used a variety of pale blue inks, one tan, and a green from Tim Holtz, Stampin’ Up! and Concord & 9th for the colors.

For the background I took a 4.25 x 5.5” piece of Neenah Classic Crest 110lb coverstock and ink blended C9’s Powder ink from the bottom right corner to the top left. Then I took the Pinkfresh Studio Floral Lattice coverplate die and cut it. This took a bit of weeding to make it look like it should. Next time I cut it, I will make sure I have a tight sandwich for my die cutting machine. I backed this with a Neenah white cardbase.
I added the Pinkfresh Studio sentiment from the stamp and die set Beyond Happy just where the stems meet at the bottom of the circle (I love these circles).
Finally, I added some sequins to the card for a little sparkle. Sadly, several of these Pinkfresh products have retired and are not available from many retailers. But, many other stamps, dies and sentiments would work.
I am also entering Time Out Challenge #319 with the Pick 2 of Floral and Birthday.

I took a little break from Stamptember creating for Simon Says Stamp to enter their Wednesday challenge. The theme is summertime blues featuring Pinkfresh Studio. I’ve come to thoroughly adore the time I spend stamping, stenciling, and die cutting with their products.
This card features plenty of Pinkfresh Studio’s products. I used the largest of the Elegant Circles dies. I stacked 2 and then added foam tape to the back. I also used the stamp, stencil and die bundle from All Kinds of Wonderful to create the 4 flowers that make up the bouquet. I used a variety of pale blue inks, one tan, and a green from Tim Holtz, Stampin’ Up! and Concord & 9th for the colors.
For the background I took a 4.25 x 5.5” piece of Neenah Classic Crest 110lb coverstock and ink blended C9’s Powder ink from the bottom right corner to the top left. Then I took the Pinkfresh Studio Floral Lattice coverplate die and cut it. This took a bit of weeding to make it look like it should. Next time I cut it, I will make sure I have a tight sandwich for my die cutting machine. I backed this with a Neenah white cardbase.
I added the Pinkfresh Studio sentiment from the stamp and die set Beyond Happy just where the stems meet at the bottom of the circle (I love these circles).
Finally, I added some sequins to the card for a little sparkle. Sadly, several of these Pinkfresh products have retired and are not available from many retailers. But, many other stamps, dies and sentiments would work.
I am also entering Time Out Challenge #319 with the Pick 2 of Floral and Birthday.


If you're reading this, first - thanks; second, I am part of today's Simon Says Stamp Instagram Hop. If you head to my tinypaperblossom account, you can comment on each maker's IG post and be entered into a drawing for a $25 SSS gift card. It's a sweet deal.

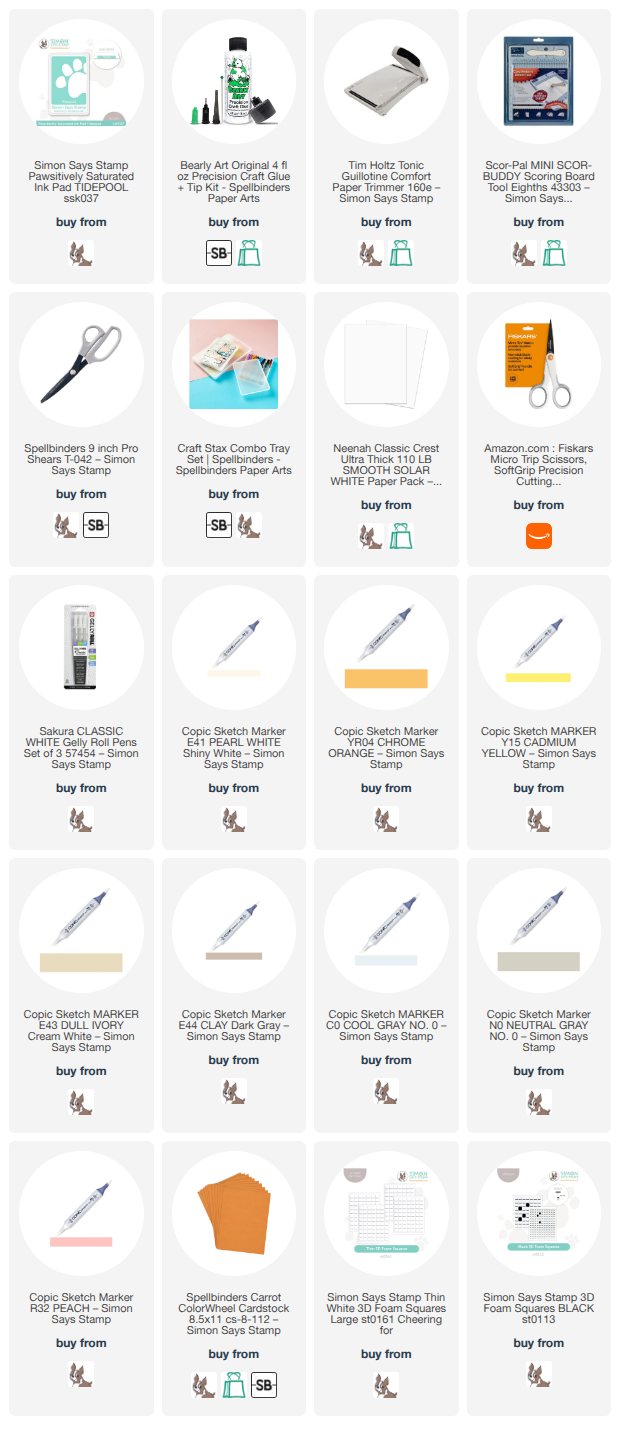
I used the Simon Says Stamp Tidepool ink and the large Pinkfresh Studio blending brushes to ink blend a glow in the center of the card. I masked off the bottom of my ink blend so that when I added the sentiment strip, the glow would not continue below it. I used Versa Clair Black ink to stamp with the 2-line sentiment onto Spellbinders Colorwheel Carrot cardstock. I used a square punch to cut the fishtail on each end of the sentiment strip. I adhered everything with a mix of foam adhesive in 2 different heights and liquid glue. Finally, I used some Poppystamp Fairy Jewels to add a bit of sparkle around the image.
Affiliate links are used in this post at no cost to you. This means I may receive a small commission when you click through and shop using the links I provide. This helps support me in creating and posting my crafts. Items marked with an asterisk * at first mention were provided by a store or manufacturer. Otherwise, all items were purchased by me.
If you're reading this, first - thanks; second, I am part of today's Simon Says Stamp Instagram Hop. If you head to my tinypaperblossom account, you can comment on each maker's IG post and be entered into a drawing for a $25 SSS gift card. It's a sweet deal.
I used the Simon Says Stamp Tidepool ink and the large Pinkfresh Studio blending brushes to ink blend a glow in the center of the card. I masked off the bottom of my ink blend so that when I added the sentiment strip, the glow would not continue below it. I used Versa Clair Black ink to stamp with the 2-line sentiment onto Spellbinders Colorwheel Carrot cardstock. I used a square punch to cut the fishtail on each end of the sentiment strip. I adhered everything with a mix of foam adhesive in 2 different heights and liquid glue. Finally, I used some Poppystamp Fairy Jewels to add a bit of sparkle around the image.
Affiliate links are used in this post at no cost to you. This means I may receive a small commission when you click through and shop using the links I provide. This helps support me in creating and posting my crafts. Items marked with an asterisk * at first mention were provided by a store or manufacturer. Otherwise, all items were purchased by me.

This little gift card holder was a cinch to make using the Coffee with Friends stamp set* from the Simon Says Stamp Every Happiness release. I took a piece of Neenah Desert Storm 80lb cardstock and cut it to 4” x 6”. I used my corner rounder to round all the corners. I used my Gina K Amalgam black ink to stamp all over it using 3 clear blocks and 3 stamps - the teapot, the paper coffee cup, and the tea cup. I carefully created a random pattern all over 1 side of the cardstock with these 3 little images. I easily could have left it like this, but I decided to break out my Distress Watercolor Pencils and color, then blend with a watercolor brush. I used the Watercolor Pencil sets #6, #4, and #1, (specifically Carved Pumpkin, Brushed Corduroy, Saltwater Taffy, Abandoned Coral, Salvaged Patina, and Lost Shadow) along with the Picket Fence white Distress Watercolor Pencil. I scored this in the middle when I was done, and folded it over. I took a glue dot and attached a Starbucks Gift Card inside.

On the outside I die cut an arch from Spellbinders Waterfall Colorwheel Cardstock using Spellbinders Essential Arches die set. I trimmed off a little at the end and attached it near the right side. I actually cut the sentiment stamp into 3 pieces and then heat embossed each part with Brutus Monroe Alabaster embossing powder onto a strip of dark brown cardstock. I cut it up and glued it to the front of the arch. I used a beige and brown baker’s twine I found in my stash to wrap around the card and keep it closed.
This is a super simple gift card holder that requires no “paper engineering.” Just cut, score and attach your card.
Affiliate links are used in this post at no cost to you. This means I may receive a small commission when you click through and shop using the links I provide. This helps support me in creating and posting my crafts. Items marked with an asterisk * at first mention were provided by a store or manufacturer. Otherwise, all items were purchased by me.
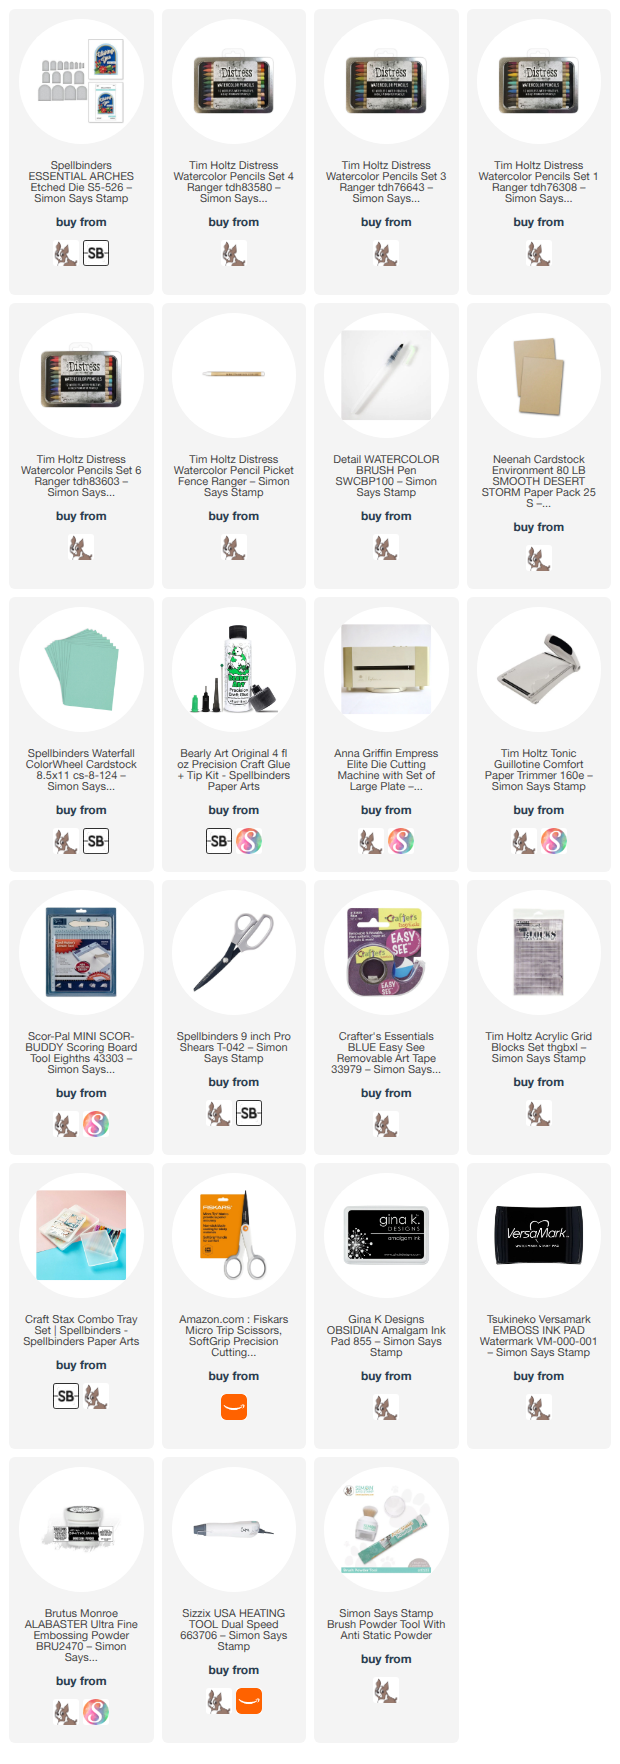
This little gift card holder was a cinch to make using the Coffee with Friends stamp set* from the Simon Says Stamp Every Happiness release. I took a piece of Neenah Desert Storm 80lb cardstock and cut it to 4” x 6”. I used my corner rounder to round all the corners. I used my Gina K Amalgam black ink to stamp all over it using 3 clear blocks and 3 stamps - the teapot, the paper coffee cup, and the tea cup. I carefully created a random pattern all over 1 side of the cardstock with these 3 little images. I easily could have left it like this, but I decided to break out my Distress Watercolor Pencils and color, then blend with a watercolor brush. I used the Watercolor Pencil sets #6, #4, and #1, (specifically Carved Pumpkin, Brushed Corduroy, Saltwater Taffy, Abandoned Coral, Salvaged Patina, and Lost Shadow) along with the Picket Fence white Distress Watercolor Pencil. I scored this in the middle when I was done, and folded it over. I took a glue dot and attached a Starbucks Gift Card inside.
On the outside I die cut an arch from Spellbinders Waterfall Colorwheel Cardstock using Spellbinders Essential Arches die set. I trimmed off a little at the end and attached it near the right side. I actually cut the sentiment stamp into 3 pieces and then heat embossed each part with Brutus Monroe Alabaster embossing powder onto a strip of dark brown cardstock. I cut it up and glued it to the front of the arch. I used a beige and brown baker’s twine I found in my stash to wrap around the card and keep it closed.
This is a super simple gift card holder that requires no “paper engineering.” Just cut, score and attach your card.
Affiliate links are used in this post at no cost to you. This means I may receive a small commission when you click through and shop using the links I provide. This helps support me in creating and posting my crafts. Items marked with an asterisk * at first mention were provided by a store or manufacturer. Otherwise, all items were purchased by me.

This card was inspired by one of my favorite card makers, Inge Groot. I used the wonderful Coffee with Friends* stamp set from the new Every Happiness release from Simon Says Stamp. I Copic colored the bear and the tree using E41, E43, E44, Y15, YR04, C0, B41, B45, G94, YG61, YG63, YR00. The remaining colors I used were Dick Blick Brush Markers and Spectrum Noir markers. I highlighted everything using a Gelly Roll white pen.

I used an old Sizzix Swiss Dot embossing folder (it's retired and I've linked to one by Simon Says Stamp) with the white tag I cut using Hero Arts Nested Tag Dies. I made the frame using Cascade cardstock from Spellbinders and an old Poppystamps die set called Scalloped Stitch Frames (again, this is retired so I've linked to a set of very similar double stitch frames by Pinkfresh Studio.) I used Dried Marigold Distress Ink to ink blend through the Sunburst Stencil by Waffle Flower. I cut this piece with the Pinkfresh Studios Nested Rectangles Postage Edge dies. Behind all this is a small scrap of black and white lined paper from an old MFT paper pad.
The sentiment is part of this sweet stamp set. I heat embossed it on black with Brutus Monroe Alabaster embossing powder.
The fun part is the Simon Says Stamp Festive Bunting die I used in the top left. I cut the triangle parts with 3 different colors (the blue is the Cascade I used earlier), and then the string part from black. The holes are large enough to easily snake the black string part through the holes.
I used a variety of foam and liquid glue to adhere everything to an A2 card base made with Neenah Classic Crest Solar White 110lb.
Affiliate links are used in this post at no cost to you. This means I may receive a small commission when you click through and shop using the links I provide. This helps support me in creating and posting my crafts. Items marked with an asterisk * at first mention were provided by a store or manufacturer. Otherwise, all items were purchased by me.
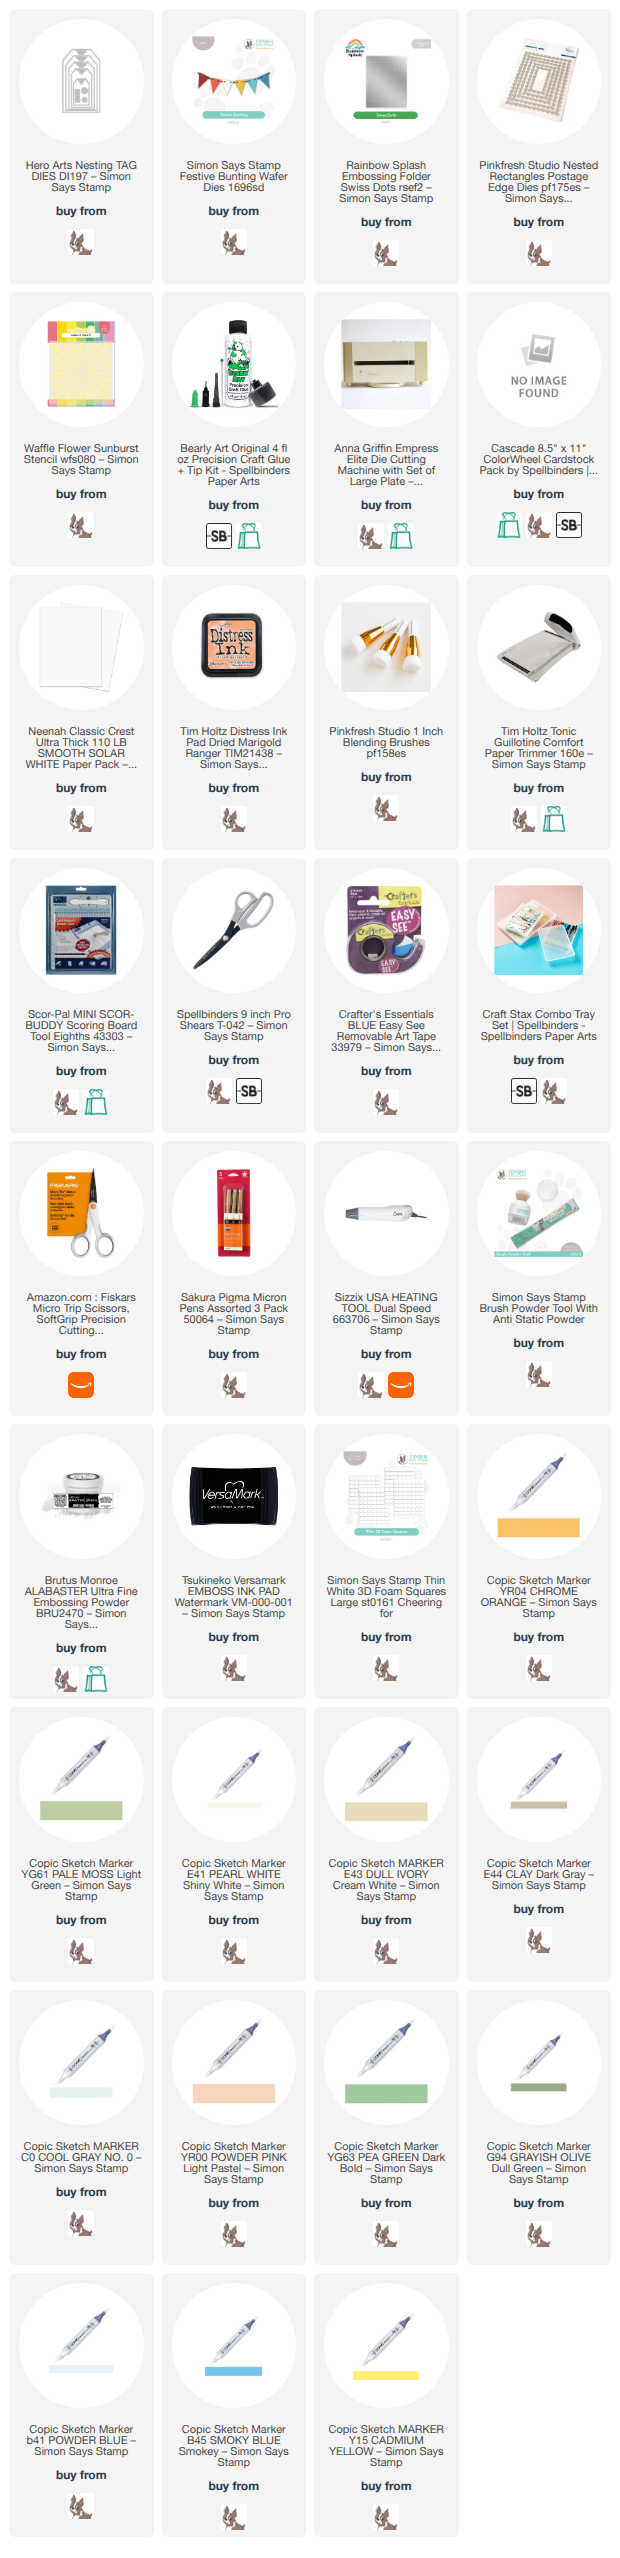
This card was inspired by one of my favorite card makers, Inge Groot. I used the wonderful Coffee with Friends* stamp set from the new Every Happiness release from Simon Says Stamp. I Copic colored the bear and the tree using E41, E43, E44, Y15, YR04, C0, B41, B45, G94, YG61, YG63, YR00. The remaining colors I used were Dick Blick Brush Markers and Spectrum Noir markers. I highlighted everything using a Gelly Roll white pen.
I used an old Sizzix Swiss Dot embossing folder (it's retired and I've linked to one by Simon Says Stamp) with the white tag I cut using Hero Arts Nested Tag Dies. I made the frame using Cascade cardstock from Spellbinders and an old Poppystamps die set called Scalloped Stitch Frames (again, this is retired so I've linked to a set of very similar double stitch frames by Pinkfresh Studio.) I used Dried Marigold Distress Ink to ink blend through the Sunburst Stencil by Waffle Flower. I cut this piece with the Pinkfresh Studios Nested Rectangles Postage Edge dies. Behind all this is a small scrap of black and white lined paper from an old MFT paper pad.
The sentiment is part of this sweet stamp set. I heat embossed it on black with Brutus Monroe Alabaster embossing powder.
The fun part is the Simon Says Stamp Festive Bunting die I used in the top left. I cut the triangle parts with 3 different colors (the blue is the Cascade I used earlier), and then the string part from black. The holes are large enough to easily snake the black string part through the holes.
I used a variety of foam and liquid glue to adhere everything to an A2 card base made with Neenah Classic Crest Solar White 110lb.
Affiliate links are used in this post at no cost to you. This means I may receive a small commission when you click through and shop using the links I provide. This helps support me in creating and posting my crafts. Items marked with an asterisk * at first mention were provided by a store or manufacturer. Otherwise, all items were purchased by me.

The delightful Coffee with Friends* from the new 2026 Simon Says Stamp Every Happiness release is full of adorable images to color, and great, easy-to-use sentiments (even if you’re a tea drinker).
I decided to create a pop up card using the excellent instructions from Jennifer McGuire’s YouTube video “Easy Pop-up Frame Cards” from September 2023. My base is a pale peachy-pink cardstock measuring 4.25” x 9.5”. I scored both short ends at .25”, 1”, and 2”. I used a pink ink and a Pinkfresh Studio large blending brush to stencil over the Lawn Fawn Brick stencil in the middle of the card base. My ‘floor’ is a kraft cardstock that is scored at every .5” to give the sense of a wood plank floor (I decided not to make this wood effect more prominent to not distract from the rest of the scene). I edged the floor pieces with Tim Holtz Distress Ink in Pumice Stone.

I folded the card base along the scorelines and then, using 2 Paper Rose nested rectangle dies (I don’t see these for sale anywhere, so I’ve linked to an almost identical Hero Arts set), I die cut 2 identical frames (gluing them together for strength) from Taylored Expressions Papaya cardstock. I adhered a small strip of the inked kraft ‘floor’ to the back of the frame. Next, following Jennifer’s instructions, I applied liquid glue to this frame and floor piece on the left and right edges only and adhered it to the .25” scored edge on the left and right of the cardbase.
On to the critters, and the sweet accessories like the chair, table, vase and counter/cupcake stand. They’re adorable. I stamped with my new favorite black ink, Gina K Amalgam black ink on Neenah Classic Crest cover stock 110lb. I colored them with Copic markers, some Dick Blick Studio Brush alcohol markers and some Spectrum Noir markers. Here is my list of Copics: E31, E33, E35, E40, E41, E43, E44, E47, E11, E13, E15, C0, N0, R00, R20, R32, B0000, BG70, BG72, BG75, YR00, YG61, YG63, G94, B41, B45, B21. Feel free to email me or message me via Instagram for more details or to learn which Dick Blick markers I used. I used a white Gelly Roll pen to highlight all the images I colored.
I fussy-cut all the animals (didn’t have the dies). The Elizabeth Craft Designs Fine Pointed Scissors are a game changer for detailed cutting. I don’t use them for big edges that are easy to cut with small scissors, but for areas like under an arm, between legs, around a stem. If you don’t have a set of these, put them on your wish list now. I carefully edged the cut images with a small or bullet-tipped black felt marker. The pen has to be held behind the cut piece so if you slip, you only mark on the backside. Jennifer McGuire gave this same tip in the video I referenced above.
I glued all the critters into place as shown, providing some depth using foam adhesive in places. I heat embossed my sentiment with Brutus Monroe Alabaster embossing powder on brown cardstock and glued it on.
This card will flatten to fit into an A2 envelope.
Affiliate links are used in this post at no cost to you. This means I may receive a small commission when you click through and shop using the links I provide. This helps support me in creating and posting my crafts. Items marked with an asterisk * at first mention were provided by a store or manufacturer. Otherwise, all items were purchased by me.

The delightful Coffee with Friends* from the new 2026 Simon Says Stamp Every Happiness release is full of adorable images to color, and great, easy-to-use sentiments (even if you’re a tea drinker).
I decided to create a pop up card using the excellent instructions from Jennifer McGuire’s YouTube video “Easy Pop-up Frame Cards” from September 2023. My base is a pale peachy-pink cardstock measuring 4.25” x 9.5”. I scored both short ends at .25”, 1”, and 2”. I used a pink ink and a Pinkfresh Studio large blending brush to stencil over the Lawn Fawn Brick stencil in the middle of the card base. My ‘floor’ is a kraft cardstock that is scored at every .5” to give the sense of a wood plank floor (I decided not to make this wood effect more prominent to not distract from the rest of the scene). I edged the floor pieces with Tim Holtz Distress Ink in Pumice Stone.
I folded the card base along the scorelines and then, using 2 Paper Rose nested rectangle dies (I don’t see these for sale anywhere, so I’ve linked to an almost identical Hero Arts set), I die cut 2 identical frames (gluing them together for strength) from Taylored Expressions Papaya cardstock. I adhered a small strip of the inked kraft ‘floor’ to the back of the frame. Next, following Jennifer’s instructions, I applied liquid glue to this frame and floor piece on the left and right edges only and adhered it to the .25” scored edge on the left and right of the cardbase.
On to the critters, and the sweet accessories like the chair, table, vase and counter/cupcake stand. They’re adorable. I stamped with my new favorite black ink, Gina K Amalgam black ink on Neenah Classic Crest cover stock 110lb. I colored them with Copic markers, some Dick Blick Studio Brush alcohol markers and some Spectrum Noir markers. Here is my list of Copics: E31, E33, E35, E40, E41, E43, E44, E47, E11, E13, E15, C0, N0, R00, R20, R32, B0000, BG70, BG72, BG75, YR00, YG61, YG63, G94, B41, B45, B21. Feel free to email me or message me via Instagram for more details or to learn which Dick Blick markers I used. I used a white Gelly Roll pen to highlight all the images I colored.
I fussy-cut all the animals (didn’t have the dies). The Elizabeth Craft Designs Fine Pointed Scissors are a game changer for detailed cutting. I don’t use them for big edges that are easy to cut with small scissors, but for areas like under an arm, between legs, around a stem. If you don’t have a set of these, put them on your wish list now. I carefully edged the cut images with a small or bullet-tipped black felt marker. The pen has to be held behind the cut piece so if you slip, you only mark on the backside. Jennifer McGuire gave this same tip in the video I referenced above.
I glued all the critters into place as shown, providing some depth using foam adhesive in places. I heat embossed my sentiment with Brutus Monroe Alabaster embossing powder on brown cardstock and glued it on.
This card will flatten to fit into an A2 envelope.
Affiliate links are used in this post at no cost to you. This means I may receive a small commission when you click through and shop using the links I provide. This helps support me in creating and posting my crafts. Items marked with an asterisk * at first mention were provided by a store or manufacturer. Otherwise, all items were purchased by me.


